crwdns2915892:0crwdne2915892:0
With how the keyboard for this laptop is fastened, replacing it is easier than in some cases. with just screws fastening it in place there is no need to solder when replacing the keyboard.
crwdns2942213:0crwdne2942213:0
-
-
With the laptop closed and upside down, unscrew the nineteen 5.5mm Phillips #1 screws that keep the back cover in place.
-
-
-
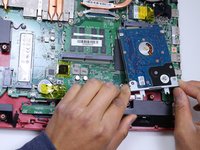
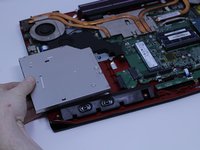
Slide the optical drive out of the laptop.
Good day sir pls am urgently look for the complete cd rom for this laptop msi 1791. Please if u can get some for me text me on 7186034112
Or send me and email rauff191@gmail.com
-
-
-
Use a Phillips screwdriver to remove the three screws along the edge of the optical drive bay.
-
-
-
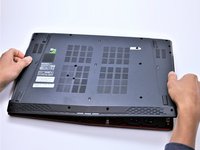
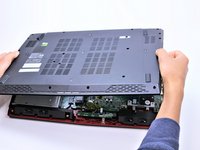
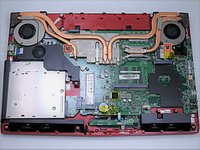
Using your fingers, gently loosen the edges of all four sides of the back cover.
-
Gently pull off the back cover.
-
-
-
Unscrew the single 5.5mm Phillips #1 screw keeping the battery secure.
-
-
-
Grab the battery with your fingers and gently pull it up and away from the rest of the laptop.
-
-
-
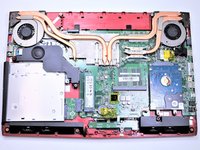
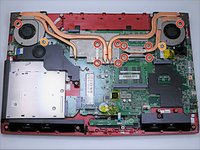
Use a Phillips #1 screwdriver to remove the ten 5.5mm screws.
-
Remove the last two 5.5mm Phillips #1 screws, and remove the washers around them.
-
-
-
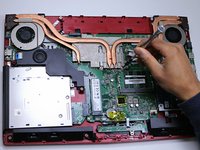
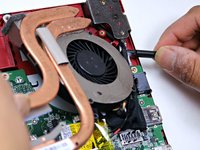
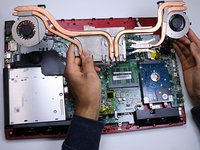
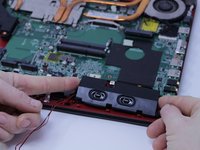
Unplug both of the fan power cords from the laptop using a spudger.
-
-
-
Continue to use the spudger to carefully separate the wires of the power cord from the laptop.
-
-
-
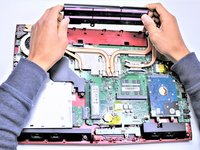
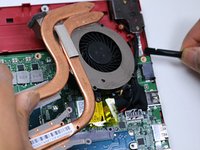
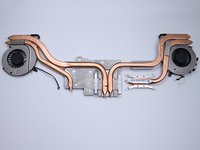
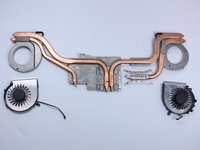
Fully remove the fans from the rest of the laptop.
what is the thing that the fans are held in called like that big metal thing i need to get that replaced i think and i dont know how ot search for it
-
-
-
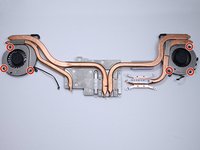
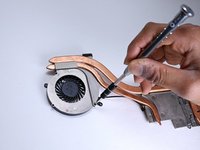
Using a Phillips #00 screwdriver, remove the six 5mm screws.
-
Separate the fans from the silver fan covers.
Should be mentioned that doing this will ALSO require repasting the CPU/GPU!!!
Not doing this step will result in improper cooling more than likely. - CRITICAL STEP
Thanks for the heads up
-
-
-
-
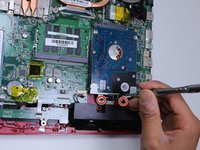
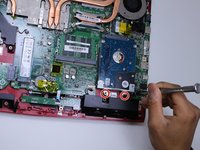
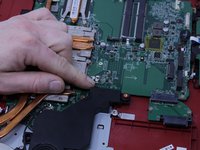
Remove the two 5.5mm screws with the Phillips #1 screwdriver.
-
-
-
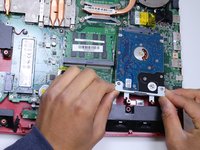
Gently pull out the hard drive by wiggling it from right to left with your hands until it is removed.
-
-
-
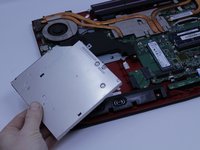
Carefully slide the Optical Drive off of the SATA connector.
-
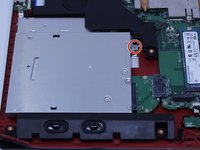
The red marker shows the location for where the retaining screw comes through the back panel to hold the Optical Drive.
-
-
-
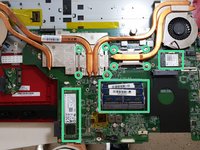
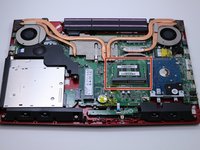
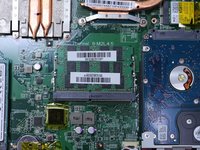
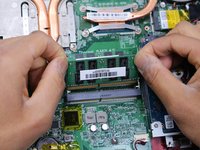
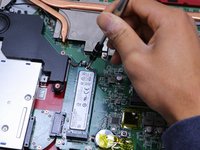
When you open the back cover, the RAM will be located as shown in the picture.
-
-
-
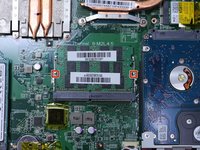
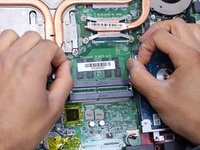
Press the hinges on the sides of the RAM chip as shown in the picture, in order to unlock it.
-
Carefully, slide it out at a 45 degree angle.
-
-
-
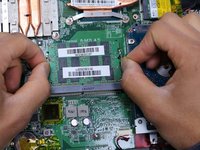
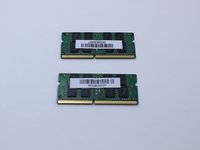
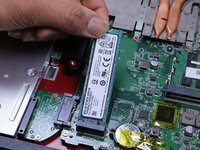
Similarly, press on the hinges on the sides of the other RAM chip, in order to unlock it.
-
-
-
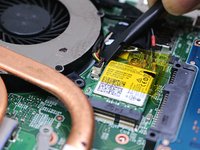
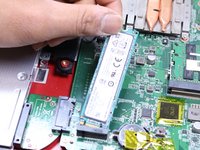
Remove the single 5.5mm Phillips #1 screw attaching the SSD to the laptop.
what do i need to go to a bigger 256 ssd . will i need to program windows again? 3 yr. old msi ge72 6qf apache pro 17” thanks, Brian
you can replace the old SSD with any NVMe M.2 SSD.
Jamba -
-
-
-
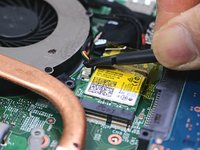
Pull out the SSD by gently wiggling it from side to side until it comes out.
Thanks folks, I was most the way through the disassembly process and had to stop as the base cover would not fully release. There was a spot at the back left corner (if your were looking at the laptop keyboard from normal typing position (right back corner if you were working to remove the back cover from the bottom)). It seemed to be stuck, is there an insulating pad that might also be an adhesive when heated? I was forced to give up as I found no clips, latches or screws holding it in place.
What was preventing the back corner of the cover from releasing please?
Hello @welltech20 , I have the MSI GE72 VR, this model has the same chassis. When I opened the laptop, I noticed there are lot of clips retaining the bottom case. Also, there is the USB type C port is inserted in the bottom case. It's a little bit difficulte to open this laptop because the clips are very well attached and the side of the bottom case with the USB type-c port must be lift after the 3 other sides, because you need to slide the side of thé bottom case with the USB type C port to free the bottom case from this port, as this USB type C port is soldered to the motherbord and is inserted in the bottom case. Also be carfull when you will reasemble the laptop bottom case because of that. A plastic opening tool is very usefull to detach all the clips.
Moreover, there is an hidden screw behind a waranty sticker on the bottom case perhaps there is one on your laptop too. There is lot us screws maintaining thé bottom case (14 on my laptop), ensure there is no remaining screws.
Have a nice day
Brendan -
There are clips on the back corner too, they are a little bit difficult to detach the first time.
Brendan -
-
-
-
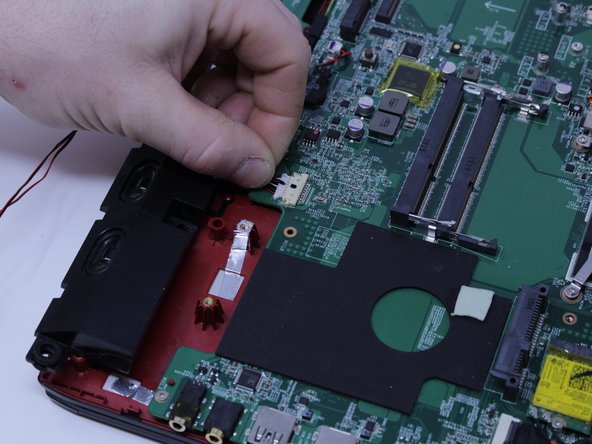
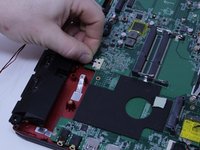
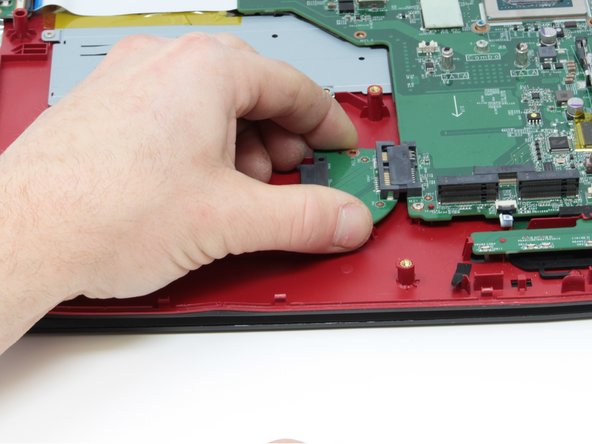
Pull upward to lift the front speakers and sub-woofer out of place.
-
Carefully slide out the connectors for both of the speaker systems.
-
-
-
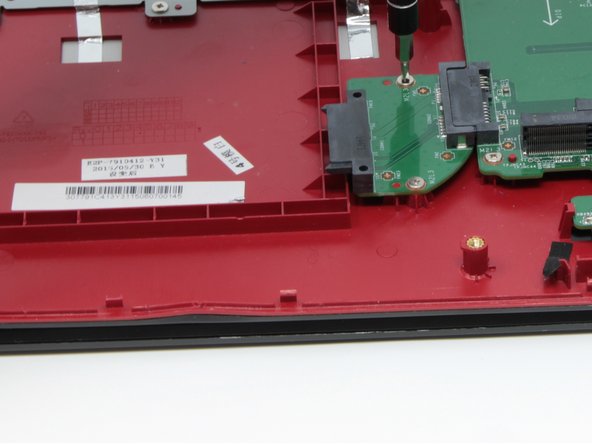
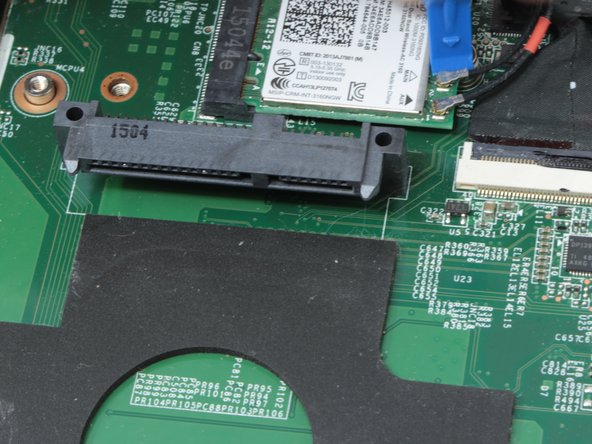
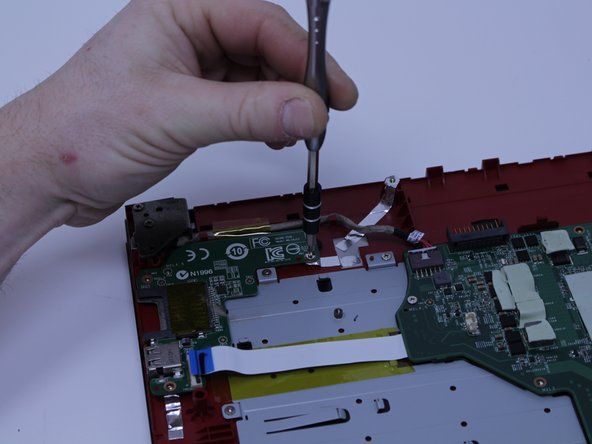
Use the Phillips #0 Screwdriver to remove the two 4mm screws that are holding the SATA connector in place.
-
-
-
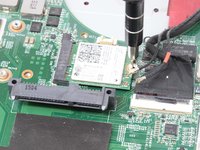
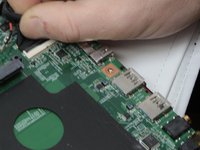
Remove the WIFI card by disconnecting the two coax cables and removing the retaining screw.
-
-
-
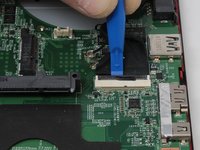
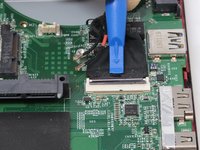
Use the plastic opening tool to pry up the connector that holds the display cable so it can be disconnected.
-
-
-
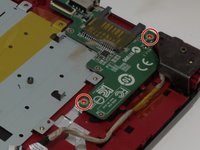
Remove the SD card reader by unscrewing the two 3 mm screws that hold it in place.
-
-
-
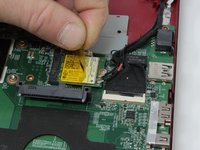
Remove the power and USB connectors that are connected to the left side of the motherboard by pulling them from the motherboard and SD card reader respectively.
-
-
-
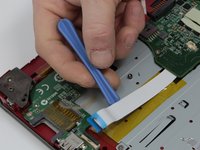
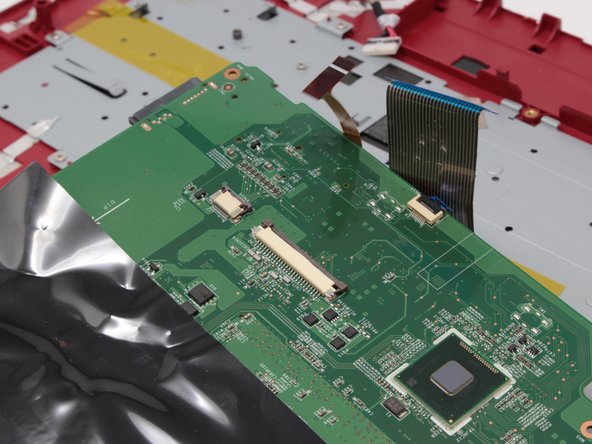
Disconnect the motherboard from the mouse key control board by pulling the connector out.
-
-
-
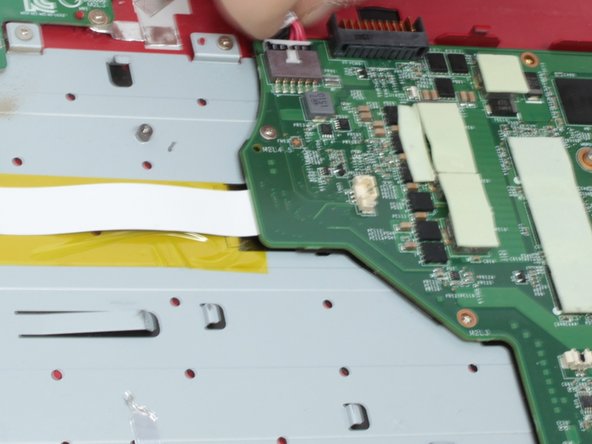
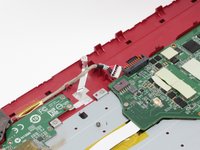
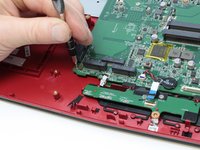
Disconnect the keyboard from the motherboard by carefully sliding the connectors out of the connections on the motherboard
Steps 25 and 26 are out of order. You can’t remove the keyboard connectors before you remove the motherboard.
-
-
-
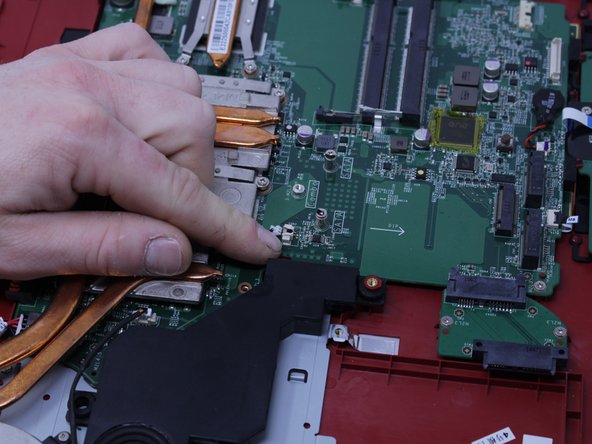
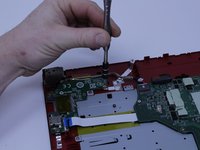
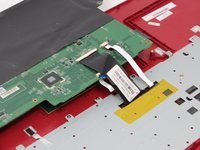
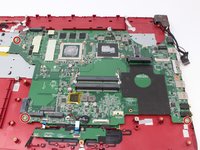
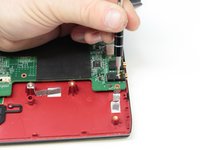
Use the Phillips #0 screwdriver to remove the three 3.8 mm standoff screws that retain the motherboard and carefully remove it.
-
-
-
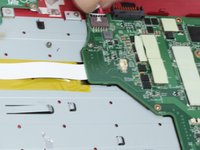
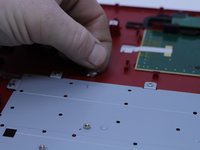
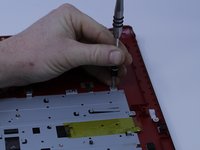
Peel the silver tape off of the keyboard back plate.
-
-
-
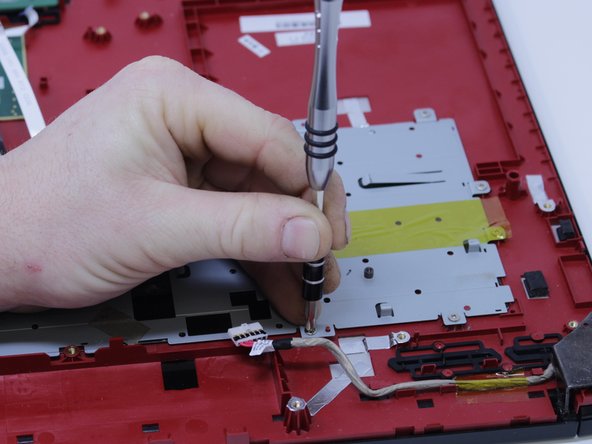
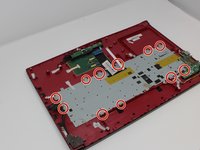
Remove the thirteen 3 mm screws that fasten the keyboard in place.
My keyboard is plastic welded in. How do I remove this.
-
-
-
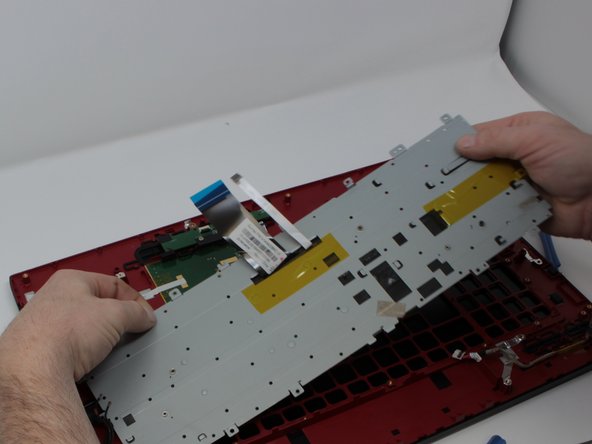
Carefully lift and slide the keyboard out.
-
-
-
Peel the yellow tape off of the back plate to free the keyboard so it can be separated from the plate.
-


To reassemble your device, follow these instructions in reverse order.
To reassemble your device, follow these instructions in reverse order.
crwdns2935221:0crwdne2935221:0
crwdns2935229:09crwdne2935229:0
crwdns2915084:0crwdne2915084:0

Central Washington University, Team S1-G2, Pengilly Fall 2017 crwdns2935289:0Central Washington University, Team S1-G2, Pengilly Fall 2017crwdne2935289:0
CWU-PENGILLY-F17S1G2
crwdns2931471:04crwdne2931471:0
crwdns2935297:04crwdne2935297:0
crwdns2947412:03crwdne2947412:0
1) Remove a single CD/DVD tray screw when the bottom cover is still on.
2) Remove the CD/DVD tray.
3) Remove the rear trim.
4) Remove the bottom cover from the CD/DVD side to the USB side, as the bottom cover has a frame that goes around the USB ports.
Otherwise, TY for your effort.
will this work for ge73 raider 8rf? i bought a keyboard to replace and have no instructions
Someone please correct the time on this guide. There’s no way this is a 10 minute job!!
Plus the replacement keyboard (not bought yet) doesn’t seem to have the screw mount holes around the frame? Are there some steps missing to transplate the backing plate from the old keyboard to the new? Or should the new come with a backing plate with the required screw holes?