crwdns2933423:0crwdne2933423:0
crwdns2947577:0crwdnd2947577:0crwdne2947577:0

Logitech Webcam Pro 9000 USB Connection Replacement

crwdns2942213:0crwdne2942213:0

    1. Logitech Webcam Pro 9000 USB Connection Replacement, Front and Back Cover: crwdns2935265:01crwdnd2935265:01crwdnd2935265:02crwdne2935265:0 Logitech Webcam Pro 9000 USB Connection Replacement, Front and Back Cover: crwdns2935265:01crwdnd2935265:02crwdnd2935265:02crwdne2935265:0
      • Remove the two 8 mm Phillips #0 screws on the back cover.

      • The motherboard connects the two covers together. DO NOT separate the two yet.

      • There is a button that loosens as the Phillips screws are removed. Don't be alarmed if it falls out.

      crwdns2952109:0crwdne2952109:0

      crwdns2917038:0crwdne2917038:0

    2. Logitech Webcam Pro 9000 USB Connection Replacement: crwdns2935265:02crwdnd2935265:01crwdnd2935265:02crwdne2935265:0 Logitech Webcam Pro 9000 USB Connection Replacement: crwdns2935265:02crwdnd2935265:02crwdnd2935265:02crwdne2935265:0
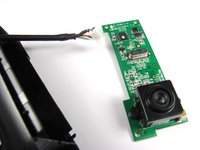
      • Remove the four 6mm Phillips #0 screws connecting the motherboard and front cover.

      • DO NOT detach the wire connecting the motherboard to the front cover.

      crwdns2952109:0crwdne2952109:0

      crwdns2917038:0crwdne2917038:0

    1. Logitech Webcam Pro 9000 USB Connection Replacement, USB Connection: crwdns2935265:03crwdnd2935265:01crwdnd2935265:02crwdne2935265:0 Logitech Webcam Pro 9000 USB Connection Replacement, USB Connection: crwdns2935265:03crwdnd2935265:02crwdnd2935265:02crwdne2935265:0
      crwdns2935267:0crwdne2935267:0
      Tweezers
      $4.99
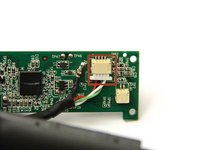
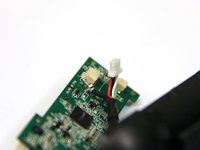
      • Use tweezers to grasp the white wire connector on the back of the motherboard.

      • Wiggle the connector back and forth to remove it from the socket.

      crwdns2952109:0crwdne2952109:0

      crwdns2917038:0crwdne2917038:0

    2. Logitech Webcam Pro 9000 USB Connection Replacement: crwdns2935265:04crwdnd2935265:01crwdnd2935265:02crwdne2935265:0 Logitech Webcam Pro 9000 USB Connection Replacement: crwdns2935265:04crwdnd2935265:02crwdnd2935265:02crwdne2935265:0
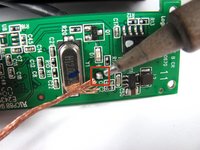
      • Desolder the joint on the front of the motherboard to completely detach the USB cable.

      • Follow this link to learn how to properly solder and desolder your parts.

      crwdns2952109:0crwdne2952109:0

      crwdns2917038:0crwdne2917038:0

crwdns2915888:0crwdne2915888:0

To reassemble your device, follow these instructions in reverse order.

crwdns2935221:0crwdne2935221:0

Cory Davis

crwdns2935283:004/14/13crwdne2935283:0

236 crwdns2915208:0crwdne2915208:0

crwdns2935297:04crwdne2935297:0

crwdns2935287:0crwdne2935287:0

Cal Poly, Team 12-34, Amido Spring 2013 crwdns2935289:0Cal Poly, Team 12-34, Amido Spring 2013crwdne2935289:0

CPSU-AMIDO-S13S12G34

crwdns2931471:04crwdne2931471:0

crwdns2935297:090crwdne2935297:0

crwdns2947410:01crwdne2947410:0

crwdns2917038:0crwdne2917038:0

crwdns2936625:0crwdne2936625:0:

crwdns2936751:024crwdne2936751:0 1

crwdns2936753:07crwdne2936753:0 3

crwdns2936753:030crwdne2936753:0 24

crwdns2942667:0crwdne2942667:0 2,529