crwdns2915892:0crwdne2915892:0
Use this guide to replace the power button board in a Logitech UE Hyperboom Bluetooth Speaker. The power button is responsible for turning on and off the speaker. The power button can be susceptible to deterioration with repeated use. If your speaker charges visibly, but you get no response from both pressing and holding the power button, this could be a sign of a power button issue.
Before beginning this guide, be sure to power off your speaker.
crwdns2942213:0crwdne2942213:0
-
-
Unscrew the two black flat-top screws that attach the handle to the speaker with your hands.
 crwdns2952109:0crwdne2952109:0
-
-
-
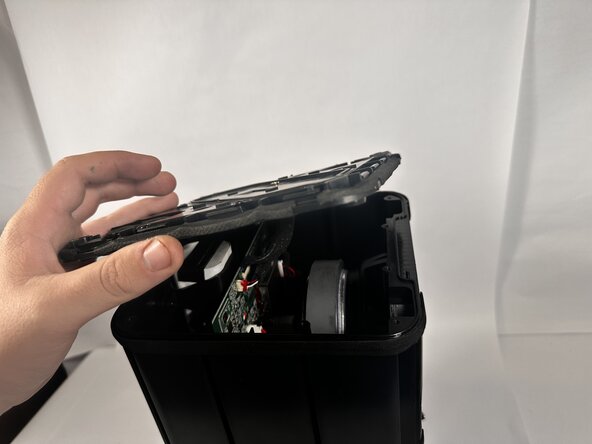
Use your hands to carefully pry the plastic cover off of the speaker.
-
-
-
-
Use a Phillips #0 screwdriver to remove the ten 11.7mm screws on the top panel.
-
Remove the top panel to access the internal components.
-
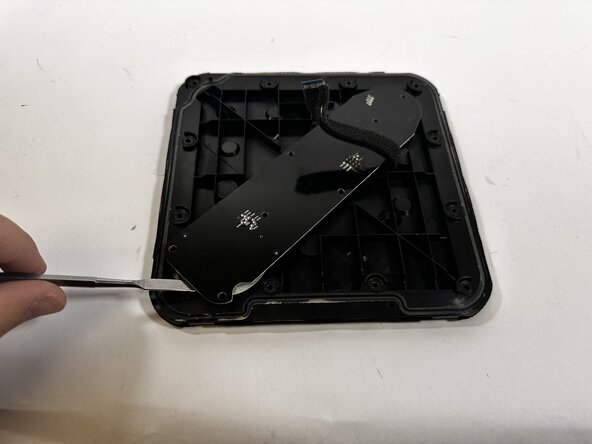
Use a metal spudger to completely disconnect the top panel.
-
-
-
Use the Phillips #0 screwdriver to unscrew the seven 6.5mm screws on the circuit board.
-
Use a metal spudger to disconnect the power button board from the panel.
-


To reassemble your device, follow these instructions in reverse order.

crwdns2935287:0crwdne2935287:0

Idaho State University, Team 1-2, Watkins Spring 2026 crwdns2935289:0Idaho State University, Team 1-2, Watkins Spring 2026crwdne2935289:0
ISU-WATKINS-S26S1G2
crwdns2931471:03crwdne2931471:0
crwdns2935297:016crwdne2935297:0