crwdns2933423:0crwdne2933423:0
crwdns2947577:0crwdnd2947577:0crwdne2947577:0

Logitech UE Boom 3 Battery Replacement

crwdns2942213:0crwdne2942213:0

    1. Logitech UE Boom 3 Battery Replacement, Base: crwdns2935265:01crwdnd2935265:01crwdnd2935265:02crwdne2935265:0 Logitech UE Boom 3 Battery Replacement, Base: crwdns2935265:01crwdnd2935265:02crwdnd2935265:02crwdne2935265:0
      • Flip the speaker so the base is facing upwards.

      • Place the iFixit opening picks in the gaps of the speaker.

      • Use the picks to pry open the speaker.

      crwdns2952109:0crwdne2952109:0

      crwdns2917038:0crwdne2917038:0

    2. Logitech UE Boom 3 Battery Replacement: crwdns2935265:02crwdnd2935265:01crwdnd2935265:02crwdne2935265:0 Logitech UE Boom 3 Battery Replacement: crwdns2935265:02crwdnd2935265:02crwdnd2935265:02crwdne2935265:0
      • Use a Jimmy to completely pry the base away from the rest of the speaker.

      crwdns2952109:0crwdne2952109:0

      crwdns2917038:0crwdne2917038:0

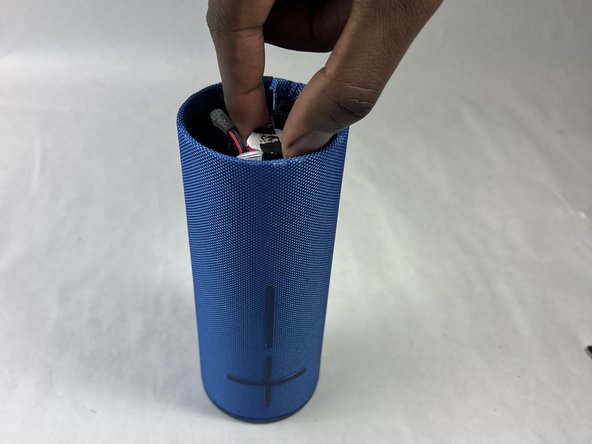
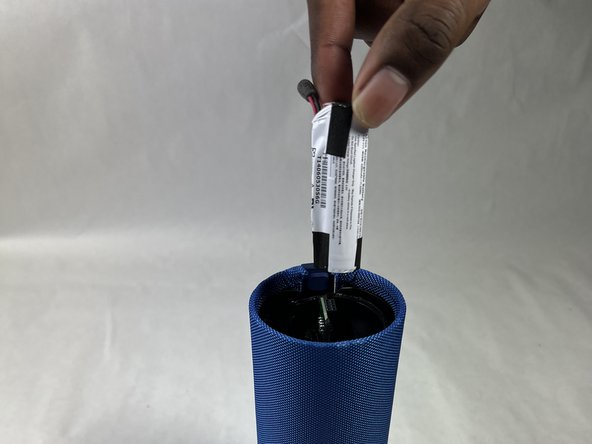
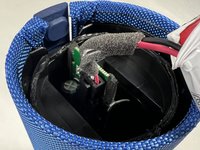
    1. Logitech UE Boom 3 Battery Replacement, Battery: crwdns2935265:03crwdnd2935265:01crwdnd2935265:03crwdne2935265:0 Logitech UE Boom 3 Battery Replacement, Battery: crwdns2935265:03crwdnd2935265:02crwdnd2935265:03crwdne2935265:0 Logitech UE Boom 3 Battery Replacement, Battery: crwdns2935265:03crwdnd2935265:03crwdnd2935265:03crwdne2935265:0
      • Remove the adhesive strap holding the battery in place.

      • It is sticky and tightly bounded, but removal is necessary.

      • Pull out the battery by hand until it is out of the casing and being held by the cable only.

      crwdns2952109:0crwdne2952109:0

      crwdns2917038:0crwdne2917038:0

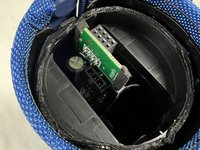
    2. Logitech UE Boom 3 Battery Replacement: crwdns2935265:04crwdnd2935265:01crwdnd2935265:02crwdne2935265:0 Logitech UE Boom 3 Battery Replacement: crwdns2935265:04crwdnd2935265:02crwdnd2935265:02crwdne2935265:0
      • The battery will still be attached to motherboard via cable.

      • Carefully press down on the lever on the end of the cable and disconnect it from the motherboard.

      • This cable is intricate and is susceptible to damage beyond repair. Be extra careful to precisely insert and remove the cable as bending the pins can result in damage.

      • Remove the battery from the motherboard.

      crwdns2952109:0crwdne2952109:0

      crwdns2917038:0crwdne2917038:0

crwdns2915888:0crwdne2915888:0

To reassemble your device, follow these instructions in reverse order.

crwdns2935221:0crwdne2935221:0

crwdns2935227:0crwdne2935227:0

Ethan Donahue

crwdns2935283:003/18/24crwdne2935283:0

603 crwdns2915208:0crwdne2915208:0

crwdns2935297:06crwdne2935297:0

crwdns2935287:0crwdne2935287:0

UMass Dartmouth, Team 1-4, Konn Spring 2024 crwdns2935289:0UMass Dartmouth, Team 1-4, Konn Spring 2024crwdne2935289:0

UMASSD-KONN-S24S1G4

crwdns2931471:04crwdne2931471:0

crwdns2935297:072crwdne2935297:0

crwdns2947412:00crwdne2947412:0

crwdns2917038:0crwdne2917038:0

crwdns2936625:0crwdne2936625:0:

crwdns2936751:024crwdne2936751:0 11

crwdns2936753:07crwdne2936753:0 49

crwdns2936753:030crwdne2936753:0 233

crwdns2942667:0crwdne2942667:0 5,778