crwdns2933423:0crwdne2933423:0

Logitech MBJ58 Mouse Support Spring Replacement

crwdns2942213:0crwdne2942213:0

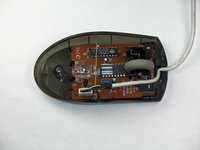
  1. Logitech MBJ58 Mouse Support Spring Replacement, Top cover: crwdns2935265:01crwdnd2935265:01crwdnd2935265:01crwdne2935265:0
    • Hold the mouse so that the bottom is facing up.

    • Remove the single Phillips #1 screw from the bottom half of the mouse.

  2. Logitech MBJ58 Mouse Support Spring Replacement: crwdns2935265:02crwdnd2935265:01crwdnd2935265:02crwdne2935265:0 Logitech MBJ58 Mouse Support Spring Replacement: crwdns2935265:02crwdnd2935265:02crwdnd2935265:02crwdne2935265:0
    • Place the mouse so that the bottom is resting against a hard surface.

    • Lift the top cover of the mouse gently, and remove it.

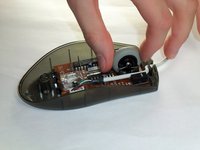
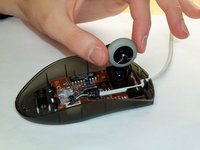
  3. Logitech MBJ58 Mouse Support Spring Replacement, Removing the Logitech MBJ58 Mouse Scroll Wheel: crwdns2935265:03crwdnd2935265:01crwdnd2935265:03crwdne2935265:0 Logitech MBJ58 Mouse Support Spring Replacement, Removing the Logitech MBJ58 Mouse Scroll Wheel: crwdns2935265:03crwdnd2935265:02crwdnd2935265:03crwdne2935265:0 Logitech MBJ58 Mouse Support Spring Replacement, Removing the Logitech MBJ58 Mouse Scroll Wheel: crwdns2935265:03crwdnd2935265:03crwdnd2935265:03crwdne2935265:0
    • Locate the scroll wheel on the mouse.

    • Grab the scroll wheel with your thumb and index finger.

    • Gently lift up, to remove the scroll wheel from the mouse.

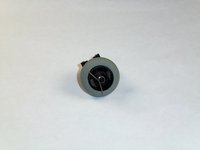
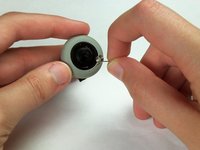
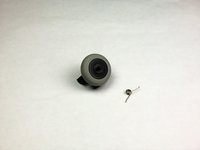
  4. Logitech MBJ58 Mouse Support Spring Replacement, Support Spring: crwdns2935265:04crwdnd2935265:01crwdnd2935265:02crwdne2935265:0 Logitech MBJ58 Mouse Support Spring Replacement, Support Spring: crwdns2935265:04crwdnd2935265:02crwdnd2935265:02crwdne2935265:0
    • Locate the spring on the scroll wheel, and carefully remove the spring.

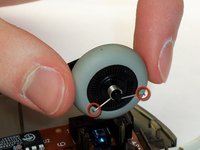
  5. Logitech MBJ58 Mouse Support Spring Replacement, Attaching the New Spring: crwdns2935265:05crwdnd2935265:01crwdnd2935265:02crwdne2935265:0 Logitech MBJ58 Mouse Support Spring Replacement, Attaching the New Spring: crwdns2935265:05crwdnd2935265:02crwdnd2935265:02crwdne2935265:0
    • Place the replacement spring on the correct side of the wheel (shown in the images) with the prongs pointing down.

crwdns2915888:0crwdne2915888:0

To reassemble your device, follow these instructions in reverse order.

crwdns2935229:06crwdne2935229:0

Conor Whatley

crwdns2935283:001/11/13crwdne2935283:0

489 crwdns2915208:0crwdne2915208:0

crwdns2935297:03crwdne2935297:0

crwdns2915084:0crwdne2915084:0

Cal Poly, Team 5-14, Forte Winter 2013 crwdns2935289:0Cal Poly, Team 5-14, Forte Winter 2013crwdne2935289:0

CPSU-FORTE-W13S5G14

crwdns2931471:05crwdne2931471:0

crwdns2935297:021crwdne2935297:0

crwdns2944067:00crwdne2944067:0

crwdns2917038:0crwdne2917038:0

crwdns2936625:0crwdne2936625:0:

crwdns2936751:024crwdne2936751:0 1

crwdns2936753:07crwdne2936753:0 4

crwdns2936753:030crwdne2936753:0 12

crwdns2942667:0crwdne2942667:0 3,864