crwdns2915892:0crwdne2915892:0
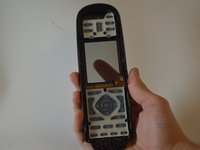
The buttons on the Harmony Ultimate can become faulty due to internal damage from the remote. To replace the buttons, it requires that you have removed both the motherboard and the battery from the device. Once those components have been removed, replacing the buttons is a breeze!
crwdns2942213:0crwdne2942213:0
-
-
Remove the single 6 mm Phillips #0 screw located beneath the sticker near the USB charging port.
-
-
-
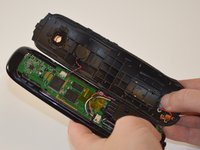
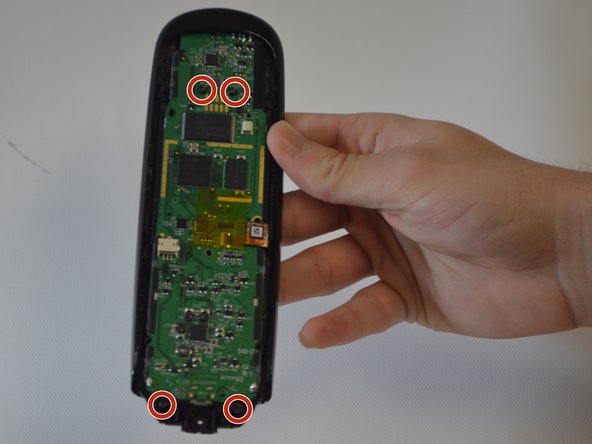
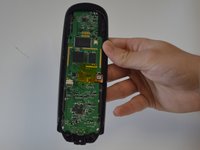
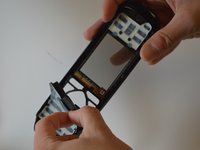
Use a plastic opening tool to release tabs that hold the front panel and back panel together. There are three tabs on each side of the device that need to separate for the device to open.
Benutze einen Plastik Öffner um die Haltekrallen zu lösen, welche die Vorder- und Rückseite zusammenhalten.
Auf jeder Seite befinden sich 3 Halteclips, welche gelöst werden müssen, um das Gerät zu öffnen.
Das Benutzen eines Plastik Öffners wird empfohlen, da andernfalls die Fernbedienung beschädigt werden könnte.
Stärkere Werkzeuge, zum Beispiel aus Metall sollte man nur als letzte Option benutzen. -
-
-
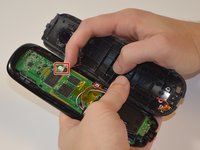
Disconnect the wires running from the back cover to the motherboard.
In the above picture what is the red/black wire connecting to on the case back ? The white quick connection has popped off my mother board but the remote still seems to be functioning ....
-
-
-
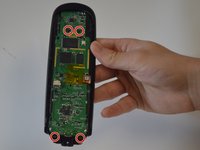
Remove the four 6mm Phillips #0 screws from the battery case.
-
-
-
-
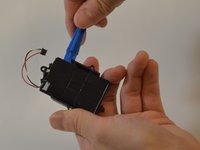
The battery is still connected to the device via wiring. To free the battery completely, remove the dark plastic piece from the slot with the plastic opening tool. Slowly rotate the dark plastic piece and the battery clockwise until then can be removed from underneath the small circuit board with the USB port.
The picture only shows the rather obvious step of removing the white connector. The instructions on how to remove the battery container are really poorly explained.
-
-
-
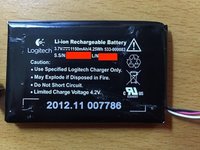
Lift the battery and its case out of the remote.
-
-
-
Use the plastic opening tool to separate the battery from the case.
I assume this is only needed if the battery is bad
-
-
-
Remove the four 6mm Phillips #0 screws from the motherboard.
-
-
-
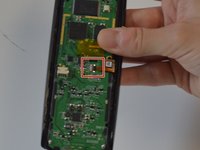
There is a flap that connects to the motherboard from the plastic casing. Use fingernails to safely release the flap by flipping the small black buckle upwards.
-
-
-
The motherboard is now safe to remove by sliding and lifting it backwards out of place.
-
-
-
After successfully removing the motherboard, you can easily peel off the buttons from the controller frame.
-


To reassemble your device, follow these instructions in reverse order.
To reassemble your device, follow these instructions in reverse order.
crwdns2935221:0crwdne2935221:0
crwdns2935229:05crwdne2935229:0
crwdns2915084:0crwdne2915084:0

USF Tampa, Team 8-1, Eyestone Fall 2015 crwdns2935289:0USF Tampa, Team 8-1, Eyestone Fall 2015crwdne2935289:0
USFT-EYESTONE-F15S8G1
crwdns2931471:05crwdne2931471:0
crwdns2935297:09crwdne2935297:0
crwdns2947412:02crwdne2947412:0
This is a great demo and it give me much more confidence to tackle the repair. I have some questions. Does the battery need to be removed as I see from your pictures, the motherboard screws are not covered by the battery - or are they? Also, where do you purchase your repair parts? Thank you!
Where do you find the parts? The Logitech website doesn’t have parts for the Ultimate
Entferne die einzige 6mm Phillips 0 Schraube, welche sich hinter dem Sticker in der Nähe des USB Ladeports befindet.
Moritz O. - crwdns2934203:0crwdne2934203:0