crwdns2933423:0crwdne2933423:0

Logitech Harmony Companion Harmony Hub Motherboard Replacement

crwdns2942213:0crwdne2942213:0

  1. Logitech Harmony Companion Harmony Hub Motherboard Replacement, Harmony Hub Motherboard: crwdns2935265:01crwdnd2935265:01crwdnd2935265:02crwdne2935265:0 Logitech Harmony Companion Harmony Hub Motherboard Replacement, Harmony Hub Motherboard: crwdns2935265:01crwdnd2935265:02crwdnd2935265:02crwdne2935265:0
    • Remove the non-slip rubber pads on the bottom of the Harmony Hub.

  2. Logitech Harmony Companion Harmony Hub Motherboard Replacement: crwdns2935265:02crwdnd2935265:01crwdnd2935265:02crwdne2935265:0 Logitech Harmony Companion Harmony Hub Motherboard Replacement: crwdns2935265:02crwdnd2935265:02crwdnd2935265:02crwdne2935265:0
    • Unscrew the four 6.0 mm Phillips #0 screws.

  3. Logitech Harmony Companion Harmony Hub Motherboard Replacement: crwdns2935265:03crwdnd2935265:01crwdnd2935265:01crwdne2935265:0
    • Insert the metal opening tool in the slit by the sensor.

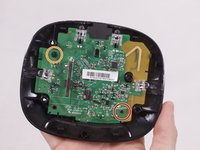
    • Carefully separate the Harmony Hub cover from the base.

    • The metal opening tool could damage the device, so use with care.

  4. Logitech Harmony Companion Harmony Hub Motherboard Replacement: crwdns2935265:04crwdnd2935265:01crwdnd2935265:02crwdne2935265:0 Logitech Harmony Companion Harmony Hub Motherboard Replacement: crwdns2935265:04crwdnd2935265:02crwdnd2935265:02crwdne2935265:0
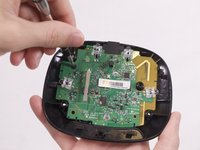
    • Unscrew the 2.0 mm Phillips #0 at the bottom right of the motherboard.

    • Unscrew the 4.0 mm Phillips #0 at the top left of the motherboard.

  5. Logitech Harmony Companion Harmony Hub Motherboard Replacement: crwdns2935265:05crwdnd2935265:01crwdnd2935265:03crwdne2935265:0 Logitech Harmony Companion Harmony Hub Motherboard Replacement: crwdns2935265:05crwdnd2935265:02crwdnd2935265:03crwdne2935265:0 Logitech Harmony Companion Harmony Hub Motherboard Replacement: crwdns2935265:05crwdnd2935265:03crwdnd2935265:03crwdne2935265:0
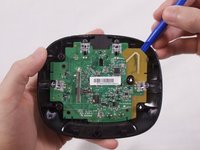
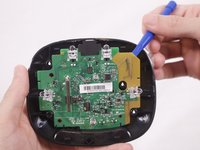
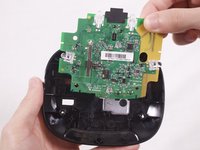
    • Face the Harmony Hub base so the sensor is facing out.

    • Insert the plastic opening tool behind the motherboard on the gold section, which is to the right of the sensor.

    • Lift until you hear a click.

crwdns2915888:0crwdne2915888:0

To reassemble your device, follow these instructions in reverse order.

Cassidy Wardlow

crwdns2935283:009/28/17crwdne2935283:0

662 crwdns2915208:0crwdne2915208:0

crwdns2935297:04crwdne2935297:0

crwdns2915084:0crwdne2915084:0

USF Tampa, Team S1-G3, Nance Fall 2017 crwdns2935289:0USF Tampa, Team S1-G3, Nance Fall 2017crwdne2935289:0

USFT-NANCE-F17S1G3

crwdns2931471:03crwdne2931471:0

crwdns2935297:04crwdne2935297:0

crwdns2944067:00crwdne2944067:0

crwdns2917038:0crwdne2917038:0

crwdns2936625:0crwdne2936625:0:

crwdns2936751:024crwdne2936751:0 0

crwdns2936753:07crwdne2936753:0 1

crwdns2936753:030crwdne2936753:0 9

crwdns2942667:0crwdne2942667:0 496