crwdns2915892:0crwdne2915892:0
This guide shows you how to begin the disassembly of the Logitech Harmony 650 Universal Remote. It is recommended that you have the iFixit ProTech Toolkit.
crwdns2942213:0crwdne2942213:0
-
-
-
Remove the battery cover by applying pressure to the indented area and pushing the cover toward the rear of the device.
 crwdns2952109:0crwdne2952109:0
-
-
-
Remove the batteries using the silver pull tab.
-
-
-
Using a J000 Philips head screwdriver remove the four 5mm screws around the rim of the battery chamber.
-
-
-
crwdns2935267:0crwdne2935267:0Flathead 3/32" or 2.5 mm Screwdriver$5.49
-
Remove the small plastic cover beneath the plastic LED housing by using a 3.0 flathead screwdriver and a spudger to pry it off. It is glued to the case. If you are having trouble removing it try applying some heat to loosen the glue.
-
-
-
Remove the two 5mm screws located underneath the cover using a J000 Philips screwdriver bit.
-
-
-
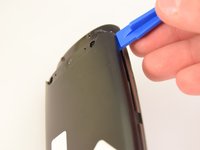
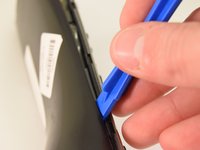
Using a plastic opening tool, pry the case off starting from the top of the device (nearest the transmitter). There are 3 tabs along the side of the case and one at the back.
-
The top led protector plastic cover will also be freed once back is removed.
-
-
-
Remove the rear cover.
-
-


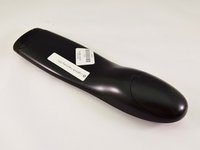



To reassemble your device, follow these instructions in reverse order.
crwdns2935221:0crwdne2935221:0
crwdns2935229:05crwdne2935229:0

crwdns2935287:0crwdne2935287:0

Eastern Washington University, Team 1-2, Rowley Winter 2016 crwdns2935289:0Eastern Washington University, Team 1-2, Rowley Winter 2016crwdne2935289:0
EWU-ROWLEY-W16S1G2
crwdns2931471:04crwdne2931471:0
crwdns2935297:060crwdne2935297:0
crwdns2947410:01crwdne2947410:0
Thanks for the fix. Now I can get on replacing the corroded battery contacts. Many thanks.
Kevin Bonney - crwdns2934203:0crwdne2934203:0 crwdns2950251:0crwdne2950251:0
