crwdns2933423:0crwdne2933423:0
crwdns2947577:0crwdnd2947577:0crwdne2947577:0

Logitech Gamepad F310 Trigger Spring Replacement

crwdns2869540:0crwdne2869540:0: 2 тыс.

crwdns2959988:0crwdne2959988:0

crwdns2959990:0crwdne2959990:0
4
crwdns2959992:0crwdne2959992:0
27
crwdns2959994:0crwdne2959994:0
134
crwdns2959996:0crwdne2959996:0
1 959
crwdns2955950:0crwdne2955950:0: 3

crwdns2960004:02crwdne2960004:0, crwdns2960006:01crwdne2960006:0

crwdns2960000:0crwdne2960000:0
crwdns2959984:0crwdne2959984:0: 1

crwdns2959972:01crwdne2959972:0

crwdns2959986:0crwdne2959986:0: 1

crwdns2959980:01crwdne2959980:0

crwdns2955944:0crwdne2955944:0: crwdns2931287:010crwdne2931287:0
crwdns2955970:0crwdne2955970:0: crwdns2937801:0crwdne2937801:0
Logitech Gamepad F310 Trigger Spring Replacement

crwdns2915892:0crwdne2915892:0

crwdns2959928:0crwdne2959928:0 ↓

If your triggers on your Logitech Gamepad F310 seem to be loose or broken, you might need to replace the springs inside them. Luckily this is a fairly easy process. Follow this guide to replace the springs on the triggers for your Gamepad controller.

The trigger spring is to help make trigger return back original position. The trigger is special function for gaming purpose like aiming, zooming and etc. So those are reason to replace trigger spring.

No special tools or skills are required.

crwdns2959930:0crwdne2959930:0

crwdns2943215:0crwdne2943215:0

    1. Logitech Gamepad F310 Trigger Spring Replacement, Case: crwdns2935265:01crwdnd2935265:01crwdnd2935265:02crwdne2935265:0 Logitech Gamepad F310 Trigger Spring Replacement, Case: crwdns2935265:01crwdnd2935265:02crwdnd2935265:02crwdne2935265:0
      • Use a Phillips #1 screwdriver to remove all seven 3 mm screws that secure the rear case.

      crwdns2952109:0crwdne2952109:0

      crwdns2917038:0crwdne2917038:0

    2. Logitech Gamepad F310 Trigger Spring Replacement: crwdns2935265:02crwdnd2935265:01crwdnd2935265:02crwdne2935265:0 Logitech Gamepad F310 Trigger Spring Replacement: crwdns2935265:02crwdnd2935265:02crwdnd2935265:02crwdne2935265:0
      • Press along the seams of the controller and gently pull the front and rear case apart.

      • If necessary, use an opening tool to help pry the front and rear case apart.

      • Make sure to open the controller with the front facing down so that the buttons do not fall out.

      crwdns2952109:0crwdne2952109:0

      crwdns2917038:0crwdne2917038:0

    3. Logitech Gamepad F310 Trigger Spring Replacement: crwdns2935265:03crwdnd2935265:01crwdnd2935265:01crwdne2935265:0
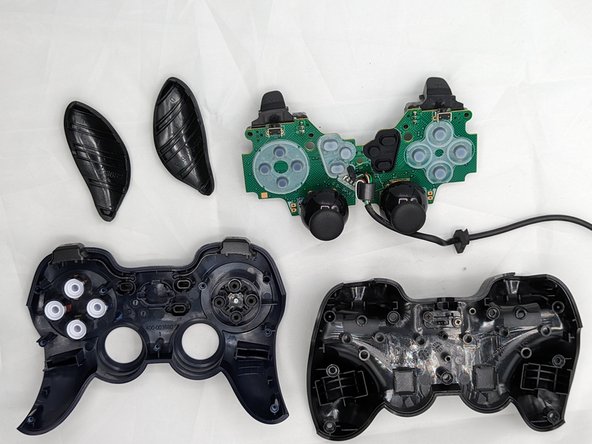
      • Separate the front and rear case.

      • There are two side panels on the controller that come apart as well. When putting them back together, they slot into place on the sides of the controller.

      crwdns2952109:0crwdne2952109:0

      crwdns2917038:0crwdne2917038:0

    1. Logitech Gamepad F310 Trigger Spring Replacement, Trigger Spring: crwdns2935265:04crwdnd2935265:01crwdnd2935265:02crwdne2935265:0 Logitech Gamepad F310 Trigger Spring Replacement, Trigger Spring: crwdns2935265:04crwdnd2935265:02crwdnd2935265:02crwdne2935265:0
      • Use a Phillips #1 screwdriver to remove:

      • Four 3 mm screws

      • One 5 mm screw

      • Remove the central silver screw last.

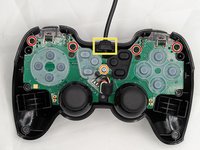
      • Gently lift the motherboard off of the back case and slide the cord out of the top slot.

      crwdns2952109:0crwdne2952109:0

      crwdns2917038:0crwdne2917038:0

    2. Logitech Gamepad F310 Trigger Spring Replacement: crwdns2935265:05crwdnd2935265:01crwdnd2935265:01crwdne2935265:0
      • Make note of the slot on the controller and the slot on the trigger that the spring is connected to.

      • Press the trigger down until the spring pops loose.

      • You may need to fish the spring out of the pocket it is in. The spring will be accompanied by a small black piece that fits inside the spring.

      crwdns2952109:0crwdne2952109:0

      crwdns2917038:0crwdne2917038:0

    3. Logitech Gamepad F310 Trigger Spring Replacement: crwdns2935265:06crwdnd2935265:01crwdnd2935265:01crwdne2935265:0
      • In order to properly place the spring into the controller, make sure that the black piece is inside, and make sure each end of the spring goes into the correct slots.

      crwdns2952109:0crwdne2952109:0

      crwdns2917038:0crwdne2917038:0

crwdns2915888:0crwdne2915888:0

You're all finished! To reassemble your device, follow these instructions carefully in reverse order.

crwdns2935221:0crwdne2935221:0

crwdns2935227:0crwdne2935227:0

Alan Mendoza DracoKing

crwdns2935283:002/05/24crwdne2935283:0

197 crwdns2915208:0crwdne2915208:0

crwdns2935297:02crwdne2935297:0

crwdns2935287:0crwdne2935287:0

University of North Texas, Team 2-6, Kilpatrick Spring 2024 crwdns2935289:0University of North Texas, Team 2-6, Kilpatrick Spring 2024crwdne2935289:0

UNT-KILPATRICK-S24S2G6

crwdns2931471:04crwdne2931471:0

crwdns2935297:072crwdne2935297:0

crwdns2947410:01crwdne2947410:0

crwdns2917038:0crwdne2917038:0

crwdns2936625:0crwdne2936625:0:

crwdns2936751:024crwdne2936751:0 4

crwdns2936753:07crwdne2936753:0 27

crwdns2936753:030crwdne2936753:0 134

crwdns2959996:0crwdne2959996:0 1,959