crwdns2933423:0crwdne2933423:0

Logitech G402 Left and Right Mouse Buttons Replacement

crwdns2942213:0crwdne2942213:0

  1. Logitech G402 Left and Right Mouse Buttons Replacement, Left and Right Mouse Buttons: crwdns2935265:01crwdnd2935265:01crwdnd2935265:01crwdne2935265:0
    • Remove the adhesive mouse skates from the bottom casing.

  2. Logitech G402 Left and Right Mouse Buttons Replacement: crwdns2935265:02crwdnd2935265:01crwdnd2935265:03crwdne2935265:0 Logitech G402 Left and Right Mouse Buttons Replacement: crwdns2935265:02crwdnd2935265:02crwdnd2935265:03crwdne2935265:0 Logitech G402 Left and Right Mouse Buttons Replacement: crwdns2935265:02crwdnd2935265:03crwdnd2935265:03crwdne2935265:0
    • Remove the five 1.2 mm screws using a Phillips #00 screwdriver from the bottom of the mouse.

    • Separate the top casing from the bottom.

  3. Logitech G402 Left and Right Mouse Buttons Replacement: crwdns2935265:03crwdnd2935265:01crwdnd2935265:02crwdne2935265:0 Logitech G402 Left and Right Mouse Buttons Replacement: crwdns2935265:03crwdnd2935265:02crwdnd2935265:02crwdne2935265:0
    • Remove the two case screws using a Phillips #00 screwdriver.

    • Remove the single 1.2 mm screw from the middle of the circuit board using a Phillips #00 screwdriver.

  4. Logitech G402 Left and Right Mouse Buttons Replacement: crwdns2935265:04crwdnd2935265:01crwdnd2935265:03crwdne2935265:0 Logitech G402 Left and Right Mouse Buttons Replacement: crwdns2935265:04crwdnd2935265:02crwdnd2935265:03crwdne2935265:0 Logitech G402 Left and Right Mouse Buttons Replacement: crwdns2935265:04crwdnd2935265:03crwdnd2935265:03crwdne2935265:0
    • Remove the perpendicular circuit board containing the side buttons.

    • Remove the remaining 1.2 mm screws under the removed board and next to the mouse buttons using a Phillips #00 screwdriver.

  5. Logitech G402 Left and Right Mouse Buttons Replacement: crwdns2935265:05crwdnd2935265:01crwdnd2935265:03crwdne2935265:0 Logitech G402 Left and Right Mouse Buttons Replacement: crwdns2935265:05crwdnd2935265:02crwdnd2935265:03crwdne2935265:0 Logitech G402 Left and Right Mouse Buttons Replacement: crwdns2935265:05crwdnd2935265:03crwdnd2935265:03crwdne2935265:0
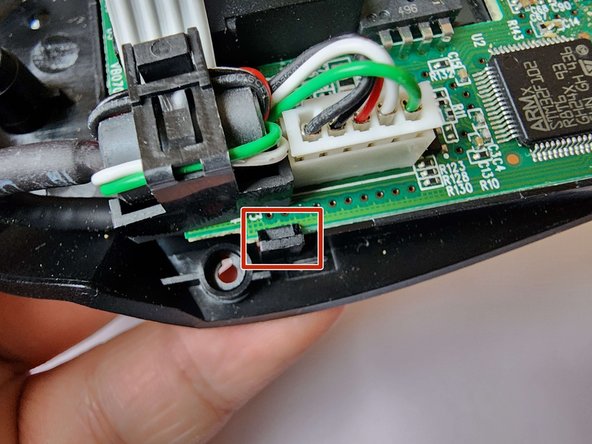
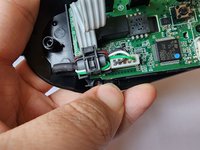
    • Pull back the plastic clip and lift the circuit board out of the bottom casing.

  6. Logitech G402 Left and Right Mouse Buttons Replacement: crwdns2935265:06crwdnd2935265:01crwdnd2935265:02crwdne2935265:0 Logitech G402 Left and Right Mouse Buttons Replacement: crwdns2935265:06crwdnd2935265:02crwdnd2935265:02crwdne2935265:0
    • Separate the wire from the bottom casing by pulling the wire out.

  7. Logitech G402 Left and Right Mouse Buttons Replacement: crwdns2935265:07crwdnd2935265:01crwdnd2935265:03crwdne2935265:0 Logitech G402 Left and Right Mouse Buttons Replacement: crwdns2935265:07crwdnd2935265:02crwdnd2935265:03crwdne2935265:0 Logitech G402 Left and Right Mouse Buttons Replacement: crwdns2935265:07crwdnd2935265:03crwdnd2935265:03crwdne2935265:0
    • You can access the iFixit guide to soldering and desoldering here.

    • Please be cautious when using a soldering iron. Soldering irons can reach several hundreds of degrees in temperature and improper use may result in a burn.

    • Please perform soldering and desoldering in a very well ventilated space. Solder containing lead can potentially be toxic and be an irritant. Solder and desolder outside or in the presence of a fume hood or fume extractor.

    • The solder connections for the left and right buttons are labeled in the second picture.

    • The solder connections circled in red are for the left mouse button.

    • The solder connections circled in orange are for the left mouse button.

  8. Logitech G402 Left and Right Mouse Buttons Replacement: crwdns2935265:08crwdnd2935265:01crwdnd2935265:02crwdne2935265:0 Logitech G402 Left and Right Mouse Buttons Replacement: crwdns2935265:08crwdnd2935265:02crwdnd2935265:02crwdne2935265:0
    • Solder the replacement button onto the circuit board.

    • Make sure the metal contacts are not bent and are touching the soldering contacts before soldering.

crwdns2915888:0crwdne2915888:0

To reassemble your device, follow these instructions in reverse order. When reassembly is complete, apply the replacement mouse skates.

Aaron C.

crwdns2935283:001/11/24crwdne2935283:0

157 crwdns2915208:0crwdne2915208:0

crwdns2935295:0crwdne2935295:0

crwdns2915084:0crwdne2915084:0

York University, Team O-10, O'Regan Winter 2024 crwdns2935289:0York University, Team O-10, O'Regan Winter 2024crwdne2935289:0

YORK-O'REGAN-W24SOG10

crwdns2934841:01crwdne2934841:0

crwdns2935303:01crwdne2935303:0

crwdns2944067:00crwdne2944067:0

crwdns2917038:0crwdne2917038:0

crwdns2936625:0crwdne2936625:0:

crwdns2936751:024crwdne2936751:0 3

crwdns2936753:07crwdne2936753:0 19

crwdns2936753:030crwdne2936753:0 81

crwdns2942667:0crwdne2942667:0 128