crwdns2933423:0crwdne2933423:0

Logic Board Shield Removal

crwdns2862623:0crwdne2862623:0
crwdns2942641:0crwdne2942641:0

crwdns2942213:0crwdne2942213:0

  1. Logic Board Shield Removal, Unfasten the logic board shield: crwdns2935265:01crwdnd2935265:01crwdnd2935265:02crwdne2935265:0 Logic Board Shield Removal, Unfasten the logic board shield: crwdns2935265:01crwdnd2935265:02crwdnd2935265:02crwdne2935265:0
    • Use a Phillips PH00 screwdriver to remove the eight screws securing the shield to the logic board:

    • Five 2 mm screws

    • Three 1.2 mm screws

  2. Logic Board Shield Removal, Heat the logic board shield: crwdns2935265:02crwdnd2935265:01crwdnd2935265:01crwdne2935265:0
    • Apply a heated iOpener to the top of the logic board for two minutes.

  3. Logic Board Shield Removal, Separate the bottom edge shield adhesive: crwdns2935265:03crwdnd2935265:01crwdnd2935265:03crwdne2935265:0 Logic Board Shield Removal, Separate the bottom edge shield adhesive: crwdns2935265:03crwdnd2935265:02crwdnd2935265:03crwdne2935265:0 Logic Board Shield Removal, Separate the bottom edge shield adhesive: crwdns2935265:03crwdnd2935265:03crwdnd2935265:03crwdne2935265:0
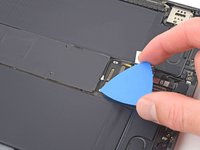
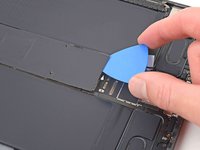
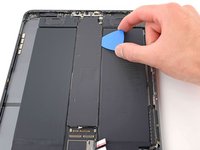
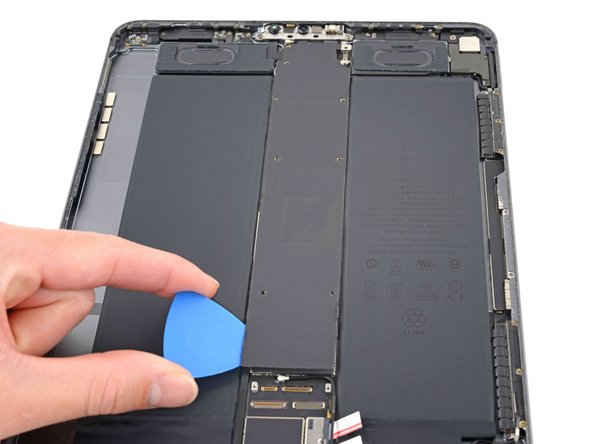
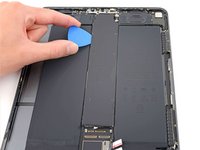
    • Insert an opening pick between the shield and the shielding gasket on the bottom edge of the logic board.

    • Slide the pick along the bottom edge to separate the adhesive.

  4. Logic Board Shield Removal, Separate the right edge shield adhesive: crwdns2935265:04crwdnd2935265:01crwdnd2935265:03crwdne2935265:0 Logic Board Shield Removal, Separate the right edge shield adhesive: crwdns2935265:04crwdnd2935265:02crwdnd2935265:03crwdne2935265:0 Logic Board Shield Removal, Separate the right edge shield adhesive: crwdns2935265:04crwdnd2935265:03crwdnd2935265:03crwdne2935265:0
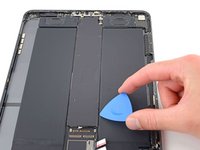
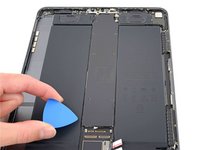
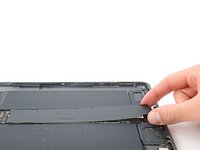
    • Repeat the previous step for the right edge of the logic board shield.

  5. Logic Board Shield Removal, Separate the left edge shield adhesive: crwdns2935265:05crwdnd2935265:01crwdnd2935265:03crwdne2935265:0 Logic Board Shield Removal, Separate the left edge shield adhesive: crwdns2935265:05crwdnd2935265:02crwdnd2935265:03crwdne2935265:0 Logic Board Shield Removal, Separate the left edge shield adhesive: crwdns2935265:05crwdnd2935265:03crwdnd2935265:03crwdne2935265:0
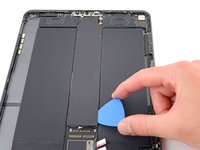
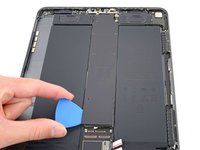
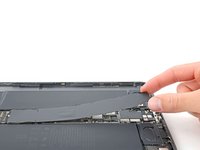
    • Repeat the previous step for the left edge of the logic board shield.

  6. Logic Board Shield Removal, Remove the logic board shield: crwdns2935265:06crwdnd2935265:01crwdnd2935265:03crwdne2935265:0 Logic Board Shield Removal, Remove the logic board shield: crwdns2935265:06crwdnd2935265:02crwdnd2935265:03crwdne2935265:0 Logic Board Shield Removal, Remove the logic board shield: crwdns2935265:06crwdnd2935265:03crwdnd2935265:03crwdne2935265:0
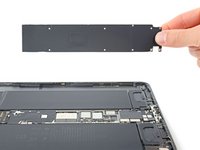
    • Grip the logic board shield at the top and lift it up.

    • Stop lifting if the shield is stuck or begins to bend—a bent shield will reduce thermal transfer from the logic board. Use an opening pick to separate any remaining adhesive.

crwdns2915888:0crwdne2915888:0

To reassemble your device, follow these instructions in reverse order.

Chayton Ritter

crwdns2935283:008/21/20crwdne2935283:0

22,688 crwdns2915208:0crwdne2915208:0

crwdns2935297:0105crwdne2935297:0

crwdns2915084:0crwdne2915084:0

Guide Team crwdns2935289:0Guide Teamcrwdne2935289:0

Staff

crwdns2931471:09crwdne2931471:0

crwdns2935297:011,602crwdne2935297:0

crwdns2947412:00crwdne2947412:0

crwdns2917038:0crwdne2917038:0

crwdns2936625:0crwdne2936625:0:

crwdns2936751:024crwdne2936751:0 0

crwdns2936753:07crwdne2936753:0 0

crwdns2936753:030crwdne2936753:0 3

crwdns2942667:0crwdne2942667:0 46