crwdns2933423:0crwdne2933423:0
Logic Board Disconnection

Logic Board Disconnection

Adam O'Camb

crwdns2944107:0crwdnd2944107:0Adam O'Cambcrwdnd2944107:0crwdnd2944107:0crwdnd2944107:02crwdnd2944107:0crwdne2944107:0

crwdns2944111:0December 16, 2024crwdne2944111:0

crwdns2931273:0crwdne2931273:0
crwdns2937801:0crwdne2937801:0
crwdns2862623:0crwdne2862623:0
crwdns2942641:0crwdne2942641:0

crwdns2915892:0crwdne2915892:0

crwdns2942287:0crwdne2942287:0

Prerequisite-only guide to disconnect the logic board in a 2019 MacBook Air.

crwdns2942213:0crwdne2942213:0

crwdns2943215:0crwdne2943215:0

  • Spudger
    Spudger
  • T3 Torx Screwdriver
    T3 Torx Screwdriver

crwdns2944105:0crwdne2944105:0

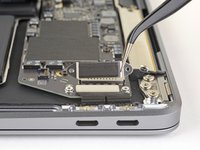
  1. Logic Board Disconnection, Disconnect the logic board: crwdns2935265:01crwdnd2935265:01crwdnd2935265:02crwdne2935265:0 Logic Board Disconnection, Disconnect the logic board: crwdns2935265:01crwdnd2935265:02crwdnd2935265:02crwdne2935265:0
    • Use a T3 Torx driver to remove the two 1.4 mm screws securing the trackpad connector bracket.

    • Depending on the condition of your bits, a T4 Torx driver may fit better.

    • Remove the trackpad connector bracket.

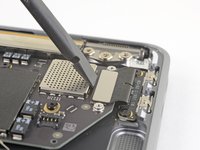
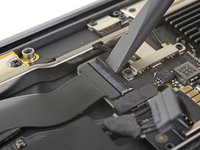
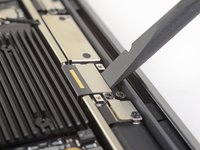
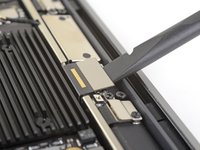
  2. Logic Board Disconnection: crwdns2935265:02crwdnd2935265:01crwdnd2935265:02crwdne2935265:0 Logic Board Disconnection: crwdns2935265:02crwdnd2935265:02crwdnd2935265:02crwdne2935265:0
    • Use the flat end of a spudger to pry the trackpad cable connector up and out of its socket.

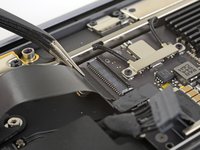
  3. Logic Board Disconnection: crwdns2935265:03crwdnd2935265:01crwdnd2935265:03crwdne2935265:0 Logic Board Disconnection: crwdns2935265:03crwdnd2935265:02crwdnd2935265:03crwdne2935265:0 Logic Board Disconnection: crwdns2935265:03crwdnd2935265:03crwdnd2935265:03crwdne2935265:0
    • If the left speaker is already disconnected, skip this step.

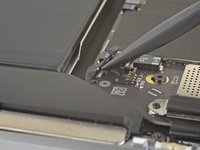
    • Slide the tip of a spudger underneath the left speaker cable and pry straight up to disconnect the speaker.

    • With the connector disconnected, slide the flat end of a spudger under the cable to separate the adhesive securing the cable to the logic board.

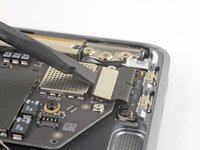
  4. Logic Board Disconnection: crwdns2935265:04crwdnd2935265:01crwdnd2935265:02crwdne2935265:0 Logic Board Disconnection: crwdns2935265:04crwdnd2935265:02crwdnd2935265:02crwdne2935265:0
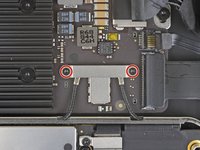
    • Use a T3 Torx driver to remove the two 1.3 mm screws securing the USB-C port connector bracket.

    • Remove the USB-C connector bracket.

  5. Logic Board Disconnection: crwdns2935265:05crwdnd2935265:01crwdnd2935265:02crwdne2935265:0 Logic Board Disconnection: crwdns2935265:05crwdnd2935265:02crwdnd2935265:02crwdne2935265:0
    • Use the flat end of a spudger to pry the USB-C cable connector up and out of its socket on the logic board.

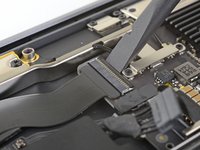
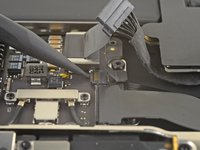
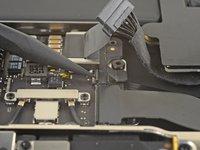
  6. Logic Board Disconnection: crwdns2935265:06crwdnd2935265:01crwdnd2935265:03crwdne2935265:0 Logic Board Disconnection: crwdns2935265:06crwdnd2935265:02crwdnd2935265:03crwdne2935265:0 Logic Board Disconnection: crwdns2935265:06crwdnd2935265:03crwdnd2935265:03crwdne2935265:0
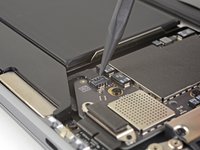
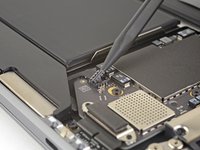
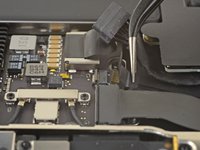
    • Use a spudger to lift up the small locking flap on the sound board cable's ZIF connector.

    • Slide the sound board cable out of the ZIF connector.

  7. Logic Board Disconnection: crwdns2935265:07crwdnd2935265:01crwdnd2935265:01crwdne2935265:0
    • Peel back the black tape covering the fan cable connector.

  8. Logic Board Disconnection: crwdns2935265:08crwdnd2935265:01crwdnd2935265:03crwdne2935265:0 Logic Board Disconnection: crwdns2935265:08crwdnd2935265:02crwdnd2935265:03crwdne2935265:0 Logic Board Disconnection: crwdns2935265:08crwdnd2935265:03crwdnd2935265:03crwdne2935265:0
    • Use the tip of a spudger to lift up the locking flap on the fan cable's ZIF connector.

    • Slide the fan cable out of the ZIF connector.

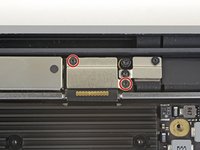
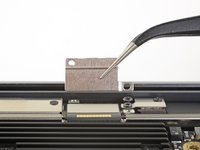
  9. Logic Board Disconnection: crwdns2935265:09crwdnd2935265:01crwdnd2935265:02crwdne2935265:0 Logic Board Disconnection: crwdns2935265:09crwdnd2935265:02crwdnd2935265:02crwdne2935265:0
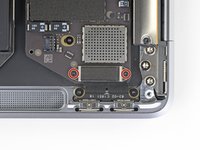
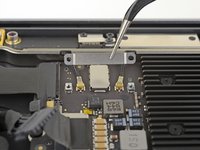
    • Use a T3 Torx driver to remove the two 1.4 mm screws securing the antenna cable bracket.

    • Remove the antenna cable bracket.

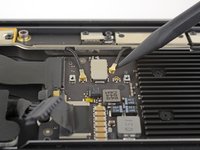
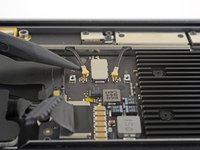
  10. Logic Board Disconnection: crwdns2935265:010crwdnd2935265:01crwdnd2935265:03crwdne2935265:0 Logic Board Disconnection: crwdns2935265:010crwdnd2935265:02crwdnd2935265:03crwdne2935265:0 Logic Board Disconnection: crwdns2935265:010crwdnd2935265:03crwdnd2935265:03crwdne2935265:0
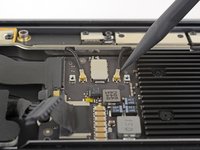
    • Insert the point of a spudger under one of the antenna cables close to the connector. Pry straight up to disconnect the cable.

    • Repeat for the other antenna cable.

  11. Logic Board Disconnection: crwdns2935265:011crwdnd2935265:01crwdnd2935265:02crwdne2935265:0 Logic Board Disconnection: crwdns2935265:011crwdnd2935265:02crwdnd2935265:02crwdne2935265:0
    • Use a T3 Torx driver to remove the two 1.5 mm screws securing the display cable connector bracket.

    • Remove the display cable connector bracket.

  12. Logic Board Disconnection: crwdns2935265:012crwdnd2935265:01crwdnd2935265:02crwdne2935265:0 Logic Board Disconnection: crwdns2935265:012crwdnd2935265:02crwdnd2935265:02crwdne2935265:0
    • Use the flat end of a spudger to pry up the display cable connector.

crwdns2915888:0crwdne2915888:0

To reassemble your device, follow these instructions in reverse order.

Adam O'Camb

crwdns2935283:004/11/15crwdne2935283:0

210,839 crwdns2915208:0crwdne2915208:0

crwdns2935297:0416crwdne2935297:0

crwdns2947412:00crwdne2947412:0

crwdns2917038:0crwdne2917038:0

crwdns2936625:0crwdne2936625:0:

crwdns2936751:024crwdne2936751:0 0

crwdns2936753:07crwdne2936753:0 2

crwdns2936753:030crwdne2936753:0 2

crwdns2942667:0crwdne2942667:0 156