crwdns2915892:0crwdne2915892:0
Having issues with your audio in your Lenovo Yoga C930-13IKB laptop? Check out this troubleshooting guide to figure out what’s wrong before using this guide to replace your speakers. If your speakers are damaged or worn out from heavy use, it is a good idea to replace them.
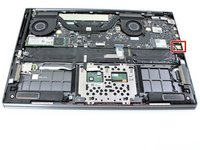
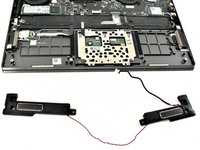
To access the speakers in your laptop, you will need to remove the back cover and the battery, which is outlined for you in the steps below. There are two speakers total, one on either side of the laptop, connected to each other by a wire. Only one of the speakers is plugged directly into the motherboard. For this guide, you will need a plastic opening tool, a T5 Torx screwdriver, and a Phillips #00 screwdriver.
crwdns2942213:0crwdne2942213:0
-
-
Flip the device over so that the underside is facing up.
-
Remove the six 3.5 mm T5 Torx screws.
-
-
-
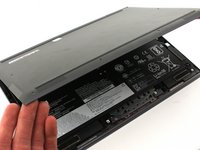
Pry off the back cover using the plastic opening tool.
-
Loosen the back cover in multiple spots using the opening tool, then remove the whole back.
-
-
-
Carefully lift the cover off with your hands.
-
-
-
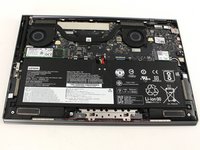
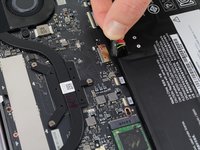
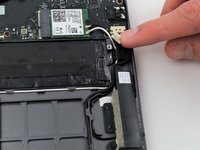
Unplug the battery from the motherboard by pinching the cables with your fingers and tugging out with force.
-
-
-
-
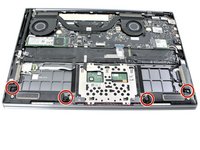
Unscrew the four 3mm screws with a Phillips screwdriver.
-
-
-
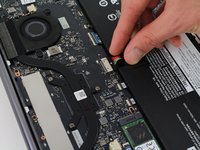
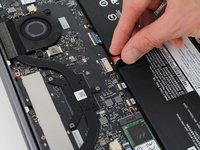
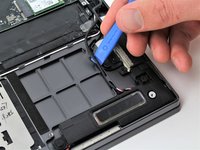
Use your fingers to pry up the clear plastic pull-tab for one of the stretch release adhesives.
-
Grasp the pull-tab and slowly pull away from the battery at a shallow angle. The adhesive strip will stretch to many times its length and slowly release from underneath the battery.
-
Repeat the procedure for the second strip on the opposite side of the battery.
-
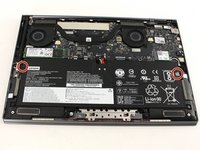
Remove the battery with your hands.
-
-
-
Remove the four 2mm screws that attach the speakers to the laptop body using a Phillips #00 screwdriver.
-
-
-
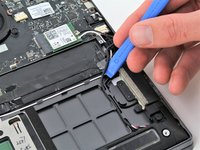
Gently unplug the connector using two fingers.
-
-
-
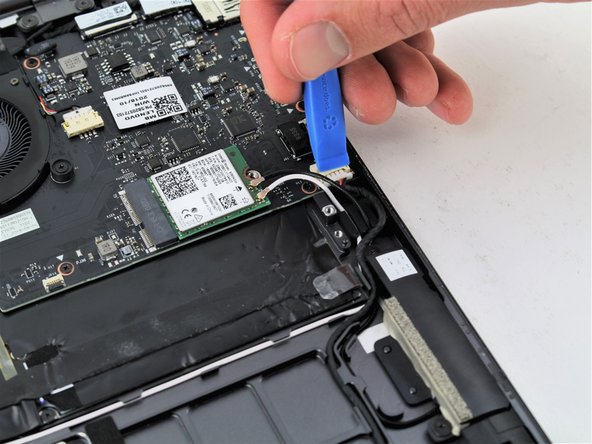
Lift the black wire that connects the speakers to the motherboard from its track using an opening tool.
-
-
-
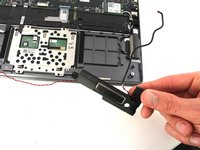
Remove the right speaker using your fingers.
-
Remove the left speaker, which is connected to the right speaker by the black and red wire.
-


To reassemble your device, follow these instructions in reverse order.
crwdns2935221:0crwdne2935221:0
crwdns2935229:02crwdne2935229:0

crwdns2935287:0crwdne2935287:0

Cal Poly, Team S19-G5, White Winter 2020 crwdns2935289:0Cal Poly, Team S19-G5, White Winter 2020crwdne2935289:0
CPSU-WHITE-W20S19G5
crwdns2931471:04crwdne2931471:0
crwdns2935297:016crwdne2935297:0
crwdns2947410:01crwdne2947410:0
What would be the additional steps to replace a right hinge as the speakers are in the hinge?