crwdns2942213:0crwdne2942213:0
-
-
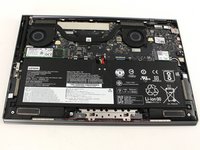
Flip the device over so that the underside is facing up.
-
Remove the six 3.5 mm T5 Torx screws.
-
-
-
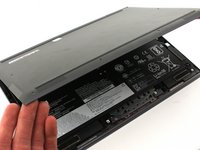
Pry off the back cover using the plastic opening tool.
-
Loosen the back cover in multiple spots using the opening tool, then remove the whole back.
-
-
-
Carefully lift the cover off with your hands.
-
-
-
-
Remove the four 3 mm Phillips #0 screws from the fan assembly.
-
-
-
Remove the four 2 mm Phillips #00 screws from the fans themselves.
-
-
-
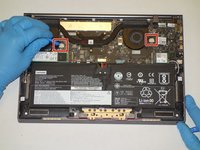
Unscrew the three 3 mm Phillips #0 screws on the heatsink.
-
-
-
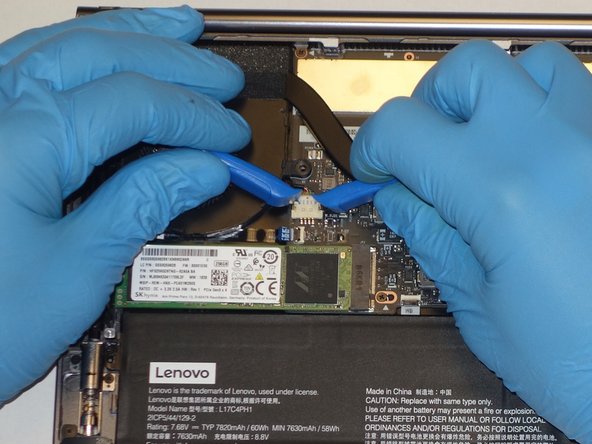
Use a plastic opening tool to remove the two small, white power cable connectors for each of the two fans.
-
-
-
Gently lift the fan assembly out of the laptop.
-


To reassemble your device, follow these instructions in reverse order. Remember to apply fresh thermal paste to the heatsink during reassembly.
crwdns2935221:0crwdne2935221:0
crwdns2935227:0crwdne2935227:0

crwdns2935287:0crwdne2935287:0

The Citadel Military College of South Carolina, Team S3-G23, Eggleston Fall 2020 crwdns2935289:0The Citadel Military College of South Carolina, Team S3-G23, Eggleston Fall 2020crwdne2935289:0
CMCSC-EGGLESTON-F20S3G23
crwdns2931471:03crwdne2931471:0
crwdns2935297:03crwdne2935297:0