crwdns2915892:0crwdne2915892:0
This guide shows how to replace the audio jack on the Lenovo Yoga 920-13IKB.
crwdns2942213:0crwdne2942213:0
-
-
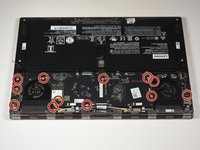
Remove the ten 5mm Torx T5 screws on the back cover to loosen the back cover.
-
-
-
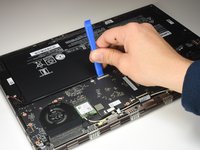
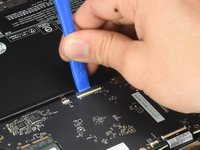
Slide the iFixit Opening Tool under the back cover to lift it up.
-
Pull up on the cover with your hand to release the tab holding the center of the cover in place.
-
-
-
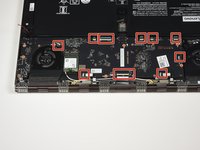
Remove the twelve 5mm Phillips #00 screws to loosen the motherboard.
-
-
-
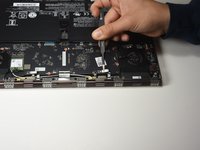
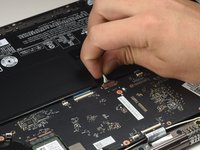
Flip up the ten flat connectors holding the motherboard using the iFixit Opening Tool to free the motherboard.
-
-
crwdns2935267:0crwdne2935267:0Tweezers$4.99
-
Pull out the ribbon cables from the opened connectors using the iFixit Tweezers to free up the motherboard.
-
-
-
-
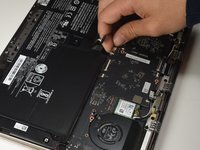
Disconnect the battery by pulling the ribbon wire grouping out of the top of the motherboard.
-
-
-
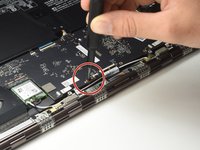
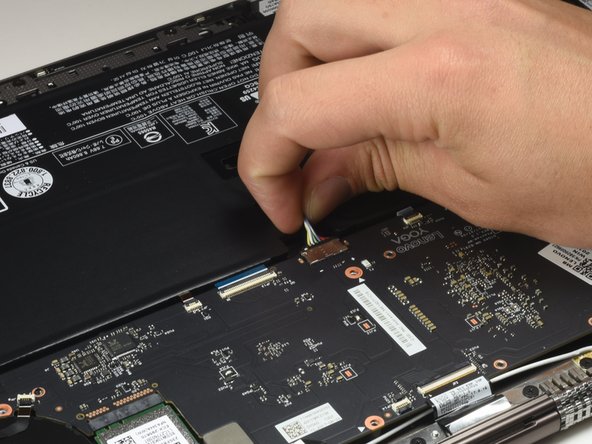
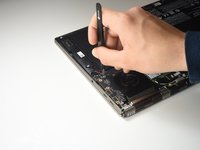
Disconnect the red and black wire from the motherboard using the iFixit Tweezers.
-
-
-
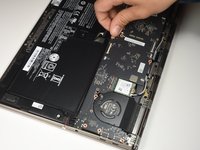
Lift the motherboard up parallel to the hinge of the device.
-
Gently pull away from the port cutouts of the USB-C and audio jack to remove the motherboard from the device casing.
-
-
-
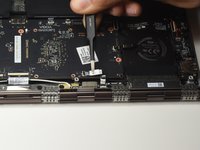
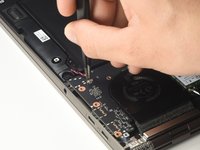
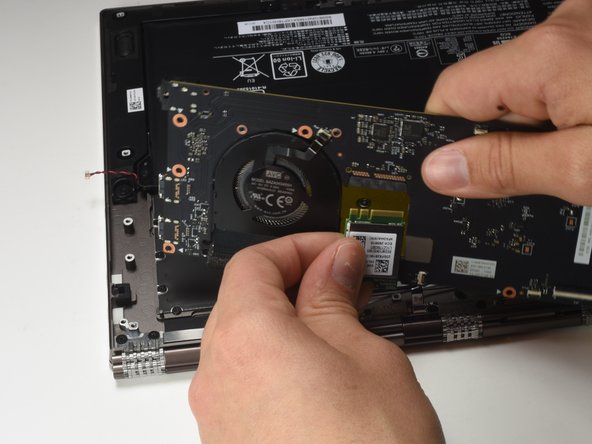
Disconnect the green AC card plugged into the motherboard by pulling it out with your hands.
-
-
-
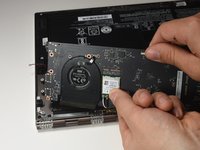
Flip the motherboard over to access the back side.
-
-
-
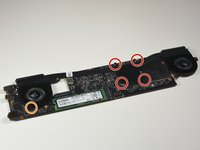
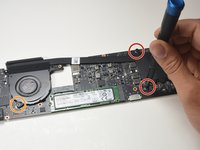
Remove four 3mm JIS #00 screws with the screwdriver.
-
Remove one 3mm Phillips #00 screw with the screwdriver.
-
-
-
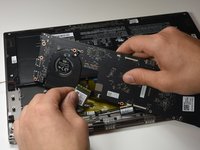
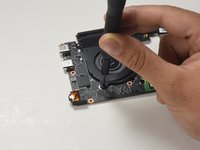
Separate the fans from the motherboard to isolate it for replacement.
-
-
-
Replace the motherboard to replace the audio jack.
-


To reassemble your device, follow these instructions in reverse order.
To reassemble your device, follow these instructions in reverse order.
crwdns2915084:0crwdne2915084:0

Cal Poly, Team S2-G3, White Winter 2019 crwdns2935289:0Cal Poly, Team S2-G3, White Winter 2019crwdne2935289:0
CPSU-WHITE-W19S2G3
crwdns2931471:04crwdne2931471:0
crwdns2935297:029crwdne2935297:0