crwdns2915892:0crwdne2915892:0
This guide shows you how to replace the Lenovo Yoga 720 15-IKB (88YG7000828) SSD. This laptop is very similar to the Lenovo Yoga 720 13-inch , the Yoga 710, and the Yoga 730. A faulty SSD can cause your data to be fragmented or even destroyed. These symptoms are further explained on the troubleshooting page.
crwdns2942213:0crwdne2942213:0
-
-
Power off the device before starting.
-
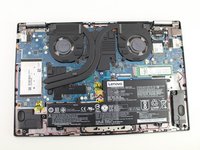
Flip the device over with the hinges facing away from you.
-
Remove seven 5.0 mm Torx T5 screws.
-
Remove three 9.5 mm Torx T5 screws.
-
-
-
Pry around the edges from one side to another with a plastic opening tool.
-
Lift the case from the front until you feel resistance.
-
Pull the cover towards you, away from the hinges.
-
Completely lift off the cover.
-
-
-
-
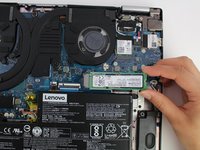
Remove the one JIS #1 screw holding the SSD.
-
-
-
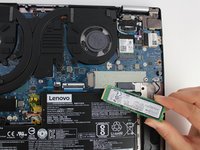
Tilt the SSD away from the screw hole.
-
Pull out the SSD away from the socket it is plugged into.
-


To reassemble your device, follow these instructions in reverse order.
To reassemble your device, follow these instructions in reverse order.
crwdns2935221:0crwdne2935221:0
crwdns2935229:03crwdne2935229:0
crwdns2915084:0crwdne2915084:0

Cal Poly, Team S19-G3, White Winter 2020 crwdns2935289:0Cal Poly, Team S19-G3, White Winter 2020crwdne2935289:0
CPSU-WHITE-W20S19G3
crwdns2931471:04crwdne2931471:0
crwdns2935297:025crwdne2935297:0
crwdns2947410:01crwdne2947410:0
The M.2 drive shown as a replacement part, at the time I replaced mine, was an Corsair M.2 drive with a SATA interface. My machine would not boot with this drive. I looked up the original drive on the internet and it was an Intel M.2 NVMe drive. I bought a new M.2 NVMe drive and it works find. I guess the disk controller in my laptop does not recognize the M.2 with a SATA interface. Maybe something they changed in the middle of the product line. Anyway be sure to check which drive you have before you buy the replacement. Rest of the information great.