crwdns2933423:0crwdne2933423:0

Lenovo Yoga 700-11ISK Touchpad Replacement

crwdns2942213:0crwdne2942213:0

  1. Lenovo Yoga 700-11ISK Touchpad Replacement, Back Panel: crwdns2935265:01crwdnd2935265:01crwdnd2935265:02crwdne2935265:0 Lenovo Yoga 700-11ISK Touchpad Replacement, Back Panel: crwdns2935265:01crwdnd2935265:02crwdnd2935265:02crwdne2935265:0
    • Flip your device so that the bottom panel is facing up.

    • Remove the eleven 5mm Torx T5 screws from the back panel.

  2. Lenovo Yoga 700-11ISK Touchpad Replacement: crwdns2935265:02crwdnd2935265:01crwdnd2935265:01crwdne2935265:0
    • Use a spudger to unclip clips on the front and near the USB ports on each side

    • Lift the back panel off

  3. Lenovo Yoga 700-11ISK Touchpad Replacement, Battery: crwdns2935265:03crwdnd2935265:01crwdnd2935265:01crwdne2935265:0
    • Remove the two 3mm Phillips #1 screws holding the battery to the laptop chassis.

    • Disconnect the battery from the IO board by holding the connector by the sides and gently pulling the connector out.

  4. Lenovo Yoga 700-11ISK Touchpad Replacement: crwdns2935265:04crwdnd2935265:01crwdnd2935265:01crwdne2935265:0
    • Carefully remove the battery from the laptop.

    • Make sure that all wires still connected to the laptop are out of the way and not pulled out with the battery.

  5. Lenovo Yoga 700-11ISK Touchpad Replacement, Touchpad: crwdns2935265:05crwdnd2935265:01crwdnd2935265:03crwdne2935265:0 Lenovo Yoga 700-11ISK Touchpad Replacement, Touchpad: crwdns2935265:05crwdnd2935265:02crwdnd2935265:03crwdne2935265:0 Lenovo Yoga 700-11ISK Touchpad Replacement, Touchpad: crwdns2935265:05crwdnd2935265:03crwdnd2935265:03crwdne2935265:0
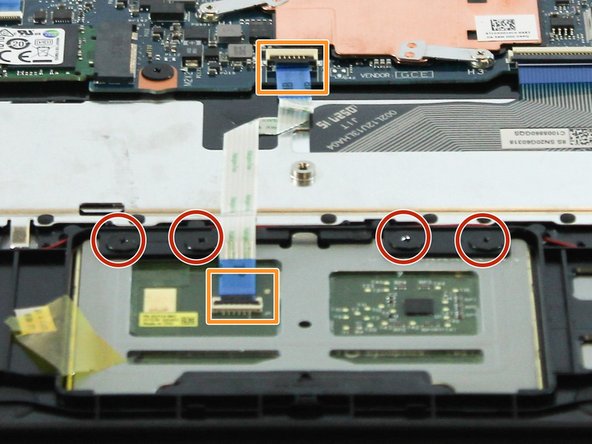
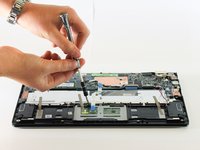
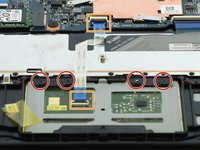
    • Remove the four 4mm Phillips #1 screws holding the touchpad onto the laptop.

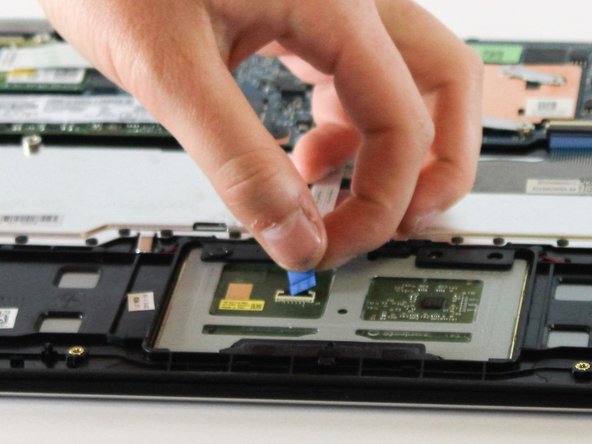
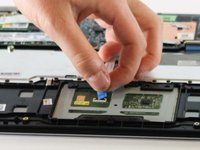
    • Use a spudger to lift up the two black tabs on the ZIF connectors and then pull the cable out by the blue tab.

    • The cable should slide in and out effortlessly. If there is resistance when pulling the cable, double check the black tabs.

  6. Lenovo Yoga 700-11ISK Touchpad Replacement: crwdns2935265:06crwdnd2935265:01crwdnd2935265:01crwdne2935265:0
    • Slightly separate the two halves of the laptop with one hand and slide the touchpad out from the laptop with the other.

    • There may be silver tape holding the touchpad to the laptop. You do not need to replace the tape when reassembling the device.

crwdns2915888:0crwdne2915888:0

To reassemble your device, follow these instructions in reverse order.

crwdns2935229:02crwdne2935229:0

Sean Wong

crwdns2935283:010/06/16crwdne2935283:0

859 crwdns2915208:0crwdne2915208:0

crwdns2935297:03crwdne2935297:0

crwdns2915084:0crwdne2915084:0

Cal Poly, Team 15-6, Livingston Fall 2016 crwdns2935289:0Cal Poly, Team 15-6, Livingston Fall 2016crwdne2935289:0

CPSU-LIVINGSTON-F16S15G6

crwdns2931471:04crwdne2931471:0

crwdns2935297:07crwdne2935297:0

crwdns2917034:0crwdne2917034:0

The “Tools Required” section says “Torx T7” but Step 1 lists, and (more importantly) the actual device has Torx T5 screws.

Step 5 suggests using a spudger, so perhaps that should be listed too.

alan - crwdns2934203:0crwdne2934203:0

crwdns2917038:0crwdne2917038:0

crwdns2936625:0crwdne2936625:0:

crwdns2936751:024crwdne2936751:0 0

crwdns2936753:07crwdne2936753:0 0

crwdns2936753:030crwdne2936753:0 2

crwdns2942667:0crwdne2942667:0 2,161