crwdns2915892:0crwdne2915892:0
Use this guide to replace the motherboard in your Lenovo Yoga 3 11.
crwdns2942213:0crwdne2942213:0
-
-
Remove the eleven 6 mm T5 Torx screws securing the lower case.
-
Gently lift the lower case up and away from the device.
-
-
-
Remove the two 3 mm Phillips #00 screws securing the battery.
-
-
crwdns2935267:0crwdne2935267:0Tweezers$4.99
-
Use a pair of tweezers to gently disconnect the battery connector.
-
-
-
Use a pair of tweezers to gently disconnect the speaker cable.
-
Remove the wires from underneath the battery tabs using the tweezers.
-
-
-
Carefully remove the battery from the device.
-
-
-
crwdns2935267:0crwdne2935267:0Tweezers$4.99
-
Use a pair of tweezers to disconnect the motherboard-size of the trackpad ribbon cable. Gently lift up the black tab, and the cable should come free from the ZIF connector.
-
-
-
Use a pair of tweezers to disconnect the keyboard ribbon cable from the motherboard ZIF connector. Gently lift up the white tab, and the cable should come free.
-
-
-
Use a pair of tweezers to disconnect the motherboard-side of the SD board ribbon cable. Gently lift up the black tab, and then ribbon cable should come free from the ZIF connector.
-
-
-
Use the tweezers to unplug the USB port from the motherboard by gently lifting the white connector up from the black motherboard connector.
-
-
-
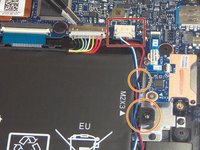
Use a plastic opening tool to gently pry up the screen cable from the motherboard.
-
-
-
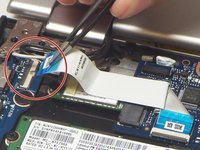
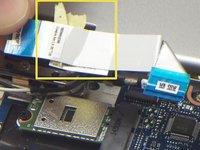
Use a pair of tweezers to disconnect the "I/O Side" of the ribbon cable connecting the audio jack/USB port assembly to the motherboard. Gently lift up the black tab, and the ribbon cable should come free from the ZIF connector.
-
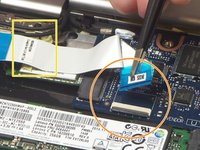
Use a pair of tweezers to disconnect the "MB Side" of the ribbon cable connecting the audio jack/USB port assembly to the motherboard. Gently lift up the black tab, and the ribbon cable should come free from the ZIF connector.
-
Remove the ribbon cable from the device.
-
-
-
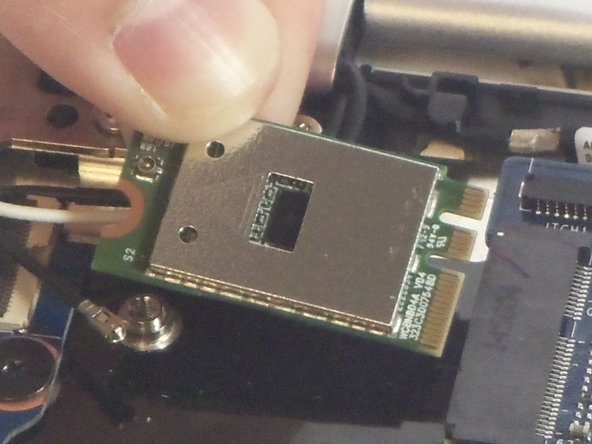
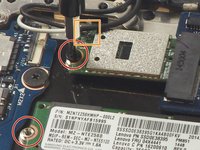
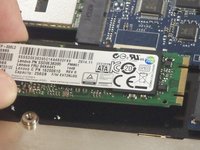
Remove the two 2 mm Phillips #00 screws securing the wireless card (top) and the SSD (bottom).
-
Use a pair of tweezers to disconnect the black and white antenna cables that are connected to the wireless card.
-
Gently lift the wireless card and SSD up and out of the device.
-
-
-
Remove the three black 2 mm Phillips #00 screws.
-
Remove the single silver 4 mm Phillips #00 screw.
-
-
-
Gently lift the motherboard up and out of the device.
-


To reassemble your device, follow these instructions in reverse order.
To reassemble your device, follow these instructions in reverse order.
crwdns2935221:0crwdne2935221:0
crwdns2935229:03crwdne2935229:0
crwdns2915084:0crwdne2915084:0

USF Tampa, Team 2-3, Blackwell Fall 2015 crwdns2935289:0USF Tampa, Team 2-3, Blackwell Fall 2015crwdne2935289:0
USFT-BLACKWELL-F15S2G3
crwdns2931471:04crwdne2931471:0
crwdns2935297:011crwdne2935297:0
crwdns2947410:01crwdne2947410:0
Not as difficult as I thought. I was surprised that there were no empty RAM locations. Usually on a Notebookk lliek this, there is one RAM location soldered to MB, and one empty slot for upgrade. I worked on an identical Yoga 3 pro that ran 16GB. But aht meant it was soldered at factory to one 16GB RAM setup.