crwdns2915892:0crwdne2915892:0
This guide will explain how to safely remove the screen from your Lenovo Yoga 2 13" laptop. It will provide a list of the tools needed as well as the easiest way to remove the screen without damaging it.
crwdns2942213:0crwdne2942213:0
-
-
-
Using an opening pick, remove one small black rectangle piece on each of the hinge corners to locate screws.
-
Using a Phillips head screwdriver, carefully remove one 4.8 mm screw from each corner.
 crwdns2952109:0crwdne2952109:0
-
-
-
Using the Jimmy, remove the long centerpiece covering between the hinges.
-
-
-
-
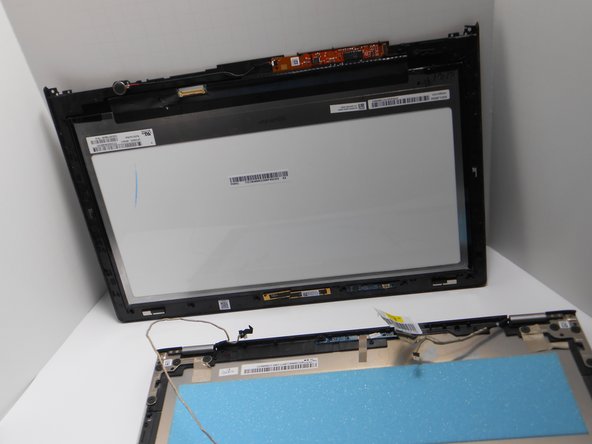
Detach the screen from the front panel by sliding the screen up about 2mm. Do not pull too far, as there are still connected wires.
-
-
-
Locate the gold wire and follow it to two clips. Remove the clips and the clear tape securing the wire.
-
Gently unsnap the wire from the hooks along the perimeter, and remove any tape along the wire.
-
-
-
Completely separate the screen from the laptop.
-
-


To reassemble your device, follow these instructions in reverse order.
crwdns2935221:0crwdne2935221:0
crwdns2935229:011crwdne2935229:0

crwdns2935287:0crwdne2935287:0

Marist, Team 1-2, Laflen Spring 2015 crwdns2935289:0Marist, Team 1-2, Laflen Spring 2015crwdne2935289:0
MARS-LAFLEN-S15S1G2
crwdns2931471:03crwdne2931471:0
crwdns2935297:060crwdne2935297:0
crwdns2947412:03crwdne2947412:0
Hi Nichelle,
thanks for your guide. Step 1 and 2 - no problem. But how actually did you do step 3? I can't detach the screen, I can just lift it a few millimeters at the corners or at the side, totally hard..
edit: Ok got it: slide the touch-lcd up a bit :)
Simon - crwdns2934203:0crwdne2934203:0 crwdns2950251:0crwdne2950251:0
Hey Nichelle, do you have any recommended vendors for both the screen and the digitizer? Thanks!
Emmanuel Duarte - crwdns2934203:0crwdne2934203:0 crwdns2950251:0crwdne2950251:0
I used laptopscreen.com.
ken - crwdns2934203:0crwdne2934203:0 crwdns2950251:0crwdne2950251:0
