crwdns2915892:0crwdne2915892:0
This guide will show to how to properly remove and replace the touchpad of a Lenovo Yoga 2 11 “ with the serial number 20428.
crwdns2942213:0crwdne2942213:0
-
-
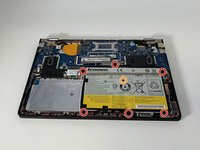
Flip the computer over so the bottom is facing up.
-
Remove the ten 6mm screws with a T5 Torx security screwdriver.
-
-
-
Carefully remove the back panel by gently separating the panel from front to back.
-
-
-
Use the Phillips #000 screwdriver to remove the six 3.3 mm screws around the perimeter of the battery.
-
Use the Phillips #000 screwdriver to remove the single 6.75 mm screw from the center of the battery.
-
-
-
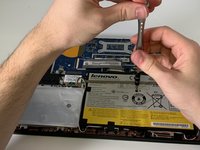
Gently remove the three pieces of tape securing the Bluetooth/Wi-Fi antenna.
-
-
-
-
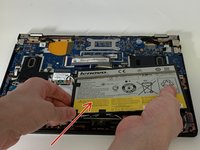
Grip the base of the connector with your fingers or pliers, and gently pull the connector straight back towards you to remove it.
-
-
-
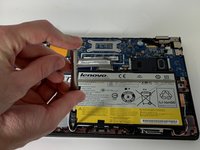
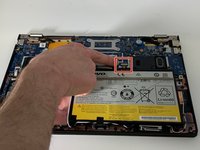
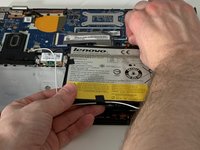
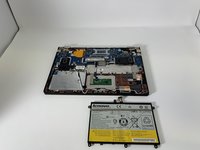
Carefully remove the battery from the laptop.
-
-
-
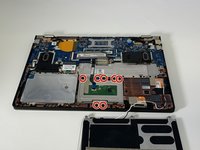
Remove seven 2mm Phillips head #00 screws.
-
-
-
The eighth screw at the top left is covered by a piece of silver tape. Gently peel the tape back and remove the screw.
-
-
-
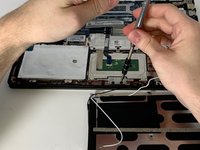
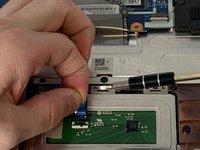
There is a small black tab holding the cable for the touchpad in place. Flip this tab up using a nylon spudger to unlock the connector.
-
-
-
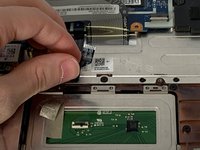
There is a blue plastic tab connected to the cable. Use this to gently pull the cable directly back and out of the connection point on the touchpad. If the black tab has been unlocked this should slide out without resistance.
-
-
-
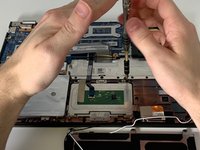
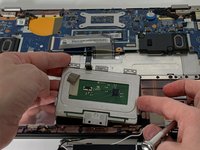
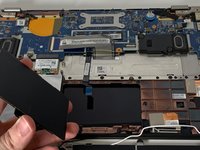
Carefully lift the touchpad up and out of the laptop. If it gets caught you may gently wiggle it as you lift to safely remove it.
-


To reassemble your device, follow these instructions in reverse order.
To reassemble your device, follow these instructions in reverse order.
crwdns2915084:0crwdne2915084:0

University of Memphis, Team S1-G2, Kim Spring 2019 crwdns2935289:0University of Memphis, Team S1-G2, Kim Spring 2019crwdne2935289:0
UM-KIM-S19S1G2
crwdns2931471:03crwdne2931471:0
crwdns2935297:06crwdne2935297:0
crwdns2947410:01crwdne2947410:0
Correction to the tools needed. The screws for the bottom panel are T5 Torx, not T4 Torx. T4 will strip the screws.