crwdns2915892:0crwdne2915892:0
This guide will show the step-by-step process of removing and/or replacing the speakers in the Lenovo Yoga 11” 20428. This guide can be used to replace broken speakers and remove speakers for repair. When removing your speakers, make sure to remove the battery before beginning the speaker removal process.
crwdns2942213:0crwdne2942213:0
-
-
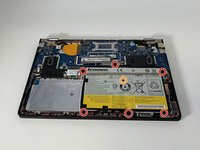
Flip the computer over so the bottom is facing up.
-
Remove the ten 6mm screws with a T5 Torx security screwdriver.
-
-
-
Carefully remove the back panel by gently separating the panel from front to back.
-
-
-
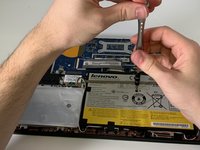
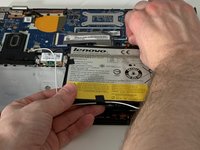
Use the Phillips #000 screwdriver to remove the six 3.3 mm screws around the perimeter of the battery.
-
Use the Phillips #000 screwdriver to remove the single 6.75 mm screw from the center of the battery.
-
-
-
-
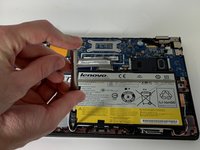
Gently remove the three pieces of tape securing the Bluetooth/Wi-Fi antenna.
-
-
-
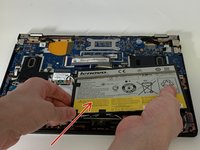
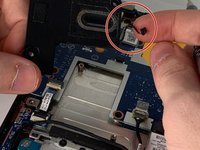
Grip the base of the connector with your fingers or pliers, and gently pull the connector straight back towards you to remove it.
-
-
-
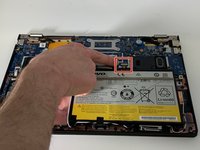
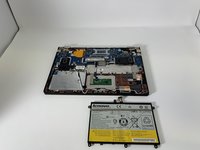
Carefully remove the battery from the laptop.
-
-
-
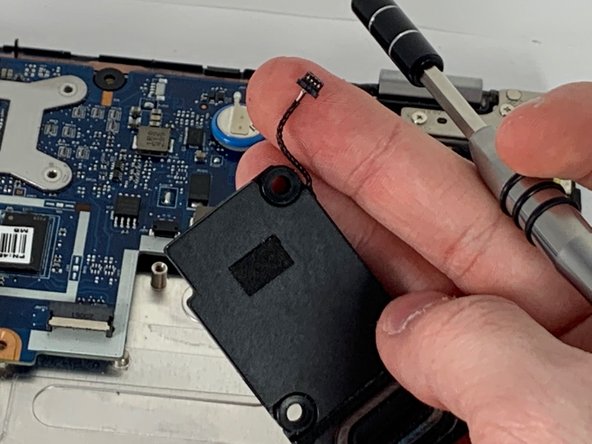
Use the Phillips #000 screwdriver to unscrew the four 1.7 mm screws.
-
-
-
Carefully detach the speaker wire and remove the speaker.
-


To reassemble your device, follow these instructions in reverse order.
crwdns2935287:0crwdne2935287:0

University of Memphis, Team S1-G2, Kim Spring 2019 crwdns2935289:0University of Memphis, Team S1-G2, Kim Spring 2019crwdne2935289:0
UM-KIM-S19S1G2
crwdns2931471:03crwdne2931471:0
crwdns2935297:06crwdne2935297:0