crwdns2915892:0crwdne2915892:0
This guide will properly show how to remove and replace the hard drive component for a Lenovo Yoga 2 11” 20428. When removing the hard drive be sure to have the laptop turned off and the battery disconnected.
crwdns2942213:0crwdne2942213:0
-
-
Flip the computer over so the bottom is facing up.
-
Remove the ten 6mm screws with a T5 Torx security screwdriver.
-
-
-
Carefully remove the back panel by gently separating the panel from front to back.
-
-
-
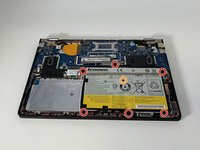
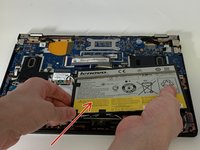
Use the Phillips #000 screwdriver to remove the six 3.3 mm screws around the perimeter of the battery.
-
Use the Phillips #000 screwdriver to remove the single 6.75 mm screw from the center of the battery.
-
-
-
-
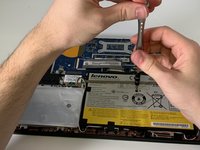
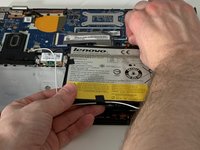
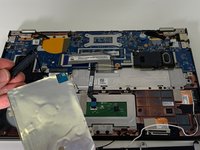
Gently remove the three pieces of tape securing the Bluetooth/Wi-Fi antenna.
-
-
-
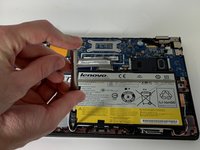
Grip the base of the connector with your fingers or pliers, and gently pull the connector straight back towards you to remove it.
-
-
-
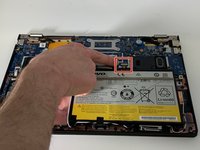
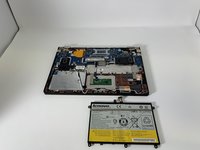
Carefully remove the battery from the laptop.
-
-
-
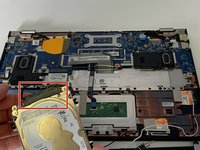
Use the Phillips #000 screwdriver to remove the four 3.3 mm screws securing the hard drive to the panel.
-
-
-
Lift the hard drive up, turn it over, and remove the connection.
-


To reassemble your device, follow these instructions in reverse order.
crwdns2935221:0crwdne2935221:0
crwdns2935229:03crwdne2935229:0
crwdns2935287:0crwdne2935287:0

University of Memphis, Team S1-G2, Kim Spring 2019 crwdns2935289:0University of Memphis, Team S1-G2, Kim Spring 2019crwdne2935289:0
UM-KIM-S19S1G2
crwdns2931471:03crwdne2931471:0
crwdns2935297:06crwdne2935297:0
crwdns2947410:01crwdne2947410:0
Is it possible to swap out the hdd for a newer ssd?