crwdns2915892:0crwdne2915892:0
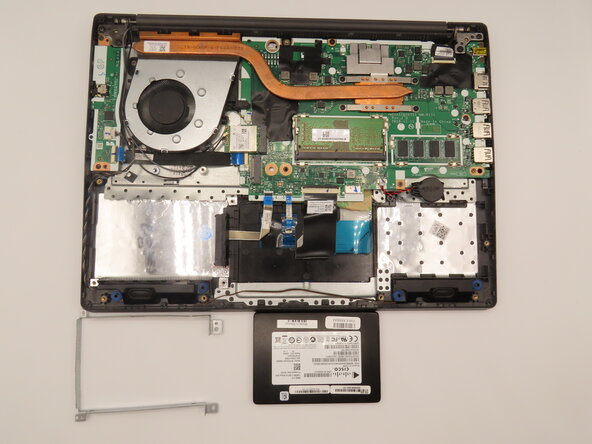
If your Lenovo V14-ADA laptop (model 82C6S03E00) is experiencing data storage problems, slow read/write speeds, or power efficiency problems, use this guide to help replace the internal hard drive.
Before using this guide be sure to review the troubleshooting page. Some problems, such as corrupted files, can be fixed without replacing the hard drive.
Be sure to back up your hard drive before replacement to avoid losing any previous stored data. Before beginning remove any power source from the laptop and make sure it is turned off to ensure your safety.
crwdns2942213:0crwdne2942213:0
-
-
Turn off the laptop.
-
Disconnect the charging cable from the laptop.
-
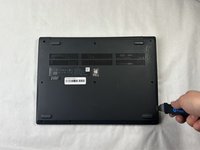
Flip the laptop upside down.
-
-
-
Remove all ten 5 mm screws from the back panel using a JIS #0 screwdriver.
-
-
-
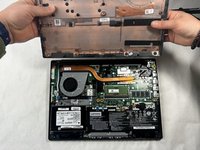
Place the Jimmy in the small crack between the back panel and the keyboard and push down.
-
Repeat this until the panel pops off.
-
-
-
-
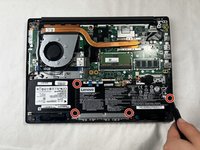
Remove the four 3 mm screws surrounding the battery using a JIS #0 screwdriver.
-
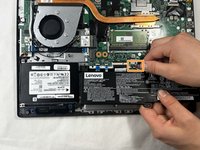
Slightly pull on the black wire connector to unplug the battery.
-
Lift up the battery to remove it from the laptop.
-
-
-
Remove two 3 mm screws from the hard drive using a JIS #0 screwdriver.
-
-
-
Unplug the grey cable connecting the hard drive to the motherboard.
-
-
-
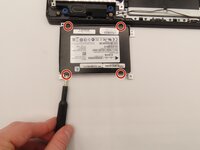
Use the JIS #0 screwdriver to remove all four 3 mm bracket screws from the hard drive.
-
Remove the hard drive from the bracket.
-


To reassemble your device, follow these instructions in reverse order.
To reassemble your device, follow these instructions in reverse order.
crwdns2935221:0crwdne2935221:0
crwdns2935227:0crwdne2935227:0
crwdns2915084:0crwdne2915084:0

University of Kentucky, Team 1-1, Frey Spring 2025 crwdns2935289:0University of Kentucky, Team 1-1, Frey Spring 2025crwdne2935289:0
UKY-FREY-S25S1G1
crwdns2931471:04crwdne2931471:0
crwdns2935297:04crwdne2935297:0
crwdns2947410:01crwdne2947410:0
is it possible to use ssd 2.5" in it?