crwdns2915892:0crwdne2915892:0
Is your device struggling to load files and applications? Consider using this guide to replace the hard drive of your device.
crwdns2942213:0crwdne2942213:0
-
-
Make sure to power down and turn off your device before proceeding with the repair.
-
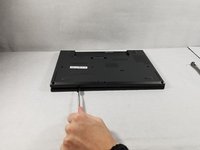
Flip your laptop over so that the backside is facing you.
-
-
-
Using a Phillips #1 screwdriver, remove the eight screws securing the backplate.
-
Don’t try to force screws which won't come out. They are held in place by a stopper on the reverse side. This will not prevent you from removing the backplate.
-
-
-
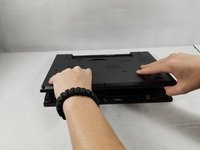
Using the metal spudger, wedge it in the seam where the backplate meets the front plate and run the tool along the seam to separate the backplate.
-
-
-
-
Remove the back panel from the device.
-
-
-
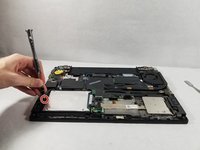
Use the Phillips #1 screwdriver to remove the single screw securing the hard drive.
-
-
-
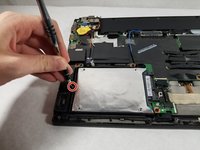
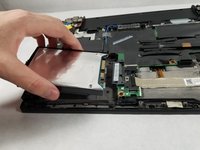
Use the metal spudger to lift the hard drive out of it's compartment.
-
-
-
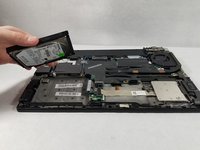
Grab a hold of the hard drive and pull it straight out from the device.
-


To reassemble your device, follow these instructions in reverse order.
To reassemble your device, follow these instructions in reverse order.
crwdns2935221:0crwdne2935221:0
crwdns2935229:05crwdne2935229:0
crwdns2915084:0crwdne2915084:0

UMass Dartmouth, Team S1-G5, Simcock Fall 2018 crwdns2935289:0UMass Dartmouth, Team S1-G5, Simcock Fall 2018crwdne2935289:0
UMASSD-SIMCOCK-F18S1G5
crwdns2931471:03crwdne2931471:0
crwdns2935297:010crwdne2935297:0