crwdns2942213:0crwdne2942213:0
-
-
Remove the marked Screws.
-
Pry the backside of and put it aside.
-
-
-
Pull gently on the marked pull tab. If it doesn't come out, pull harder.
-
After you pulled the Hard Drive Dummy out, remove the Connector.
-
-
-
-
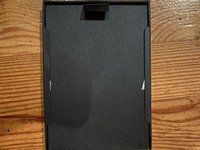
After the second step, you should have the dummy with the mounting hardware removed from the laptop.
-
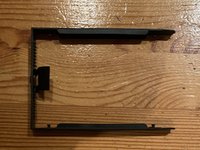
Gently pull on the side until it comes off.
-
-
-
Put your hard drive in the middle of the mounting hardware and align the sides with the holes on the hard drive. Make sure the pull tab is on the upside.
-
Push on it.
-
-
-
Connect the connector.
-
Push on the ribbon cable to glue it to the underside.
-
-
-
Finally, align the hard drive and push on the marked end.
-


To reassemble your device, follow these instructions in reverse order.
To reassemble your device, follow these instructions in reverse order.
crwdns2935221:0crwdne2935221:0
crwdns2935227:0crwdne2935227:0
