crwdns2933423:0crwdne2933423:0

Lenovo ThinkPad Yoga 11e Gen 6 Screen Replacement

crwdns2942213:0crwdne2942213:0

  1. Lenovo ThinkPad Yoga 11e Gen 6 Screen Replacement, Screen: crwdns2935265:01crwdnd2935265:01crwdnd2935265:02crwdne2935265:0 Lenovo ThinkPad Yoga 11e Gen 6 Screen Replacement, Screen: crwdns2935265:01crwdnd2935265:02crwdnd2935265:02crwdne2935265:0
    • Wearing the anti-static wrist strap will prevent a static shock from damaging the components in the laptop.

    • Disconnect the laptop from power and make sure it is completely powered off.

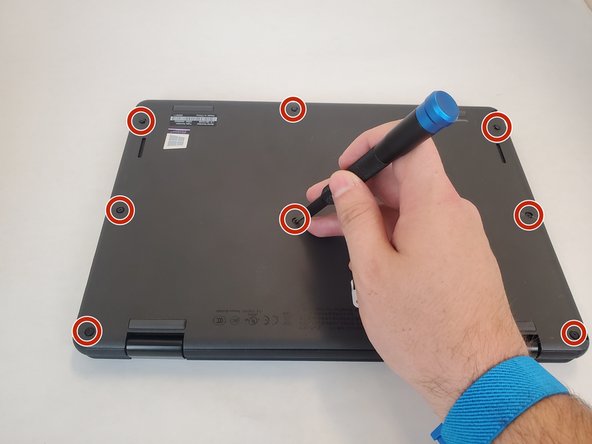
    • Turn the laptop facing down.

    • Loosen the eight captive screws using a JIS #0 screwdriver.

    • The screws are attached to the panel and cannot be removed.

    • Carefully remove the panel.

  2. Lenovo ThinkPad Yoga 11e Gen 6 Screen Replacement: crwdns2935265:02crwdnd2935265:01crwdnd2935265:03crwdne2935265:0 Lenovo ThinkPad Yoga 11e Gen 6 Screen Replacement: crwdns2935265:02crwdnd2935265:02crwdnd2935265:03crwdne2935265:0 Lenovo ThinkPad Yoga 11e Gen 6 Screen Replacement: crwdns2935265:02crwdnd2935265:03crwdnd2935265:03crwdne2935265:0
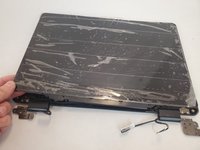
    • Carefully disconnect the two sliding connectors in the left and right corner.

    • Disconnect the sliding connector on the Wi-Fi board.

    • Loosen the four 9.7 mm screws on the hinges in the top left and right corners using a Phillips #0 screwdriver.

    • Carefully lift the closest part of the laptop away from the screen side of the laptop.

  3. Lenovo ThinkPad Yoga 11e Gen 6 Screen Replacement: crwdns2935265:03crwdnd2935265:01crwdnd2935265:03crwdne2935265:0 Lenovo ThinkPad Yoga 11e Gen 6 Screen Replacement: crwdns2935265:03crwdnd2935265:02crwdnd2935265:03crwdne2935265:0 Lenovo ThinkPad Yoga 11e Gen 6 Screen Replacement: crwdns2935265:03crwdnd2935265:03crwdnd2935265:03crwdne2935265:0
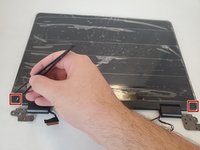
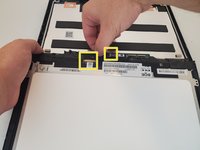
    • Using tweezers, gently pry and remove the covers on the LCD strip.

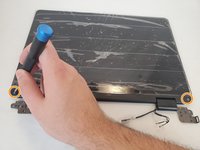
    • Remove the two 3.3 mm screws that were previously under the covers on the LCD strip using a Phillips #0 screwdriver.

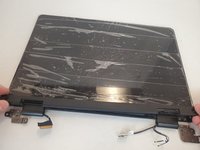
    • Carefully lift and remove the LCD strip.

  4. Lenovo ThinkPad Yoga 11e Gen 6 Screen Replacement: crwdns2935265:04crwdnd2935265:01crwdnd2935265:03crwdne2935265:0 Lenovo ThinkPad Yoga 11e Gen 6 Screen Replacement: crwdns2935265:04crwdnd2935265:02crwdnd2935265:03crwdne2935265:0 Lenovo ThinkPad Yoga 11e Gen 6 Screen Replacement: crwdns2935265:04crwdnd2935265:03crwdnd2935265:03crwdne2935265:0
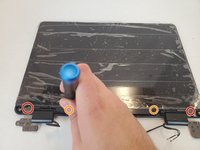
    • Remove the two 3.3 mm screws from the silver panels using a Phillips #0 screwdriver.

    • Remove the two 3.3 mm screws from the LCD panel using a Phillips #0 screwdriver.

    • Carefully lift the screen towards you. You may use the spudger to assist lifting the screen. There will be one more connector on the side of the screen.

    • Carefully remove the ribbon connectors by gently pulling with your fingers.

crwdns2915888:0crwdne2915888:0

To reassemble your device, follow these instructions in reverse order.
Lex

crwdns2935283:010/02/24crwdne2935283:0

509 crwdns2915208:0crwdne2915208:0

crwdns2935297:04crwdne2935297:0

crwdns2915084:0crwdne2915084:0

Eastern Washington University, Team 1-1, Carnegie Fall 2024 crwdns2935289:0Eastern Washington University, Team 1-1, Carnegie Fall 2024crwdne2935289:0

EWU-CARNEGIE-F24S1G1

crwdns2931471:04crwdne2931471:0

crwdns2935297:05crwdne2935297:0

crwdns2947412:00crwdne2947412:0

crwdns2917038:0crwdne2917038:0

crwdns2936625:0crwdne2936625:0:

crwdns2936751:024crwdne2936751:0 2

crwdns2936753:07crwdne2936753:0 2

crwdns2936753:030crwdne2936753:0 23

crwdns2942667:0crwdne2942667:0 149