crwdns2915892:0crwdne2915892:0
The motherboard is the central hub of communication between all of the components in your device. If one or more components are failing in your device, it may be time to replace the motherboard. Use this guide to replace the motherboard in your laptop.
crwdns2942213:0crwdne2942213:0
-
-
Flip the computer over so the bottom is facing up.
-
Remove nine 4mm Phillips #1 screws from the bottom of the computer.
-
Use an iFixit opening tool to pry the back cover off of the laptop.
-
-
-
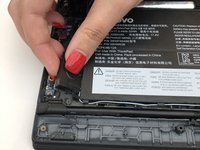
Remove the five 4.5mm Phillips #1 screws that secure the battery.
-
-
crwdns2935267:0crwdne2935267:0Tweezers$4.99
-
Using a pair of tweezers, push the sides of the white speaker wire toward the battery (where it says Lenovo) to unplug it.
-
-
-
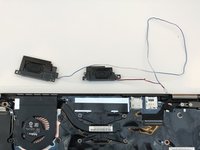
Remove the speakers from either side of the battery. The connecting wire will unthread from the sides of the battery.
-
-
-
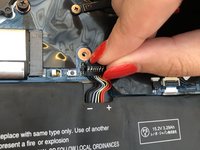
Lift the plastic black strip cover that's laying over the battery connector.
-
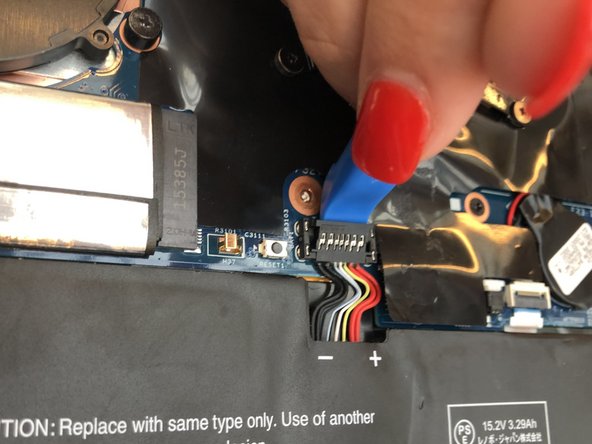
Use the iFixit opening tool to flip up and disconnect the black battery connector from its motherboard socket.
-
Gently pull the connector away from the battery to pull it out of the slot.
-
-
-
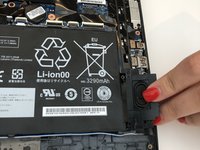
Lift and remove the battery away from the computer.
-
-
-
-
Remove four 4.5mm Phillips #1 screws from the corners of the heat sink.
-
-
-
Gently peel back the black plastic covering around the fan.
-
Using an iFixit opening tool, flip up the small black cover of the fan plug.
-
-
crwdns2935267:0crwdne2935267:0Tweezers$4.99
-
Using tweezers, pull the plastic strip out.
-
-
-
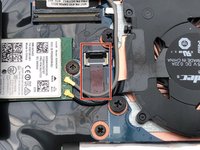
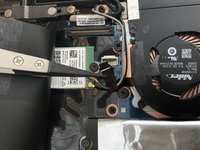
Gently peel back the black plastic covering.
-
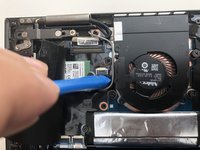
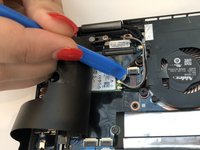
Remove the single Phillips #1 screw securing the wireless chip in place.
-
-
-
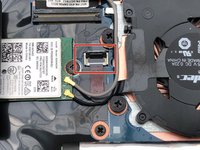
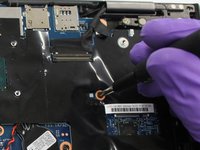
Use an iFixit opening tool to gently pop the gold caps off their connections.
-
Move these wires out of the way.
-
-
-
Gently peel back the black plastic covering.
-
Remove the single 2mm Phillips #1 screw from the hard drive's silver casing.
-
-
-
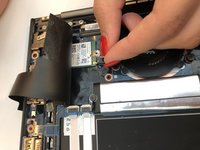
Unplug the hard drive from the computer by pulling away from the computer.
-
-
-
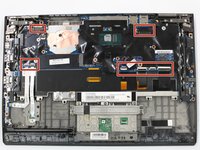
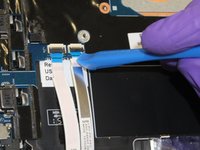
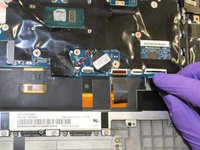
Using the iFixit opening tool, flip up the eight small covers from the cable connectors.
-
Gently pull the cables out of the slots.
-
-
-
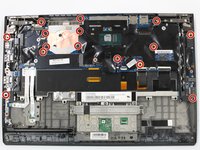
Using the Phillips #1 screwdriver, remove sixteen 4.5mm screws.
-
-
-
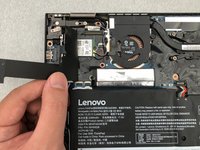
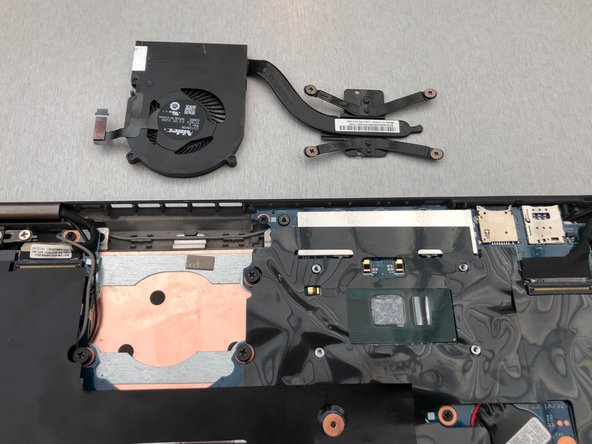
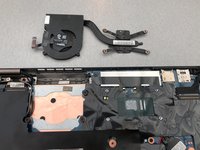
Lift and remove the motherboard away from the computer.
-


To reassemble your device, follow these instructions in reverse order.
crwdns2935221:0crwdne2935221:0
crwdns2935229:02crwdne2935229:0

crwdns2935287:0crwdne2935287:0

The Citadel Military College of South Carolina, Team S3-G16, Eggleston Spring 2020 crwdns2935289:0The Citadel Military College of South Carolina, Team S3-G16, Eggleston Spring 2020crwdne2935289:0
CMCSC-EGGLESTON-S20S3G16
crwdns2931471:03crwdne2931471:0
crwdns2935297:09crwdne2935297:0
crwdns2947412:02crwdne2947412:0
Do you have closeup pictures of the 16Gb vs the 8Gb model? I am planning on upgrading the RAM and need to know the RAM IC chipnames and possible configuration resistors.
Help is much appreciated.
According to this link the memory is soldered onto the motherboard and it's 2666MHz DDR4 (they specify it's actually 3200 MHz but running at 2666 MHz due to system limitations).
This site has a picture of the motherboard, but I'm not sure if it shows the actual memory chips. It does show the SSD.
Hope this helps, all the best of luck!