crwdns2915892:0crwdne2915892:0
The keyboard is an essential component of the device so that a user can properly type a command into the device. If the keyboard isn’t properly recording your strokes, you may need to replace it.
crwdns2942213:0crwdne2942213:0
-
-
Flip the computer over so the bottom is facing up.
-
Remove nine 4mm Phillips #1 screws from the bottom of the computer.
-
Use an iFixit opening tool to pry the back cover off of the laptop.
-
-
-
Remove the five 4.5mm Phillips #1 screws that secure the battery.
-
-
crwdns2935267:0crwdne2935267:0Tweezers$4.99
-
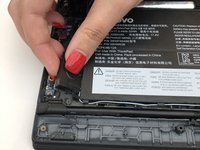
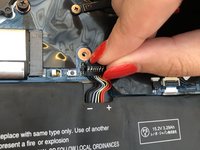
Using a pair of tweezers, push the sides of the white speaker wire toward the battery (where it says Lenovo) to unplug it.
-
-
-
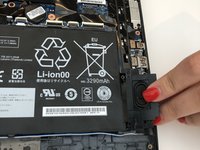
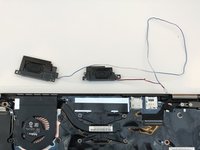
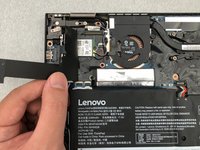
Remove the speakers from either side of the battery. The connecting wire will unthread from the sides of the battery.
-
-
-
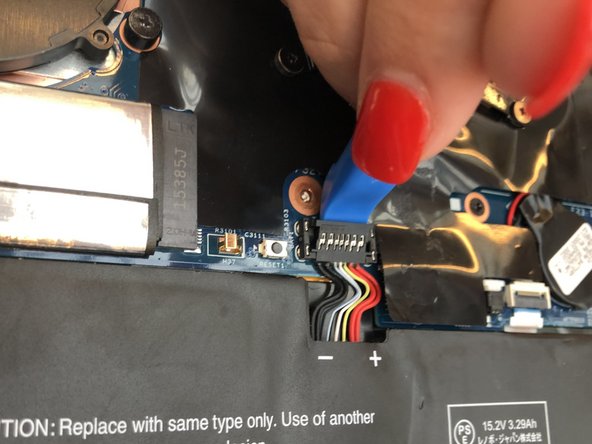
Lift the plastic black strip cover that's laying over the battery connector.
-
Use the iFixit opening tool to flip up and disconnect the black battery connector from its motherboard socket.
-
Gently pull the connector away from the battery to pull it out of the slot.
-
-
-
Lift and remove the battery away from the computer.
-
-
-
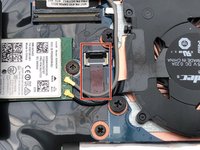
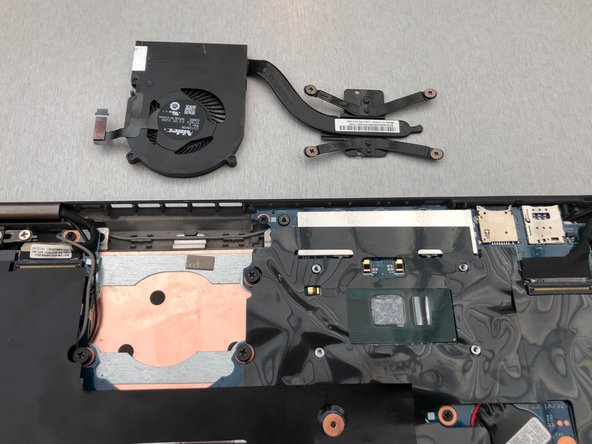
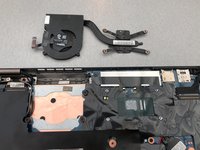
Remove four 4.5mm Phillips #1 screws from the corners of the heat sink.
-
-
-
-
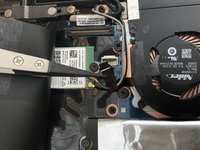
Gently peel back the black plastic covering around the fan.
-
Using an iFixit opening tool, flip up the small black cover of the fan plug.
-
-
crwdns2935267:0crwdne2935267:0Tweezers$4.99
-
Using tweezers, pull the plastic strip out.
-
-
-
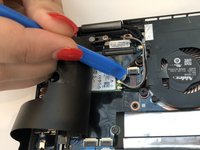
Gently peel back the black plastic covering.
-
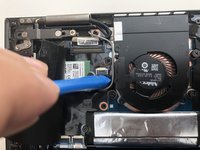
Remove the single Phillips #1 screw securing the wireless chip in place.
-
-
-
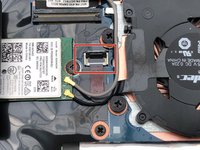
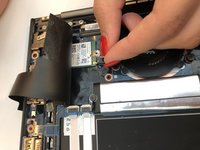
Use an iFixit opening tool to gently pop the gold caps off their connections.
-
Move these wires out of the way.
-
-
-
Gently peel back the black plastic covering.
-
Remove the single 2mm Phillips #1 screw from the hard drive's silver casing.
-
-
-
Unplug the hard drive from the computer by pulling away from the computer.
-
-
-
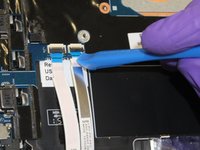
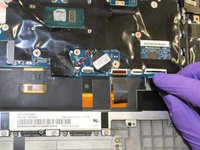
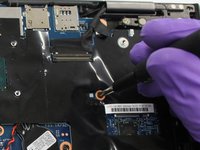
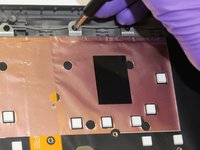
Using the iFixit opening tool, flip up the eight small covers from the cable connectors.
-
Gently pull the cables out of the slots.
-
-
-
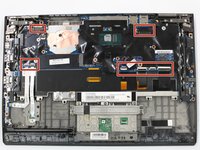
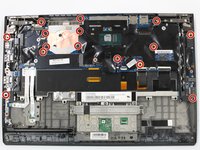
Using the Phillips #1 screwdriver, remove sixteen 4.5mm screws.
-
-
-
Lift and remove the motherboard away from the computer.
-
-
-
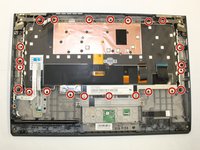
Using the Phillips #1 screwdriver, remove 23 (twenty three) 4.5mm screws.
-
-
-
Using the iFixit opening tool, lift the metal frame away from the keyboard.
-
-
-
Lift and remove the keyboard away from the computer.
-


To reassemble your device, follow these instructions in reverse order.
crwdns2935221:0crwdne2935221:0
crwdns2935229:09crwdne2935229:0

crwdns2935287:0crwdne2935287:0

The Citadel Military College of South Carolina, Team S3-G16, Eggleston Spring 2020 crwdns2935289:0The Citadel Military College of South Carolina, Team S3-G16, Eggleston Spring 2020crwdne2935289:0
CMCSC-EGGLESTON-S20S3G16
crwdns2931471:03crwdne2931471:0
crwdns2935297:09crwdne2935297:0
crwdns2947412:02crwdne2947412:0
Samw steps on gen 4, screws just in different places, thie guide worked great! Thanks :)
there's no need to remove the heat sink, SSD and wireless cards - you can just remove the motherboard in 1 piece with these still attached.