crwdns2915892:0crwdne2915892:0
If your touch ID no longer functions you may have a faulty touch ID. To determine if you need to replace the touch ID, follow the steps in this guide to access the ribbon cable. If the ribbon cable is disconnected, reconnect the cable. If the touch ID still fails to read your fingerprint, replace it using this guide. Ensure you are replacing the touch ID with Lenovo ThinkPad X1 Yoga 2nd Generation’s Touch ID part. This guide is not particularly difficult, but take care when removing parts such as the ribbon cable to avoid damage.
crwdns2942213:0crwdne2942213:0
-
-
Flip over the laptop to access the back cover.
-
-
-
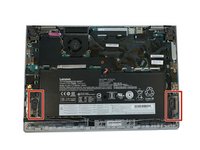
Use a Phillips #0 screwdriver to remove the eight 8 mm screws.
-
-
crwdns2935267:0crwdne2935267:0Tweezers$3.99
-
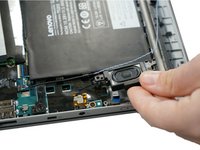
Follow the ribbon cable that runs from the left speaker to the motherboard.
-
Pull the black connector up and release the cable wire by hand.
-
-
-
-
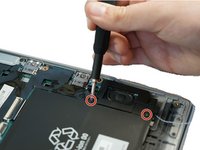
Remove two 6 mm Phillips #0 screws from each speaker.
-
-
-
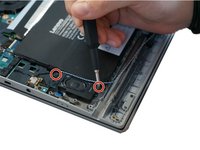
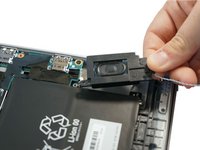
Use your fingers to remove the speakers from the device.
-
-
-
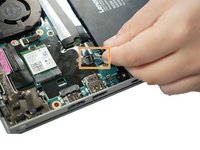
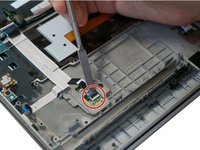
Use a spudger to pop the ribbon cable that runs from the upper-middle portion of the battery to the motherboard out of the motherboard.
-
-
-
Use a Phillips #0 screwdriver to remove one 6 mm screw from the bottom-middle portion of the battery.
-
-
crwdns2935267:0crwdne2935267:0Tweezers$4.99
-
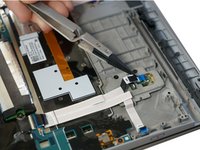
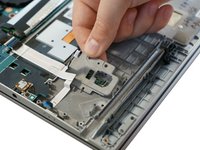
Use a metal spudger to lift the tab containing the black ribbon cable.
-
Use nylon-tipped reverse tweezers to slowly pull out the ribbon cable.
-
-
-
Remove two 4 mm screws using the Phillips #0 screwdriver.
-
-
-
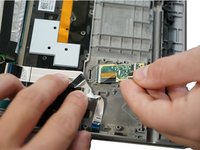
Remove the gray covering from the Touch ID.
-
Remove the Touch ID chip from the device.
-


To reassemble your device, follow these instructions in reverse order.

crwdns2935287:0crwdne2935287:0

Cal Poly, Team S22-G3, Regan Winter 2020 crwdns2935289:0Cal Poly, Team S22-G3, Regan Winter 2020crwdne2935289:0
CPSU-REGAN-W20S22G3
crwdns2931471:05crwdne2931471:0
crwdns2935297:011crwdne2935297:0