crwdns2915892:0crwdne2915892:0
This is a pretty straightforward and easy repair, but does require steady hands and precision, so keep that in mind when performing this repair, and definitely do not force anything.
crwdns2942213:0crwdne2942213:0
-
-
Disconnect all chargers and accessories from the laptop.
-
Shut down the laptop through Windows (or whatever OS), or hold the power button down for ~10secs until the screen and power lights turn off and the laptop does not respond to key presses or touchpad input.
-
-
-
Unscrew the 7 captive screws on the base of the laptop.
-
Pull up from the top (next to the hinge) and unclip the base clips, then pull up and forward (away from the laptop) to remove the base.
-
Pull the battery connector up to a 45 degree angle and gently pull up to remove it from the base of the laptop.
-
-
-
-
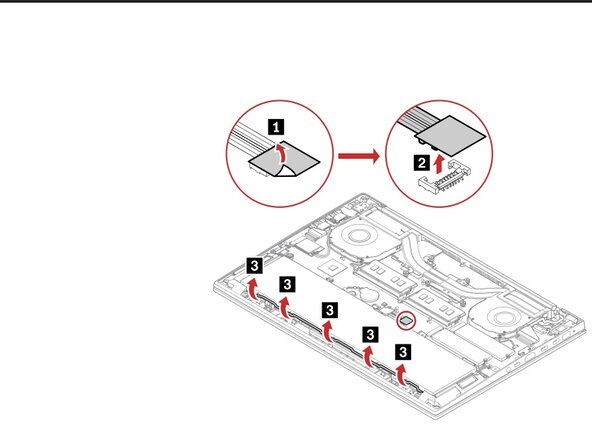
Gently pull up on the black and gray antennae from the tip to disconnect the antennae from the WiFi card.
-
Unscrew the 1 Philips screw from the WiFi card, and gently pull the card out of the slot.
-
-
-
To install a new WiFi Card. Insert the card at a slight angle into the slot, and screw the 1 Philips screw in to hold the card in place. Then insert the antennae into their respective holes gently. Black goes into slot 1 on the card, and gray in slot 2.
-


Once the new card is installed, check Lenovo/Intel (or whatever the manufacturer of the card is for the proper drivers to ensure reliability and speed.
Once the new card is installed, check Lenovo/Intel (or whatever the manufacturer of the card is for the proper drivers to ensure reliability and speed.
