crwdns2942213:0crwdne2942213:0
-
-
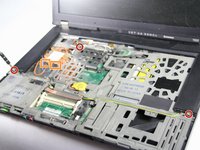
Remove the eight 14mm screws using the Phillips #0 Screwdriver.
 crwdns2952109:0crwdne2952109:0
-
-
-
Lift the palm rest panel up.
-
-
-
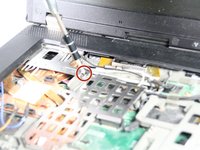
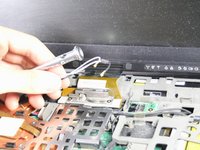
Use the spudger to disconnect the ribbon cable.
-
-
-
With the panel disconnected, lift the keyboard.
-
-
-
Disconnect the ribbon cable with the spudger.
-
-
-
-
Remove the keyboard and the panel.
-
Using the Phillips #0 Screwdriver, remove the three 3 mm screws that are at the bottom sides and near the top-left of the speaker cover.
-
Disconnect the orange and blue cables next to the left side of the speaker cover.
-
-
-
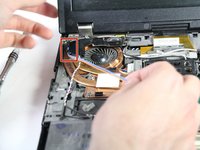
Remove the speaker cover.
-
-
-
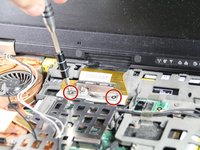
Remove the two 3mm screws on the left speaker with the Phillips #0 Screwdriver.
-
-
-
Detach the blue and orange cables from the left speaker's clamps.
-
-
-
Using the Phillips #0 Screwdriver, lift the metal fastener up and remove the black and white wires.
-
-
-
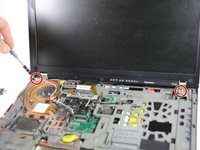
Remove the two 3mm screws next to the lid hinges, as well as the two 3mm screws on the lid's ribbon cable.
-
-
-
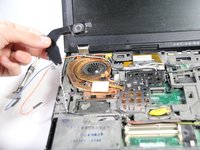
Use the spudger to detach the screen's ribbon cable.
-


To reassemble your device, follow these instructions in reverse order.
crwdns2935221:0crwdne2935221:0
crwdns2935229:07crwdne2935229:0

crwdns2947410:01crwdne2947410:0
It was of good help, but be aware that you need to remove two screws on the back before removing the speaker cover. If not you will break the cover.
Bjørnar Valand - crwdns2934203:0crwdne2934203:0 crwdns2950251:0crwdne2950251:0