crwdns2942213:0crwdne2942213:0
-
-
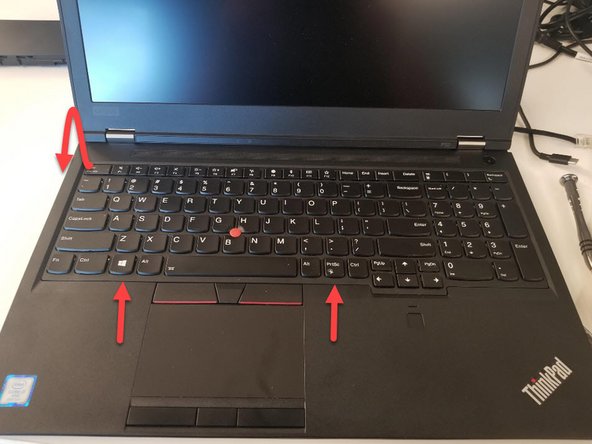
The first step is to remove the track pad left and right click covers. I used a plastic spudger tool to carefully pry and remove.
-
-
-
Once you have removed the covers you will see two screws (one on each cover). Using a PH0 screw driver, loosen the screws (they are attached so will not come out).
-
-
-
-
Once the screws are loose, you can push the keyboard up to release the tabs holding it on on the bottom. I use a spudger to assist with this.
-
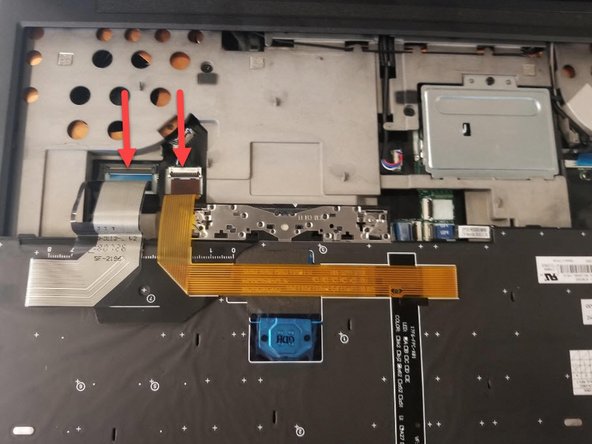
Once the tabs are released, you can carefully pull the keyboard down and flip it towards you. Exposing the two cables connecting it to the motherboard.
-
-
-
Using a plastic spudger, release the clips holding the cable ribbons on.
-
Remove cable ribbons and keyboard has now been removed.
-
-
-
The new keyboard can be attached by running these steps in reverse.
-
First attach ribbon cable
-
The fold keyboard into laptop starting at top and then clip in towards bottom by pulling it down.
-
Then tighten the screws under the left and right click covers
-
Then attach the covers
-


To reassemble your device, follow these instructions in reverse order.
To reassemble your device, follow these instructions in reverse order.
crwdns2935221:0crwdne2935221:0
crwdns2935229:02crwdne2935229:0
crwdns2947412:02crwdne2947412:0
This isn’t for the P52s….
Thank you. It is for the P52 model. I don’t know if the P52s is the same as the P52 as far as replacing the keyboard but when I was making the article it auto-populated the P52s and I didn’t change it back. I have made the appropriate change.
Bill -