crwdns2915892:0crwdne2915892:0
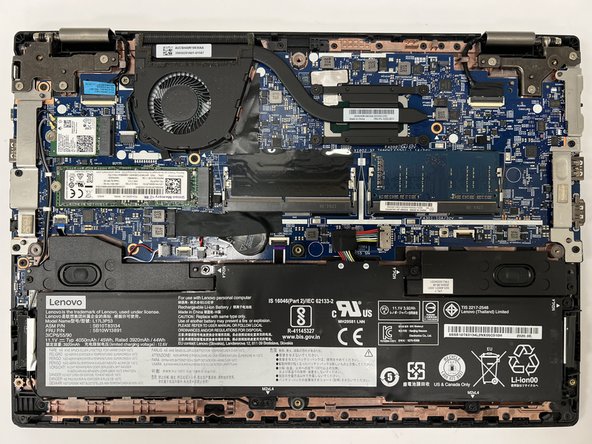
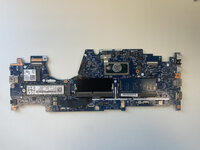
In this guide, the motherboard of the Lenovo ThinkPad L390 is being removed for replacement because the motherboard is damaged. The motherboard is a key component within any device. It’s responsible for facilitating communication between all of the device’s main components. Without the motherboard, the device becomes unusable. Before removing the motherboard, make sure to remove any connecting power cables and to only proceed if your battery charge is at 25% or lower. This is to prevent your battery from exploding or catching on fire in case of a puncture. After removing the motherboard, the proper steps to dispose of it would be to take it to a facility that takes electronic waste.
crwdns2942213:0crwdne2942213:0
-
-
Power off your laptop and disconnect the charger and any peripheries before beginning disassembly.
-
Unscrew the nine 5 mm Phillips #00 screws that secure the lower case.
-
-
-
Insert an opening tool in the gap between the lower case and the chassis.
-
Pry around the entire perimeter of the lower case until it fully releases.
-
Lift the lower case up and off.
-
-
-
Use your fingernails or two opening tools to gently "walk" the battery connector directly out of its socket.
-
-
-
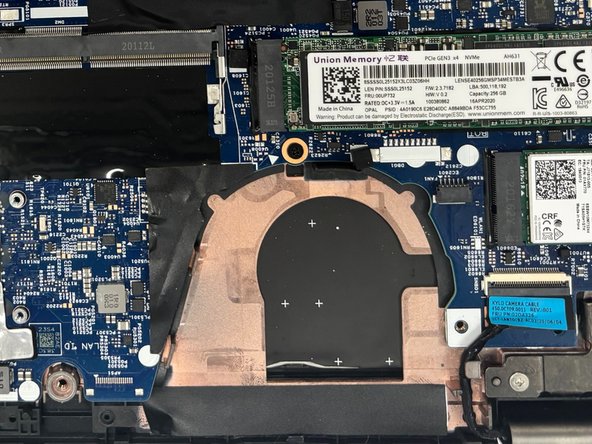
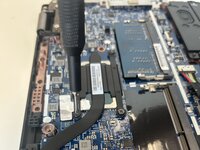
Remove the four 4 mm Phillips #00 screws that secure the heat sink.
-
Remove the 6 mm Phillips #00 screw that secures the fan.
-
-
-
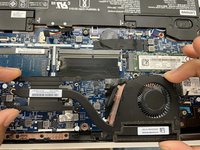
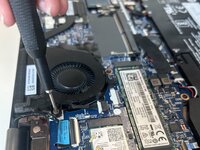
Grip the fan/heat sink assembly from both sides and lift it up and out of the chassis.
-
-
-
-
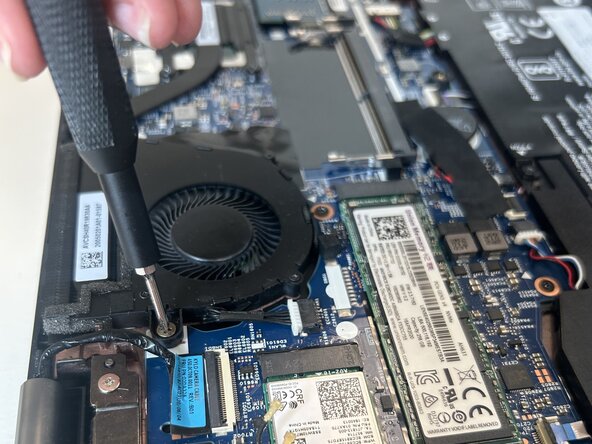
Remove the 6 mm Phillips #00 screw that from the fan/heat sink as highlighted in step 4
-
-
-
Remove the six 4mm #00 phillips screws that secure the metal tabs on both sides of the computer.
-
Gently lift the metal piece up and away from the computer to remove. Do this for both of the metal pieces.
-
-
-
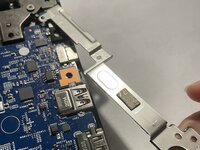
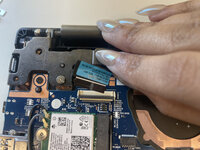
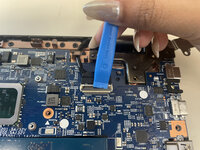
Use the opening tool to gently lift the black flap up and pull the display cable connector out of the socket.
-
-
-
Continuing from step 2, on the right side of the computer, use the opening tool to gently lift the black flap up and pull the second display cable connector out of the socket.
-
-
-
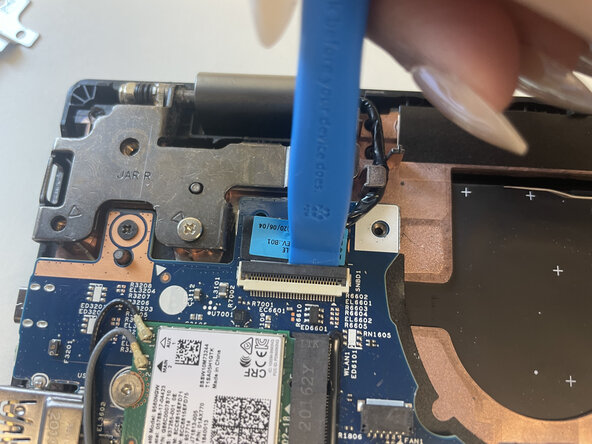
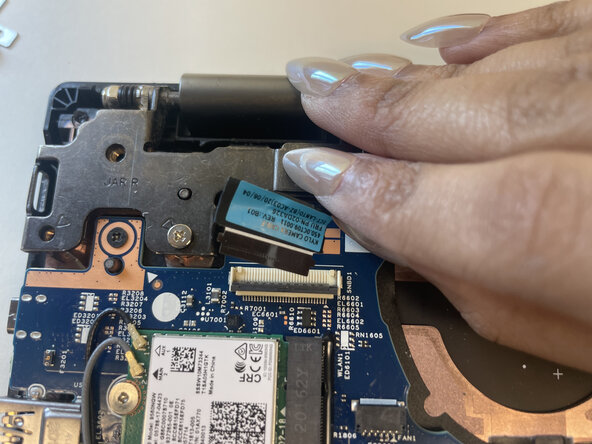
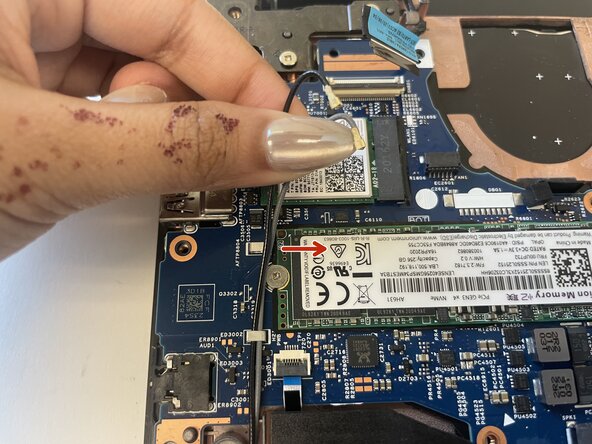
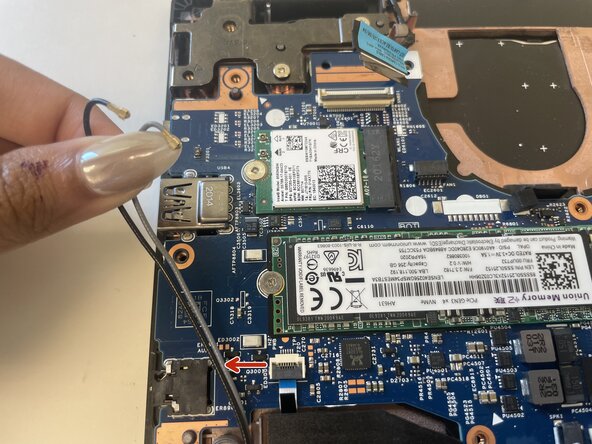
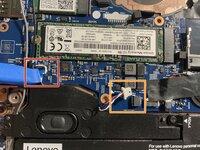
Gently pull the black and grey coaxial connectors from the Wi-Fi card.
-
Pull both connectors towards the right to unhook them from the metal hook located on the left side of the SSD card.
-
Pull the connectors towards the left to unhook them from the second metal hook.
-
-
-
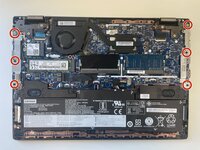
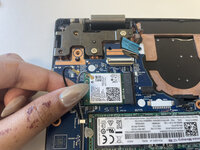
Remove the four 4mm #00 phillips screws securing the motherboard.
-
-
-
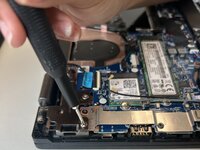
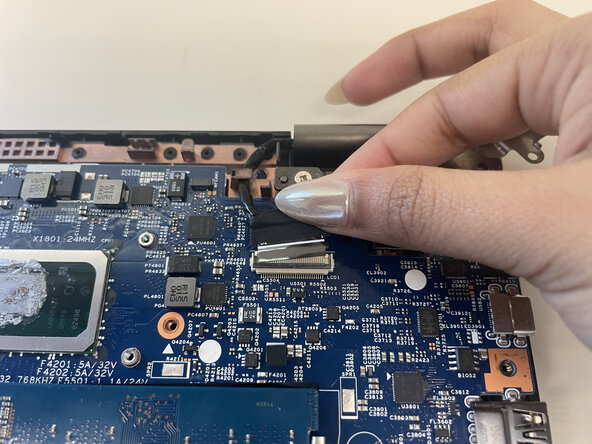
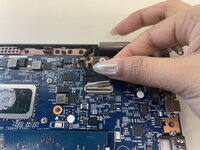
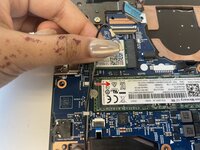
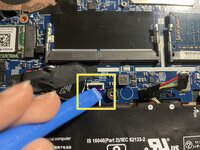
Gently lift the black tab with a opening tool.
-
Gently "walk" the connector out of the socket as shown in step 3.
-
Gently lift the black tab with a opening tool.
-
-
-
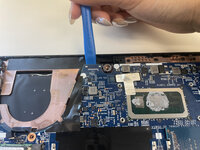
Using the opening tool gently pry the top part of the motherboard up.
-


To reassemble your device, follow these instructions in reverse order.
To reassemble your device, follow these instructions in reverse order.

crwdns2915084:0crwdne2915084:0

Austin Community College, Team 22-2, Watkins Summer 2025 crwdns2935289:0Austin Community College, Team 22-2, Watkins Summer 2025crwdne2935289:0
AUSTINCC-WATKINS-SU25S22G2
crwdns2931471:03crwdne2931471:0
crwdns2935297:06crwdne2935297:0