crwdns2915892:0crwdne2915892:0
This guide will cover the steps needed to remove the speakers. The speakers may need to be removed if the user is experiencing distorted or no audio.
crwdns2942213:0crwdne2942213:0
-
-
Flip the Chromebook so that the bottom is facing up.
-
Use a Phillips #1 screwdriver to remove the six 6.6 mm screws on the bottom.
-
Use a spudger to remove each of the 4 rubber feet.
-
Use a Phillips #1 screwdriver to remove the four additional screws under the rubber feet.
-
-
-
Flip the Chromebook back over and open the screen.
-
Wedge the plastic opening tool between the keyboard and the bottom of the Chromebook.
-
Run the plastic opening tool along the seam between the keyboard and the bottom of the Chromebook until the keyboard moves freely. Several tabs will pop out.
-
-
-
Once the keyboard is released, grab the two top corners closest to the screen and slowly lift the keyboard up.
-
Disconnect the cables by lifting up the retaining flaps on the black ZIF connectors.
-
Slowly pull the cables up and out of the connectors.
-
-
-
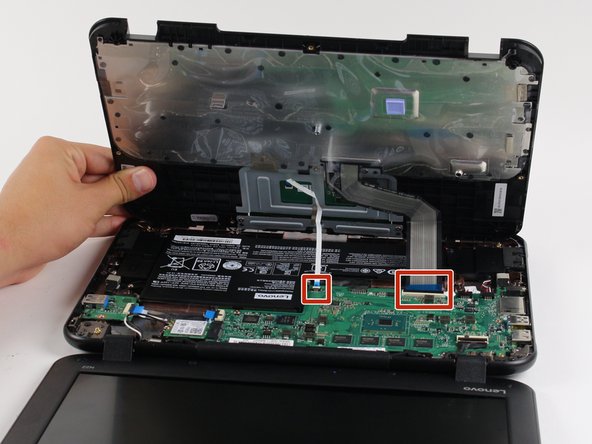
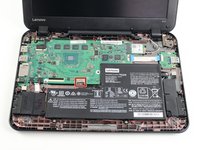
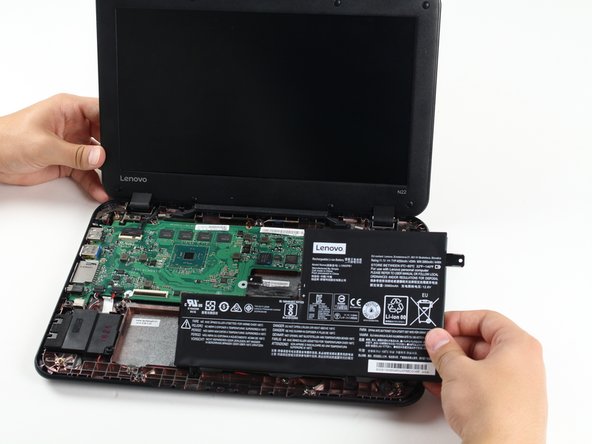
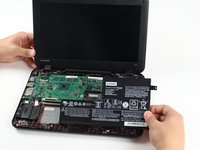
Lift the keyboard up and off the back panel, exposing the motherboard and battery.
-
-
-
-
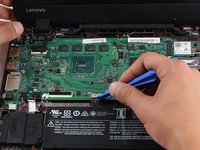
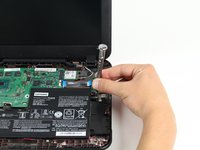
Separate the battery cable from the motherboard by wedging the edge of a plastic opening tool between the black cable connector and the silver socket on the motherboard.
-
Pull the battery cable straight towards you, away from the silver socket.
-
-
-
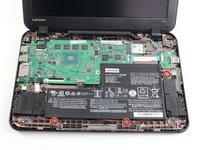
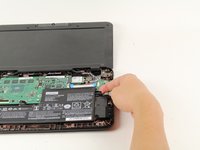
Use a Philips #1 screwdriver to remove the three 4.3 mm screws securing the battery.
-
-
-
Lift up on the tabs that were held down by the screws to remove the battery.
-
-
-
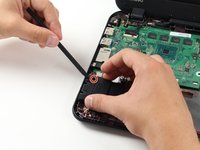
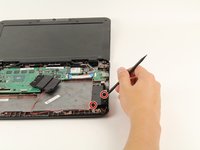
Use the edge of the opening tool to separate the speaker cable connector from the black socket on the motherboard.
-
Pull the cables towards you and away from the socket.
-
-
-
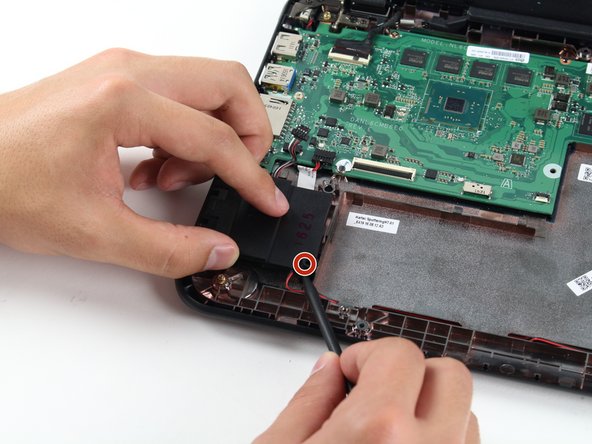
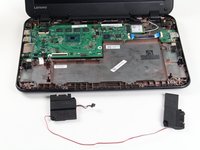
Use the pointed end of the spudger to pop the speaker up and off of the two posts.
-
-
-
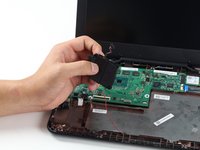
Slide the wire that connects the two separate speakers out from under the guide tabs.
-
-
-
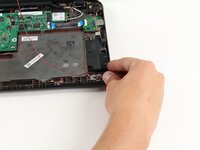
Use the flat end of the spudger to pop the speaker up and off of the two posts.
-


To reassemble your device, follow these instructions in reverse order.
crwdns2935221:0crwdne2935221:0
crwdns2935227:0crwdne2935227:0
crwdns2935287:0crwdne2935287:0

Cal Poly, Team S21-G1, Livingston Spring 2017 crwdns2935289:0Cal Poly, Team S21-G1, Livingston Spring 2017crwdne2935289:0
CPSU-LIVINGSTON-S17S21G1
crwdns2931471:04crwdne2931471:0
crwdns2935297:014crwdne2935297:0