crwdns2915892:0crwdne2915892:0
The motherboard acts as the central hub of communication between all of the components in your device. If random applications are quitting or if you’re seeing the “blue screen of death” (BSoD), it may be time to replace the motherboard in your computer. This guide will go through the steps on how to replace the motherboard of the Lenovo Legion Y530-15ICH.
crwdns2942213:0crwdne2942213:0
-
-
Use a PZ00 screwdriver bit to remove the eleven screws securing the back cover.
-
Five 7mm screws
-
Two 6mm screws
-
Four 4mm screws
-
-
-
Carefully pry the back cover off the computer using an opening pick.
-
-
-
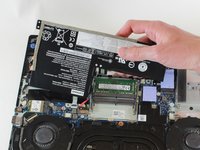
Use a Phillips screwdriver to remove the five 4 mm screws holding the battery in place.
-
-
-
Disconnect the battery cable from its motherboard socket by gently pulling it towards the battery.
-
-
-
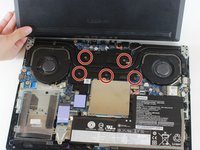
Use a JIS #1 screwdriver to loosen the five spring screws located at the middle of the fan piece.
-
Remove the plastic covering after the screws have been loosened.
-
-
-
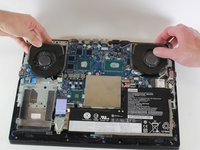
Use a JIS #1 screwdriver to remove four 4mm screws securing the fans to the device.
-
-
-
-
Unplug the wires connecting the two fans to the motherboard.
-
-
-
Lift the fans out of their positions and remove them from the device.
-
-
-
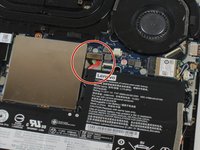
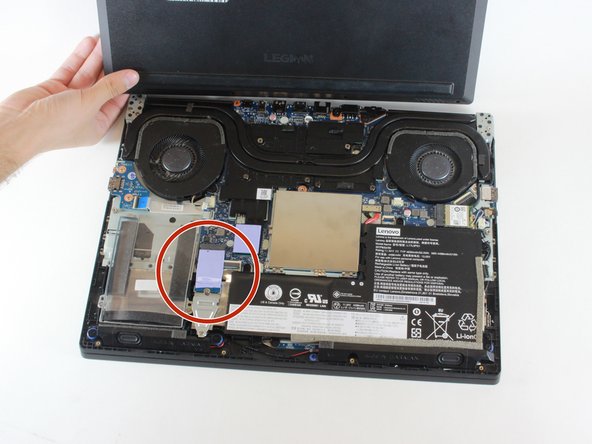
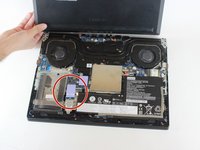
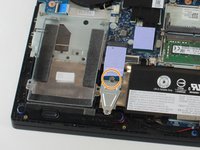
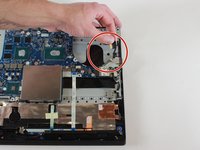
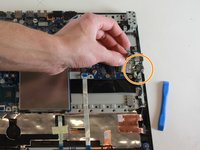
Remove one 4mm screw circled in orange in the second picture with a JIS #1 screwdriver.
-
-
-
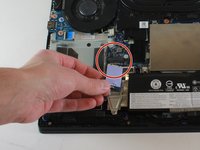
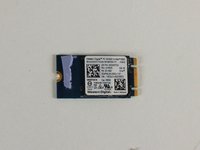
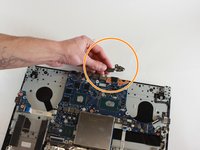
Carefully remove the SSD from its connector.
-
-
-
Start by disconnecting the ribbon cable that is near the audio driver. It is recommended to use the iFixit Opening Pick to remove the ribbon cable.
-
-
-
Remove three 4mm screws using a JIS #1 screwdriver.
-
Remove the black cover the screws were holding down.
-
-
-
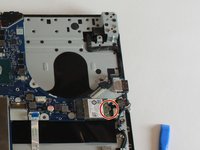
Remove the 4mm screw on top of the audio driver using a JIS #1 screwdriver.
-
Pull the audio cables gently off the audio driver.
-
Remove the audio driver from the motherboard.
-
-
-
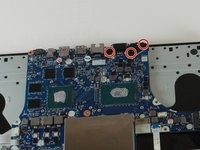
Remove twelve 4mm screws circled in red using a JIS #1 screwdriver.
-
Peel off the Lenovo sticker and remove one 4mm screw with a JIS #1 screwdriver.
-
-
-
Remove two ribbon cables in the circled areas. Gently pull them out of their ports.
-
-
-
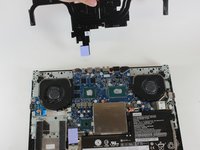
Remove the final ribbon cable by gently pulling it from its socket.
-
-
-
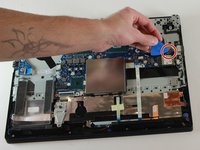
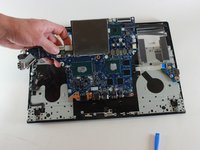
Gently lift the motherboard out of the housing.
-


To reassemble your device, follow these instructions in reverse order.
crwdns2935221:0crwdne2935221:0
crwdns2935229:04crwdne2935229:0

crwdns2935287:0crwdne2935287:0

Cal Poly, Team S7-G1, Regan Winter 2020 crwdns2935289:0Cal Poly, Team S7-G1, Regan Winter 2020crwdne2935289:0
CPSU-REGAN-W20S7G1
crwdns2931471:04crwdne2931471:0
crwdns2935297:012crwdne2935297:0
crwdns2947412:03crwdne2947412:0
Kaylie Klausing
I hope you burn in !&&*
You fckking piece of $@$*.
DON'T FOLLOW THIS.
FCKKKK YOUUUUU
What the hell is wrong with this guy?