crwdns2915892:0crwdne2915892:0
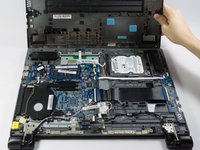
By the end of this guide, you will be able to remove the back panel from the laptop.
crwdns2942213:0crwdne2942213:0
-
-
Start by removing the feet near the LCD hinge of the laptop to reveal two screws.
-
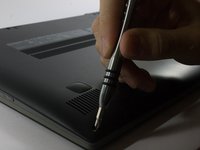
Using a Phillips #1 screwdriver, remove the top five (30 mm) screws underneath the battery.
-
-
-
Once both feet are removed, two (40 mm) screws will reveal themselves. Unscrew these.
-
-
-
-
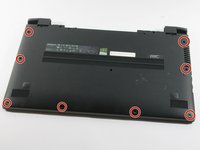
Working your way around the outer edges of the Flex 15, remove the 8 (30 mm) outer screws.
-
-
-
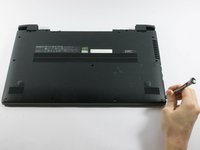
Remove the one (40 mm) screw in the middle of the Flex 15.
-
-
-
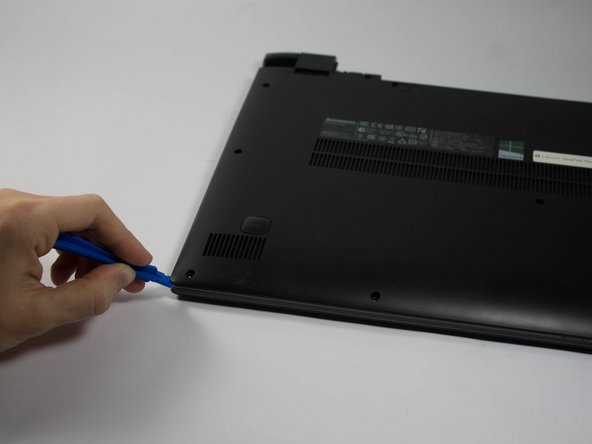
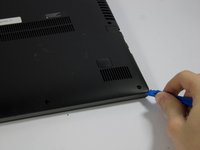
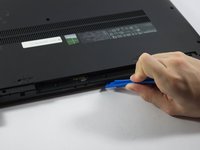
Using a plastic opening tool, make your way around the edge of the laptop.
-
There is a visible line between the bottom shell of the laptop and the laptop body itself.
-
-
-
Make sure to pry evenly around this edge and only remove the bottom of the laptop when it is fully loose.
-


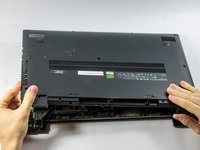
To reassemble your device, follow these instructions in reverse order.
crwdns2935221:0crwdne2935221:0
crwdns2935229:03crwdne2935229:0
crwdns2935287:0crwdne2935287:0

UMass Dartmouth, Team 6-6, Bhusal Spring 2016 crwdns2935289:0UMass Dartmouth, Team 6-6, Bhusal Spring 2016crwdne2935289:0
UMASSD-BHUSAL-S16S6G6
crwdns2931471:03crwdne2931471:0
crwdns2935297:06crwdne2935297:0