crwdns2915892:0crwdne2915892:0
In this guide, we will be replacing the screen of the Lenovo Ideapad 320-15ABR.
crwdns2942213:0crwdne2942213:0
-
-
Begin by prying off the black cover surrounding the screen by wedging the the iFixit opening tool underneath it. Work your way down until you reach the hinge cover.
-
Insert iFixit opening tool in to the hinge cover as pictured and begin slowly prying it off.
-
Remove the black cover.
-
-
-
-
Using the Phillips #1 screwdriver, remove the four 3mm screws securing the screen, and put them on the magnetic mat so you will not misplace them.
-
Gently lift the screen out and place it facing down on the keyboard.
-
-
-
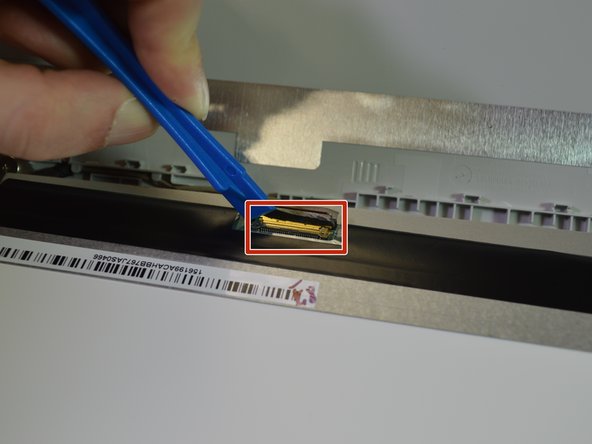
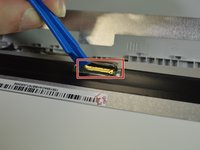
Carefully flip the hinge securing the connector up with the opening tool.
-
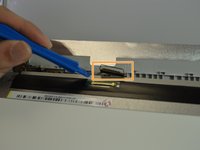
Slowly work the plug out of the connector.
-
Insert the plug from the replacement screen in to the connector. Make sure the connection is secure before flipping the hinge back down.
-


To reassemble your device, follow these instructions in reverse order.
To reassemble your device, follow these instructions in reverse order.
crwdns2935221:0crwdne2935221:0
crwdns2935229:03crwdne2935229:0
crwdns2915084:0crwdne2915084:0

Purdue University Northwest, Team S1-G5, Hingst Fall 2018 crwdns2935289:0Purdue University Northwest, Team S1-G5, Hingst Fall 2018crwdne2935289:0
PNW-HINGST-F18S1G5
crwdns2931471:04crwdne2931471:0
crwdns2935297:019crwdne2935297:0
crwdns2947410:01crwdne2947410:0
How to replace hinge for this model