crwdns2915892:0crwdne2915892:0
If you are experiencing troubles with your fan and it needs to be replaced you can locate it inside the laptop.
crwdns2942213:0crwdne2942213:0
-
-
Remove the single 7 mm Phillips #1 screw securing the optical drive.
-
-
-
Carefully remove the optical drive bracket by pulling the bezel away from the laptop.
-
-
-
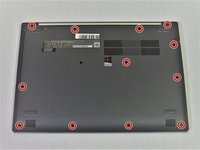
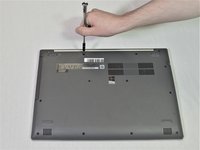
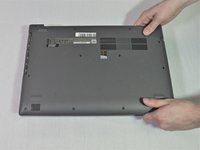
Using the Phillips #1 screwdriver, remove the twelve screws around the back panel from the laptop.
-
-
-
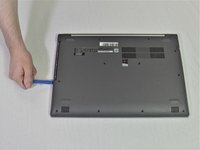
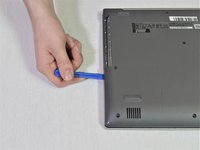
Use an opening tool to pry out the back cover.
-
-
-
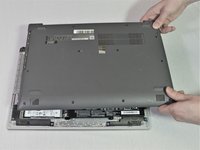
Remove the back panel by pulling it up and away from the laptop.
-
-
-
-
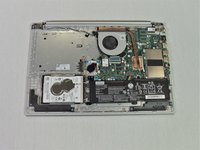
Remove the four 6mm screws using the Phillips #1 screwdriver.
-
-
-
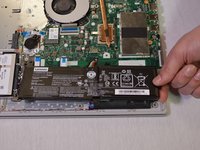
Disconnect the battery connector by pulling toward the battery parallel to the motherboard.
-
-
-
Disconnect black and grey wires by simply giving them a light tug.
-
-
-
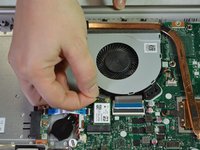
Remove the 6mm Phillips #1 screw connecting the fan to the laptop.
-
-
-
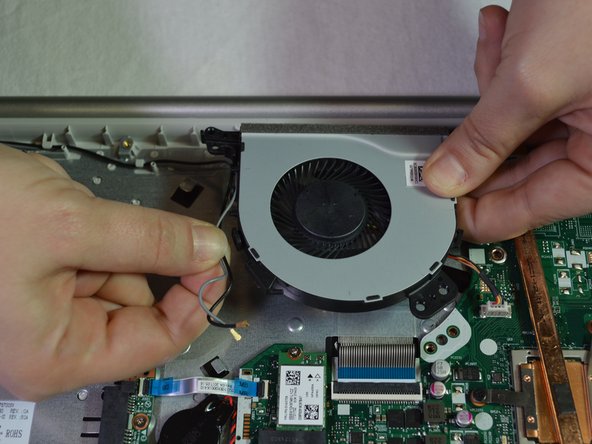
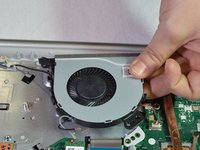
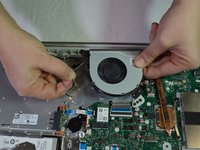
Lift the fan slightly and straight upward and unwind the black and grey wires from the fan.
-
-
-
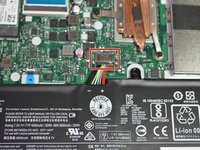
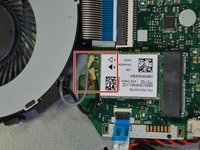
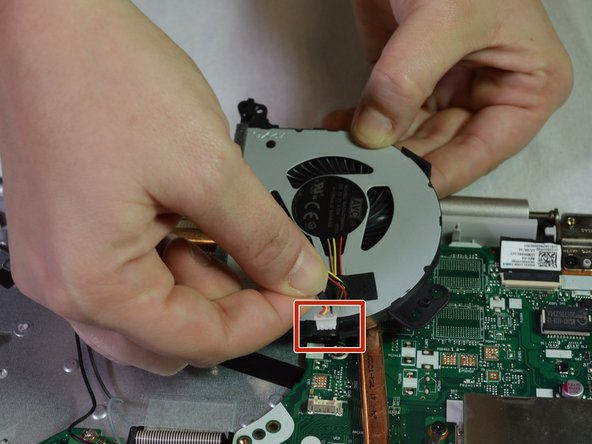
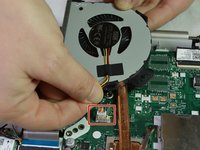
Identify the red, black, yellow, and brown wire coming from the back of the fan connecting to the motherboard with a white connector piece.
-
-
-
Slowly pull and wiggle the white connector piece until it comes loose from the laptop.
-


To reassemble your device, follow these instructions in reverse order.
To reassemble your device, follow these instructions in reverse order.
crwdns2935221:0crwdne2935221:0
crwdns2935227:0crwdne2935227:0

crwdns2915084:0crwdne2915084:0

Purdue University Northwest, Team S1-G5, Hingst Fall 2018 crwdns2935289:0Purdue University Northwest, Team S1-G5, Hingst Fall 2018crwdne2935289:0
PNW-HINGST-F18S1G5
crwdns2931471:04crwdne2931471:0
crwdns2935297:019crwdne2935297:0