crwdns2915892:0crwdne2915892:0
Battery removal is easy. All you have to do is remove the back cover, system board cover and a disconnect a wire! Let's get started!
crwdns2942213:0crwdne2942213:0
-
-
Locate the small tab, marked with the lock symbol on the upper right hand of your IdeaTab above the volume control buttons. Use your fingernail to gently loosen this tab.
-
Use your Phillips #000 screwdriver and remove the 3.5mm screw and put it aside.
-
Using your blue, plastic opening tool, begin to gently pry the back panel away from the front panel starting by where the screw was.
-
-
-
-
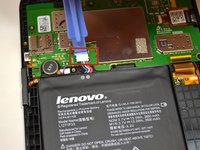
Locate the black back plate, above the battery.
-
Using a Phillips #000 screwdriver remove the 7 silver 3.5mm screws from the back plate.
-
Next, with the same screwdriver, remove the black 4.1mm screw.
-
Gently remove the back plate from the device.
-
-
-
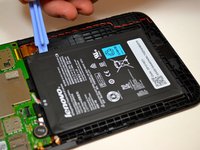
Use the plastic opening tool to disconnect the battery wires from the system board. Slide your opening tool under the white plastic piece and pry it up.
-
Again, use the plastic opening tool to loosen the battery from the device by lifting up on the battery on all sides. This will detach the battery from the adhesive.
-
Gently place the battery aside.
-


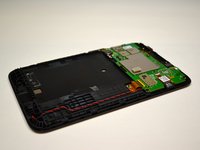
To reassemble your device, follow these instructions in reverse order.
To reassemble your device, follow these instructions in reverse order.
crwdns2935221:0crwdne2935221:0
crwdns2935229:010crwdne2935229:0
crwdns2915084:0crwdne2915084:0

Cal Poly, Team 7-21, Regan Spring 2014 crwdns2935289:0Cal Poly, Team 7-21, Regan Spring 2014crwdne2935289:0
CPSU-REGAN-S14S7G21
crwdns2931471:04crwdne2931471:0
crwdns2935297:06crwdne2935297:0