crwdns2915892:0crwdne2915892:0
In order to proceed with this guide, you should know that the laptop must not be plugged in for safety reasons. The laptop should also be powered off and the battery drained. Once completed, safely dispose of the old keyboard.
crwdns2942213:0crwdne2942213:0
-
-
Place the laptop face down with the battery facing away from you
-
-
-
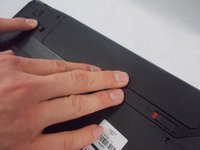
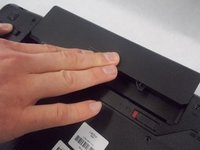
Push the battery forward lightly to remove it while holding the left switch.
-
-
-
Place the laptop face down with the battery slot facing away from you.
-
-
-
-
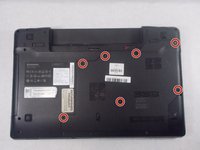
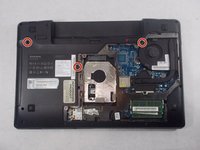
Loosen all seven 3mm screws from the back panel using a Phillips #0 screwdriver.
-
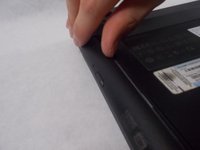
Remove the back panel from the device.
-
-
-
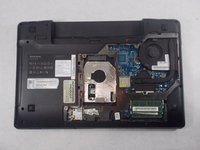
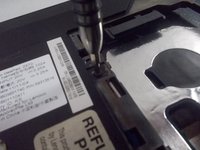
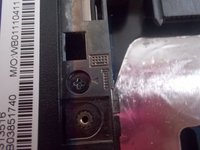
Remove the 3 mm Phillips #0 screw located on the left hand side that holds the disc drive in place.
-
-
-
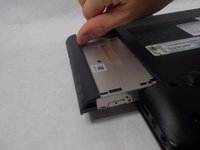
Gently remove the disc drive from the left hand side of the laptop.
-
-
-
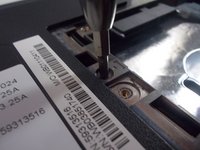
Remove the three 12mm screws found near these symbols with a Phillips #0 screwdriver.
-
-
-
Orient the laptop at a 90 degree angle with the keyboard being vertical and the screen horizontal to the surface you are working on.
-
-
-
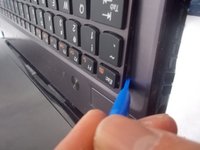
Pry the keyboard off staring from the corner where the “esc”” key is located using an opening tool.
-
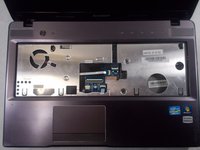
Now orient the laptop in the standard position and take off the keyboard.
-
-
-
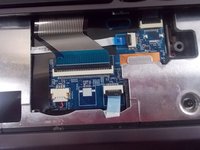
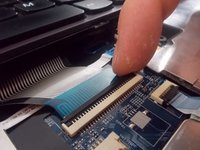
At the terminal block, flip the black switch on the terminal up.
-
-
-
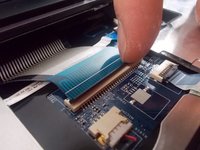
Pull the keyboard out from the terminal block.
-


To reassemble your device, follow these instructions in reverse order.
To reassemble your device, follow these instructions in reverse order.
crwdns2935221:0crwdne2935221:0
crwdns2935229:03crwdne2935229:0

crwdns2915084:0crwdne2915084:0

UMass Dartmouth, Team S1-G6, Botvin Spring 2019 crwdns2935289:0UMass Dartmouth, Team S1-G6, Botvin Spring 2019crwdne2935289:0
UMASSD-BOTVIN-S19S1G6
crwdns2931471:04crwdne2931471:0
crwdns2935297:05crwdne2935297:0