crwdns2915892:0crwdne2915892:0
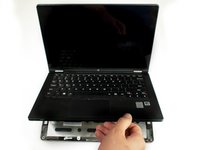
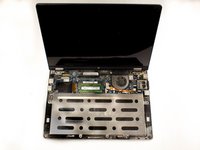
The top assembly contains the keyboard and trackpad. Removing it allows access to the logic board, battery, and RAM.
crwdns2942213:0crwdne2942213:0
-
-
Position the laptop so that the bottom enclosure is facing upward.
-
Use a Phillips #0 Screwdriver to remove the ten 1.9mm screws holding the bottom enclosure in place.
-
Use an opening tool to carefully pry up the rubber pads.
-
Use a Phillips screwdriver to remove the two screws under the rubber pads, which secure the keyboard.
-
-
-
Flip the laptop over and swing open the display.
-
Lift the edge of the keyboard closest to the trackpad up.
-
Carefully disconnect keyboard ribbon cable from the laptop.
-
Remove the keyboard.
-
-
-
-
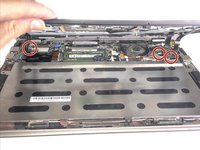
Remove the two screws securing the midframe.
-
-
-
Grab the front edge of the top assembly and lift it up carefully.
-
Gently slide the three ribbon cables out of their slots.
-
Remove the top assembly completely by pulling it off of the device.
You need to remove the keyboard too otherwise you will miss the 2 screws underneath!
this is a terrible guide, you unlatch the ribbons in the prior step with screws.
I’m pretty sure all you need to do is remove 4 screws on the back (2 under the foot pads on the upper side and 2 in the middle, all beneath the keyboard), then loosen the keyboard from the top slide forward and up, not the whole cover, then the dimm slot is right there
-
To reassemble your device, follow these instructions in reverse order.
To reassemble your device, follow these instructions in reverse order.
crwdns2935221:0crwdne2935221:0
crwdns2935229:02crwdne2935229:0
crwdns2947410:01crwdne2947410:0
I am looking into buying one of these but looking at your pictures I can't find the SSD. Is it user upgradeable?


under the rubber pads can be, or are? the bottom pads are much more secured.
zZz - crwdns2934203:0crwdne2934203:0
2 of them. The 2 near the screen hinges. They release the keyboard.
jsoper - crwdns2934203:0crwdne2934203:0
Mine had t5 Torx screws on the perimeter and center, with #0 phillips underneath the foot pads.
dan lench - crwdns2934203:0crwdne2934203:0
Mine also had the T5 Torx screws.
Willem -