crwdns2915892:0crwdne2915892:0
If the keys are not working, you can use this guide to replace the keyboard.
crwdns2942213:0crwdne2942213:0
-
-
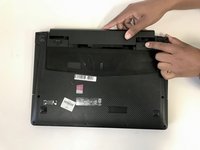
Flip the laptop over so the model stickers are facing up.
-
-
-
Slide the left battery lock to the unlock position and release.
-
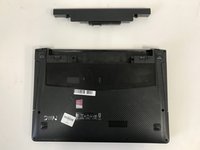
Slide the right battery lock to the unlock positon and hold it in place.
-
-
-
-
While holding the right battery lock in the unlock position, slide the battery carefully out of the laptop and set it aside.
-
-
-
Use a metal spudger to loosen the frame of the keyboard by running it under the edges of the keyboard as shown.
-
After loosening the keyboard frame, you should be able to gently lift up the keyboard.
-
-
-
Detach the ribbon cables from the latches shown.
-


To reassemble your device, follow these instructions in reverse order.
To reassemble your device, follow these instructions in reverse order.
crwdns2935221:0crwdne2935221:0
crwdns2935229:02crwdne2935229:0
crwdns2915084:0crwdne2915084:0

University of North Texas, Team S3-G6, Raign Fall 2018 crwdns2935289:0University of North Texas, Team S3-G6, Raign Fall 2018crwdne2935289:0
UNT-RAIGN-F18S3G6
crwdns2931471:04crwdne2931471:0
crwdns2935297:05crwdne2935297:0
crwdns2947412:02crwdne2947412:0
Terrible guide - completely fails to point out the two screws that hold the keyboard down underneath the bottom casing. Bent my keyboard thanks to this.
Awful guide. Wish I'd seen the other comment before I also ruined my keyboard. Thought it popped out, but there's 2 screws under the bottom case that hold it (remove!) … bent the keyboard frame and ripped the screw tabs off. Was just trying to clean it. Now it needs total replacement.
How is this article reportable?