crwdns2915892:0crwdne2915892:0
Is your screen too dim, plagued with dead pixels, or just not working at all anymore? Fixing it can be a lot easier than you might think with this screen replacement guide for the Lenovo IdeaPad U310.
crwdns2942213:0crwdne2942213:0
-
-
Flip the device over so the bottom panel is facing up.
-
Remove the rubber feet by pinching and pulling in an upward motion.
-
-
-
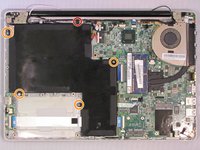
Remove the 4 screws securing the bottom panel to the device.
-
-
-
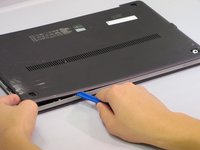
Place the plastic opening tool between the bottom panel and device.
-
Pry around the device's outer edge until the bottom panel is no longer attached.
-
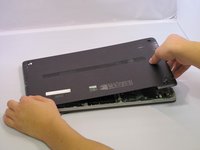
Lift the bottom panel up and away from device.
-
-
-
Unplug the Battery from the circuit board by carefully prying the connector from its housing.
-
-
-
Remove the 5.6 mm Screw with the PH1 screwdriver.
-
Remove the 4.6 mm screws with the PH1 screwdriver.
-
-
-
-
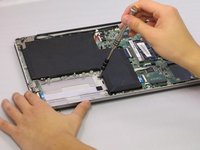
Lift the strip tape away from the battery, being careful not to completely remove it.
-
-
-
Remove the battery by lifting up and away from device.
-
-
-
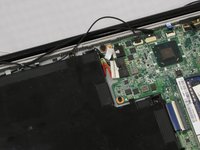
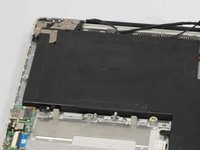
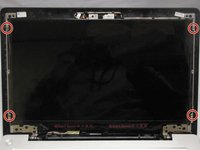
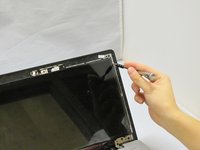
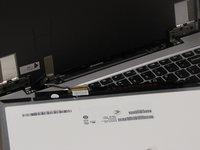
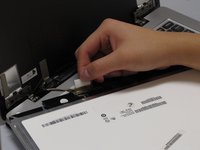
Insert opening tool between the frame and the back panel of the screen.
-
-
-
Work your way around the frame until every connection is loose.
-
-
-
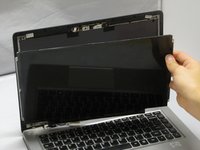
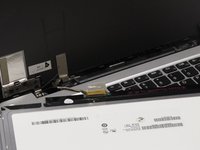
Lift the screen up and away from the device.
-
-
-
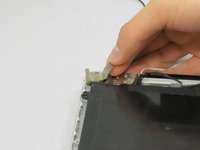
Remove the 1.9 mm screws using the PH0 screwdriver.
-
-
-
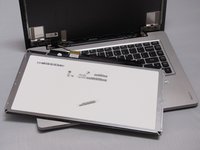
Once the four screws are removed, gently rest the screen facedown on the keyboard.
-
-
-
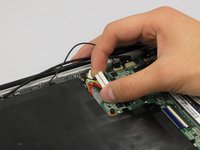
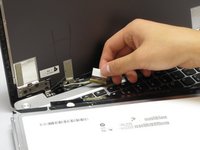
Peel back the white tape, revealing the power connection.
-
-
-
Unplug the connector, pulling it by the white tape.
-


To reassemble your device, follow these instructions in reverse order.
To reassemble your device, follow these instructions in reverse order.
crwdns2935221:0crwdne2935221:0
crwdns2935229:02crwdne2935229:0
crwdns2915084:0crwdne2915084:0

Eastern Washington University, Team 2-1, Mathisen Fall 2016 crwdns2935289:0Eastern Washington University, Team 2-1, Mathisen Fall 2016crwdne2935289:0
EWU-MATHISEN-F16S2G1
crwdns2931471:05crwdne2931471:0
crwdns2935297:05crwdne2935297:0