crwdns2915892:0crwdne2915892:0
Replacing the keyboard on your Lenovo IdeaPad U310 could seem tricky at first. Be sure not to apply too much pressure to the keyboard for this might damage the plastic casing, and use the proper opening tools.
crwdns2942213:0crwdne2942213:0
-
-
Flip the device over so the bottom panel is facing up.
-
Remove the rubber feet by pinching and pulling in an upward motion.
-
-
-
Remove the 4 screws securing the bottom panel to the device.
-
-
-
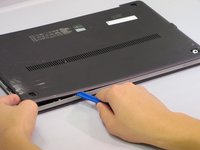
Place the plastic opening tool between the bottom panel and device.
-
Pry around the device's outer edge until the bottom panel is no longer attached.
-
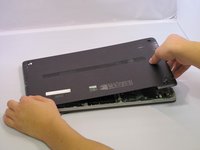
Lift the bottom panel up and away from device.
-
-
-
Unplug the Battery from the circuit board by carefully prying the connector from its housing.
-
-
-
-
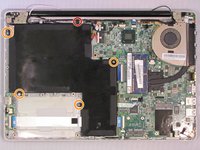
Remove the 5.6 mm Screw with the PH1 screwdriver.
-
Remove the 4.6 mm screws with the PH1 screwdriver.
-
-
-
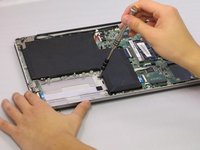
Lift the strip tape away from the battery, being careful not to completely remove it.
-
-
-
Remove the battery by lifting up and away from device.
-
-
-
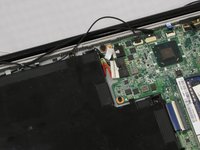
Remove the two 4.6 mm screws using PH1.
-
One is located next to the fan, the other at the corner of the battery.
-
-
-
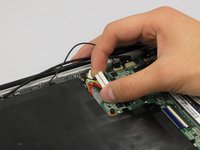
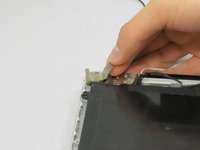
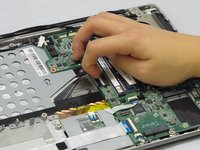
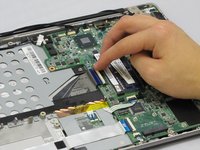
Pry up the hinge that houses the keyboard's ribbon cable.
-
-
-
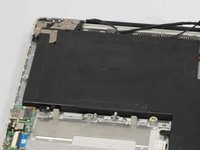
Turn laptop upside down so the keyboard is facing up.
-
Place prying tool between the keyboard and the housing.
-
Move the prying tool around the keyboard's edge, releasing the tabs securing the keyboard.
All look so clear and I eent through all stept to 10. Step 11, the prying step. It seems too tight to insert anything there. Do you just move it around and that frees the keyboard?
-
-
-
Life the keyboard up and away from the device.
-


To reassemble your device, follow these instructions in reverse order.
To reassemble your device, follow these instructions in reverse order.
crwdns2935221:0crwdne2935221:0
crwdns2935229:02crwdne2935229:0
crwdns2915084:0crwdne2915084:0

Eastern Washington University, Team 2-1, Mathisen Fall 2016 crwdns2935289:0Eastern Washington University, Team 2-1, Mathisen Fall 2016crwdne2935289:0
EWU-MATHISEN-F16S2G1
crwdns2931471:05crwdne2931471:0
crwdns2935297:05crwdne2935297:0
crwdns2947410:01crwdne2947410:0
Honestly, the best instructions for any task i ever made ⭐⭐⭐⭐⭐. Thank you