crwdns2915892:0crwdne2915892:0
Use this guide to replace the touchpad in your Lenovo IdeaPad 3-15ADA05 laptop. This model is also sold under alternate names, including Lenovo IdeaPad 3 15ADA05 and Model 81W1.
A faulty touchpad can cause the cursor to move erratically, respond slowly, or stop functioning altogether. This guide will help you remove the old touchpad and install a replacement to restore normal input functionality.
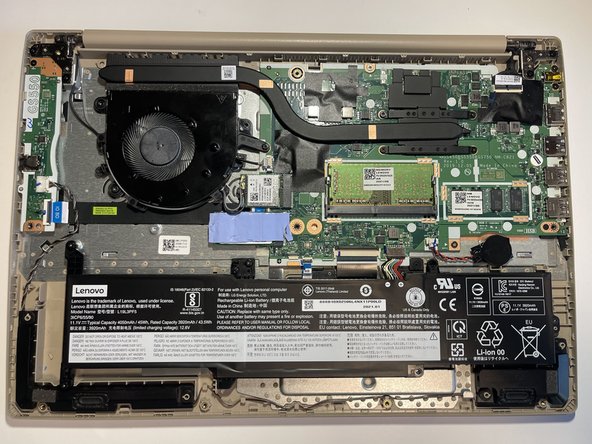
The touchpad is located beneath the palm rest and connects to the motherboard via a ribbon cable. It detects finger movement and translates it into cursor actions on the screen.
Before starting this repair, review the Lenovo IdeaPad 3-15ADA05 Troubleshooting Page on iFixit to ensure the issue is not software-related. If your touchpad isn’t responding at all, or gestures and clicks are no longer working properly, this guide is for you.
Caution:
- Power off your device and disconnect the battery before beginning any internal repairs.
- Use ESD-safe tools and work on an anti-static surface to avoid damaging sensitive components.
- Take care when detaching ribbon cables, as they are delicate and easily torn.
- If the battery is swollen, do not proceed—follow battery safety procedures.
For additional guidance, refer to the official Lenovo Hardware Maintenance Manual (HMM) for the 15ADA05 series.
crwdns2942213:0crwdne2942213:0
-
-
Remove the six 5 mm screws located at the top half of the laptop using a Phillips #0 screwdriver.
-
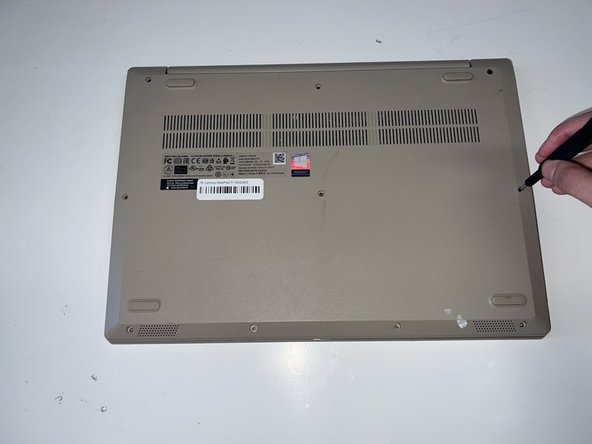
Remove the four 2.5 mm screws located at the bottom of the laptop using a Phillips #0 screwdriver.
-
-
-
Insert the opening pick between the base plate and the bottom of the laptop and pry the clips loose around the edge until the base pops off.
-
-
-
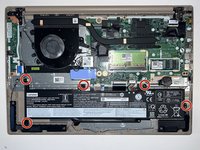
Using a #0 Phillips head, remove the five M2 x 3.5mm screws holding the battery in place.
-
-
-
-
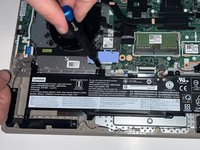
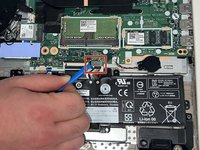
Using the opening tool, disconnect the battery connector from the motherboard, and then remove the battery.
-
-
-
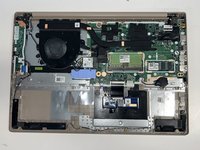
Remove the five 2.5 mm screws securing the motherboard and fan to the chassis.
-
-
-
Lift the motherboard to gain access to the screws that are securing the touchpad.
-
Remove the two 2.5 mm screws securing the touchpad.
-
-
-
Pull the touchpad to the inside of the chassis.
-
Remove the touchpad from the laptop.
-


To reassemble your device, follow these instructions in reverse order.
crwdns2935221:0crwdne2935221:0
crwdns2935227:0crwdne2935227:0
crwdns2935287:0crwdne2935287:0

University of Kentucky, Team 1-5, Frey Spring 2025 crwdns2935289:0University of Kentucky, Team 1-5, Frey Spring 2025crwdne2935289:0
UKY-FREY-S25S1G5
crwdns2931471:05crwdne2931471:0
crwdns2935297:06crwdne2935297:0