crwdns2915892:0crwdne2915892:0
Welcome to this guide on how to replace the internal M.2 SSD inside your Lenovo Ideapad 3-1481W000NGUS.
If you are experiencing issues with your computer not turning on, running out of storage space, or simply just want to upgrade your SSD, this guide will explain step by step how to carry out a replacement.
Before attempting an SSD replacement, make sure that your laptop is completely shut down and unplugged from its power source. The steps listed below will outline how to remove the SSD from your laptop. In order to install a new SSD, follow the steps in reverse order.
crwdns2942213:0crwdne2942213:0
-
crwdns2935267:0crwdne2935267:0Magnetic Project Mat$19.95
-
Orient the laptop so that the bottom is facing up.
-
Remove the six 7 mm screws using a Phillips #00 screwdriver.
-
Remove the four 4 mm screws using a Phillips #00 screwdriver.
-
-
-
Pry up the sides of the back case using the iFixit opening tool. Then, lift to remove.
-
-
-
-
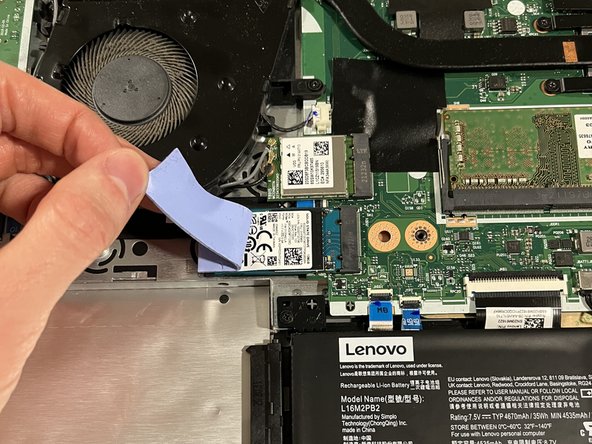
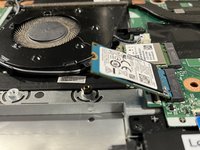
Gently peel away the blue thermal pad, revealing the SSD underneath.
-
-
-
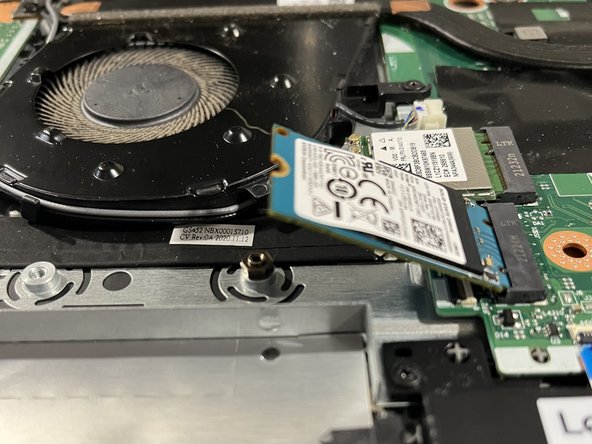
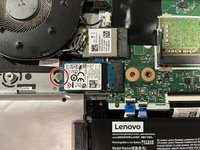
Remove the 4 mm screw keeping the SSD in place using a Phillips #00 screwdriver.
-
-
-
Pull the SSD out straight, without applying any vertical pressure.
-


To reassemble your device, follow these instructions in reverse order.
crwdns2935221:0crwdne2935221:0
crwdns2935229:02crwdne2935229:0

crwdns2935287:0crwdne2935287:0

University of Delaware, Team 11-4, McGuire Spring 2023 crwdns2935289:0University of Delaware, Team 11-4, McGuire Spring 2023crwdne2935289:0
UD-MCGUIRE-S23S11G4
crwdns2931471:05crwdne2931471:0
crwdns2935297:06crwdne2935297:0