crwdns2933423:0crwdne2933423:0

Lenovo IdeaPad 110-171KB Battery Replacement

crwdns2942213:0crwdne2942213:0

  1. Lenovo IdeaPad 110-171KB Battery Replacement, Battery: crwdns2935265:01crwdnd2935265:01crwdnd2935265:02crwdne2935265:0 Lenovo IdeaPad 110-171KB Battery Replacement, Battery: crwdns2935265:01crwdnd2935265:02crwdnd2935265:02crwdne2935265:0
    • Insert an opening pick between the chassis and keyboard.

    • Gently slide the pick around the perimeter of the keyboard while prying until it releases completely.

    • Remove the keyboard.

  2. Lenovo IdeaPad 110-171KB Battery Replacement: crwdns2935265:02crwdnd2935265:01crwdnd2935265:02crwdne2935265:0 Lenovo IdeaPad 110-171KB Battery Replacement: crwdns2935265:02crwdnd2935265:02crwdnd2935265:02crwdne2935265:0
    • Disconnect the cable connector from the motherboard.

    • Slide the cable out of the case.

  3. Lenovo IdeaPad 110-171KB Battery Replacement: crwdns2935265:03crwdnd2935265:01crwdnd2935265:01crwdne2935265:0
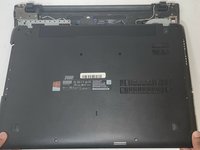
    • Place the the computer bottom facing up. Unscrew the eleven Phillips #0 6 mm screws.

  4. Lenovo IdeaPad 110-171KB Battery Replacement: crwdns2935265:04crwdnd2935265:01crwdnd2935265:02crwdne2935265:0 Lenovo IdeaPad 110-171KB Battery Replacement: crwdns2935265:04crwdnd2935265:02crwdnd2935265:02crwdne2935265:0
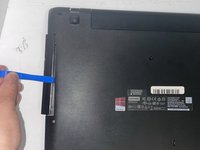
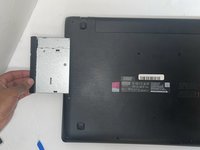
    • Pry the disk drive opposite of the laptop.

    • Since the screws has already been removed, you will not need to worry about any more screws on the optical drive.

  5. Lenovo IdeaPad 110-171KB Battery Replacement: crwdns2935265:05crwdnd2935265:01crwdnd2935265:02crwdne2935265:0 Lenovo IdeaPad 110-171KB Battery Replacement: crwdns2935265:05crwdnd2935265:02crwdnd2935265:02crwdne2935265:0
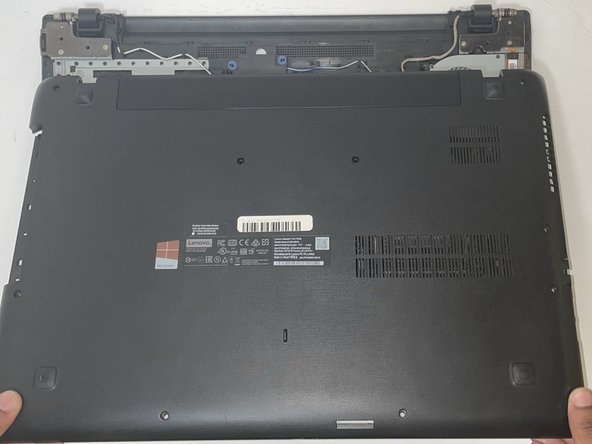
    • Release any of the remaining retaining clips and remove the lower case.

  6. Lenovo IdeaPad 110-171KB Battery Replacement: crwdns2935265:06crwdnd2935265:01crwdnd2935265:03crwdne2935265:0 Lenovo IdeaPad 110-171KB Battery Replacement: crwdns2935265:06crwdnd2935265:02crwdnd2935265:03crwdne2935265:0 Lenovo IdeaPad 110-171KB Battery Replacement: crwdns2935265:06crwdnd2935265:03crwdnd2935265:03crwdne2935265:0
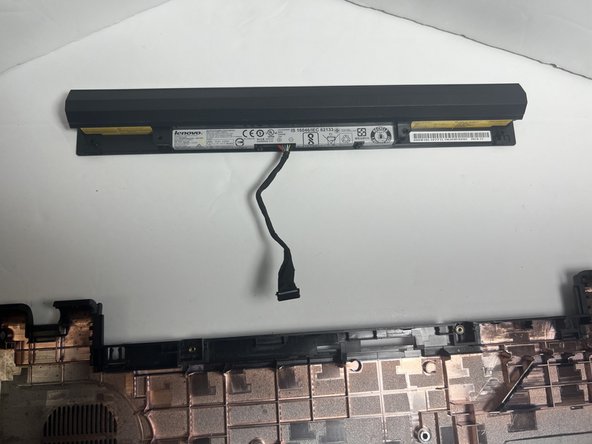
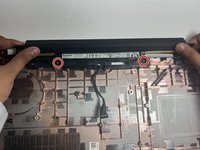
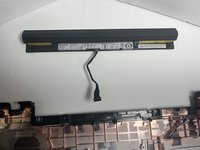
    • Remove the two 9 mm Phillips #0 screws that secure the battery.

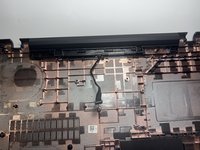
    • Remove the battery from the device.

crwdns2915888:0crwdne2915888:0

To reassemble your device, follow these instructions in reverse order.

Cameron Mounce

crwdns2935283:009/05/23crwdne2935283:0

668 crwdns2915208:0crwdne2915208:0

crwdns2935297:05crwdne2935297:0

crwdns2915084:0crwdne2915084:0

Gateway, Team 1-3, Pee Fall 2023 crwdns2935289:0Gateway, Team 1-3, Pee Fall 2023crwdne2935289:0

GCC-PEE-F23S1G3

crwdns2931471:04crwdne2931471:0

crwdns2935297:07crwdne2935297:0

crwdns2944067:00crwdne2944067:0

crwdns2917038:0crwdne2917038:0

crwdns2936625:0crwdne2936625:0:

crwdns2936751:024crwdne2936751:0 0

crwdns2936753:07crwdne2936753:0 0

crwdns2936753:030crwdne2936753:0 6

crwdns2942667:0crwdne2942667:0 73