crwdns2942213:0crwdne2942213:0
-
-
Remove the two keyboard screws on the back of the device(the two on the same row)
-
-
-
Insert a prying tool in the crack between the keyboard and frame. Start by the power button and go all the way round the keyboard.
-
-
-
Remover the ribbon cable and remove the keyboard afterward.
-
-
-
-
After the keyboard is removed, remove the screw and the battery connector.
-
-
-
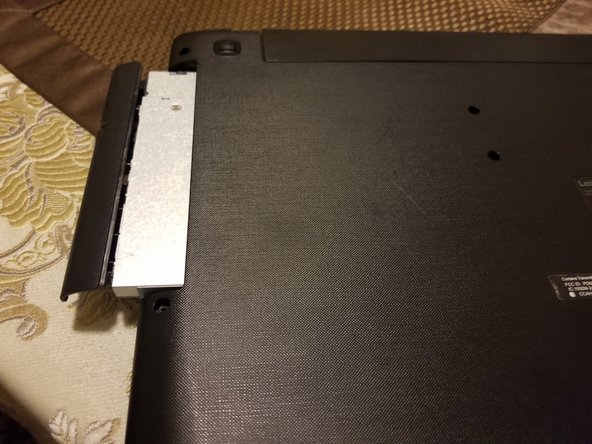
Remove the screw that is under the two keyboard screws and pull the disk drive out.
-
-
-
Remove all of the screws on the outside edge of the bottom.
-
-
-
Flip the laptop over and in the crack between the two case pieces slide a prying tool in between and follow the perimeter until the two pieces are separated.
-
-
-
Remove the four screws securing the drive bay into the case.
-
-
-
Remove the four screws the hold the metal cage onto the drive to separate them.
-


To reassemble your device, follow these instructions in reverse order.
To reassemble your device, follow these instructions in reverse order.
crwdns2935221:0crwdne2935221:0
crwdns2935227:0crwdne2935227:0