crwdns2915892:0crwdne2915892:0
This guide will show you how to unscrew and remove the power board button from your laptop.
crwdns2942213:0crwdne2942213:0
-
-
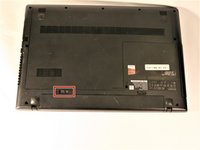
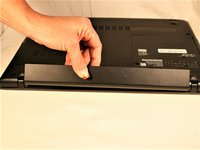
Place the laptop on a flat surface with the back cover facing up and the hinges facing you.
-
-
-
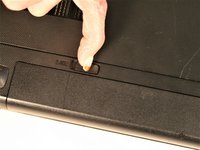
Slide the tab positioned on the right side to the right.
-
-
-
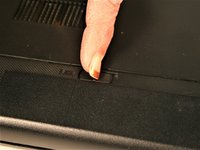
Move the left tab to the left to release the battery.
-
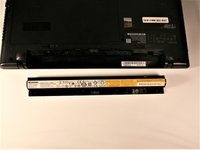
You will hear an audible 'click' and see the battery separate from the rest of the laptop.
-
-
-
Hold the battery at the top seam between it and the laptop.
-
Roll the battery towards yourself.
-
Lift the battery out of the laptop.
-
-
-
Remove the three screws securing the outer cover of the laptop using a Phillips #0 screwdriver.
-
-
-
Slide the cover away from the hinges and lift the panel off.
-
-
-
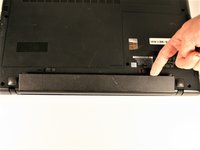
Locate the 3 screws on the bottom securing the keyboard in place.
-
One Screw will be located under a Lenovo security sticker. Break sticker to gain access to screw.
-
-
-
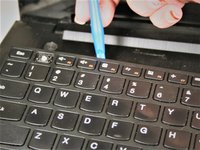
Starting on the side, gently pry up using spudge.
-
-
-
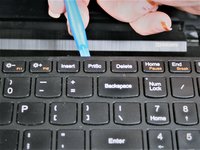
Continue prying around the top of the keyboard
-
-
-
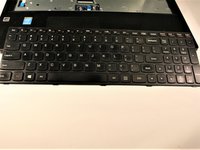
Once the top of keyboard is loose, gently lift up
-
-
-
-
lift up bottom of keyboard slightly, to access keyboard ribbon
-
-
crwdns2935267:0crwdne2935267:0Tweezers$4.99
-
Using tweezers, lift up clip to remove keyboard ribbon cable.
-
-
-
Keyboard ribbon cable removed
-
Once ribbon is removed, keyboard can be lifted out
-
-
-
Remove wifi wires by lifting up
-
-
-
locate power and monitor cable on bottom side next to fan
-
-
crwdns2935267:0crwdne2935267:0Tweezers$4.99
-
remove power cable with tweezers by gently pullying
-
-
-
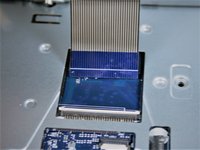
remove monitor cable by gently pulling on tab straight up
-
-
-
Monitor and power cable disconnected
-
-
-
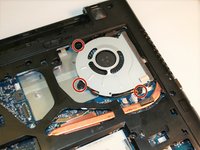
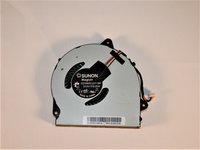
Disconnect the fan wires from the motherboard by lifting upwards
-
-
-
Locate the 3 screws holding fan in place
-
Remove 3 screws
-
fan should lift out of place
-
-
-
lift clip to remove ribbon cable for think pad.
-
-
-
lift clip to remove power button ribbon cable.
-
-
-
Begin by locating screws on bottom panel
-
-
-
Remove screws using a 001 phillips screw driver.
-
-
-
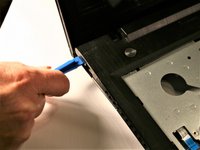
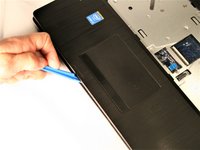
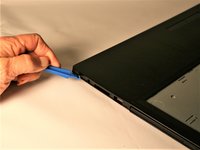
Once screws are removed, begin by gently prying up in one corner using a spudge
-
Continue to center and then around to opposite side.
-
once all sides have been pried open, lift top half off
-
-
-
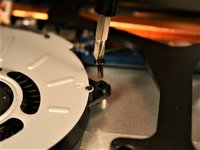
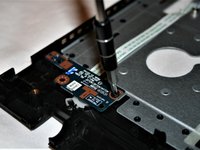
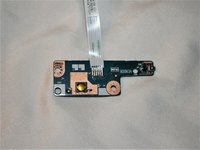
At this point in disassembly, there will be one #00x5.5 mm screw securing the power button board in place.
-
Take your screwdriver and remove the screw.
-
-
crwdns2935267:0crwdne2935267:0Tweezers$4.99
-
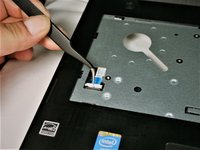
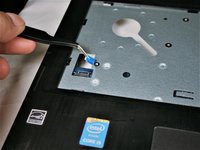
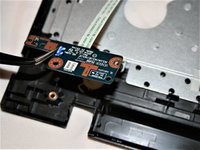
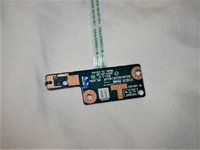
Take your tweezers and grip the power button board.
-
Using tweezers, lift power button board up and out. The cable wire for the power button board should be disconnected at this point and the piece should lift out without any extra work needed.
-


To reassemble your device, follow these instructions in reverse order.
To reassemble your device, follow these instructions in reverse order.
crwdns2935221:0crwdne2935221:0
crwdns2935229:02crwdne2935229:0
crwdns2915084:0crwdne2915084:0

UMass Dartmouth, Team S1-G6, Simcock Fall 2017 crwdns2935289:0UMass Dartmouth, Team S1-G6, Simcock Fall 2017crwdne2935289:0
UMASSD-SIMCOCK-F17S1G6
crwdns2931471:04crwdne2931471:0
crwdns2935297:010crwdne2935297:0