crwdns2915892:0crwdne2915892:0
If the Lenovo Flex 3-1580 screen has been damaged, this guide will help you replace it. Before replacing the screen we do recommend checking two different guides. This first troubleshooting guide will be of use if the touchscreen is unresponsive, and this second troubleshooting guide will help if the screen has flickering and distortion.
Warning: Power down your device completely by holding the power button for 5-10 seconds.
No Lenovo Flex 3 series had any screen recalls.
crwdns2942213:0crwdne2942213:0
-
-
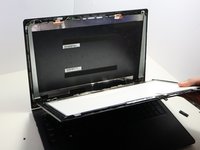
Open up the laptop so that the screen is facing you like in the picture.
-
-
-
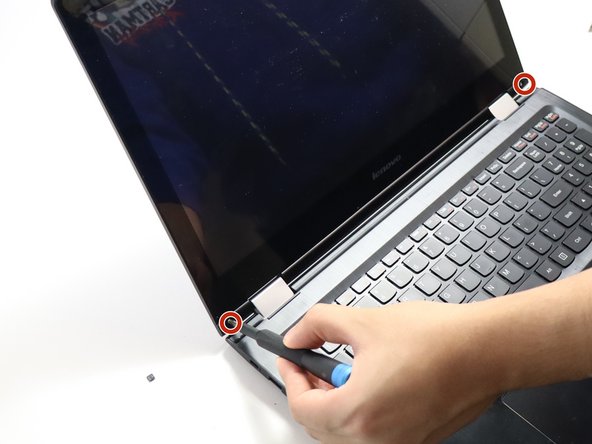
Use the black spudger to pry off the two rubber covers at the bottom right and left side of the laptop screen.
-
Remove the two 4.0 mm screws that were under the rubber covers using a JIS #0 screwdriver.
-
Pry off the plastic covers that you just unscrewed with the spudger.
-
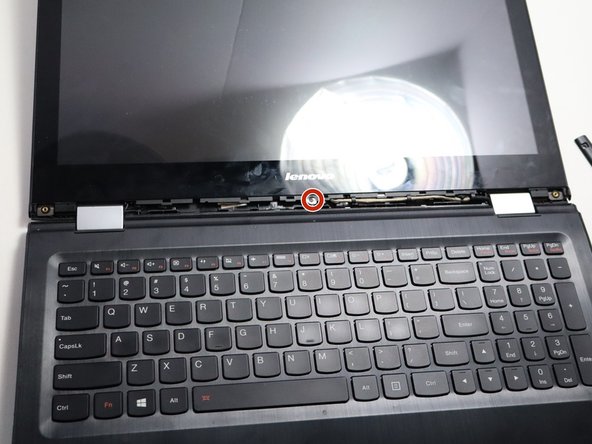
Pry off the middle black plastic part with the spudger. Remove the 4.0 mm screw using a JIS #0 screwdriver.
-
-
-
-
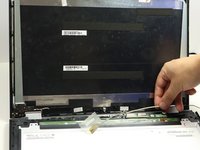
Pry off the backing of the screen with a spudger.
-
-
-
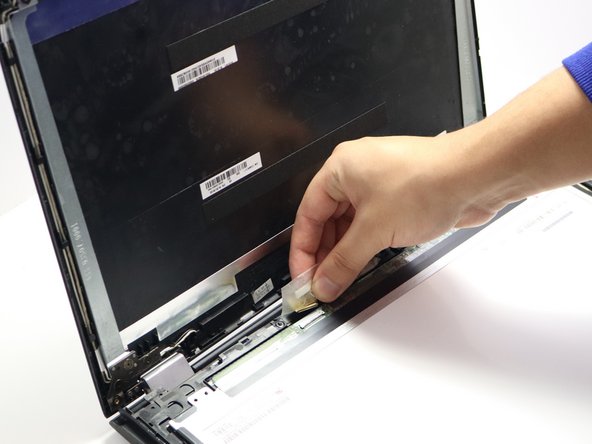
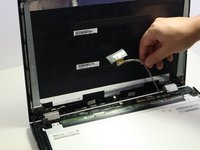
Peel off the tape and disconnect the yellow cable from the screen.
-
Follow the cable to unplug the smaller black plug in as seen in the second picture.
-
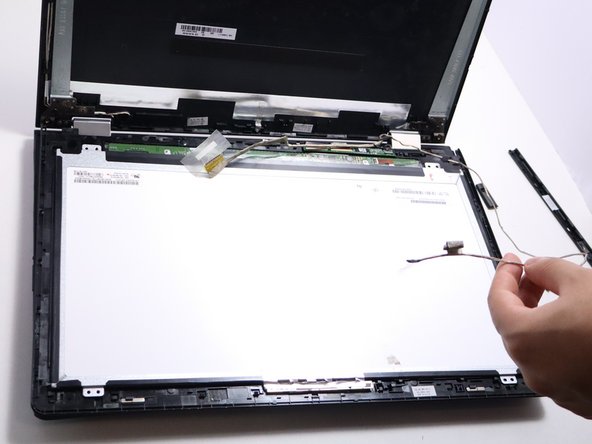
Follow the same cable all along the side of the screen and untape and disconnect the cable going into the camera.
-


To reassemble your device, follow these instructions in reverse order.
To reassemble your device, follow these instructions in reverse order.

crwdns2915084:0crwdne2915084:0

Austin Community College, Team 7-1, Watkins Spring 2025 crwdns2935289:0Austin Community College, Team 7-1, Watkins Spring 2025crwdne2935289:0
AUSTINCC-WATKINS-S25S7G1
crwdns2931471:04crwdne2931471:0
crwdns2935297:06crwdne2935297:0